Well it's 2200 here and the Little One and the Mrs have retired for the evening. He's gotten very good at going up and down the stairs, and when he goes up the stairs, he heads directly to "his" room, and the toys all come out and get scattered around on the floor.
The downstairs family room is still foreign to him. We spent time there in the winter with the fireplace going, but I doubt he remembers it.
He did NOT like getting put on the rattan footstool and being rotated! Pilot training will have to wait a few years, I guess.
With all the heat we've had the last few days, the basement has turned into a pleasant place to spend time. It's about 72* down there, and probably a bit damp. When I was a kid growing up, one of my jobs was to empty the water catch pan the dehumidifier in the basement had. I checked it every day, and if it was more than half-full, I'd empty it. Probably be a good idea to get one for down there.
I finally decided on the workbench/operating desk layout for the Radio Room. After getting some quotes from people who build this stuff, I've decided at this point in life I don't need a custom $1500 workbench and custom $2500 desk to operate from, additional shelving optional. About $900 worth of stuff from IKEA will do both sides of the room, and give me more drawers and shelves to store stuff in. The sad/ironic part is I'll be replacing pretty much the same stuff I threw/gave away in Long Beach. Oh, well....this time I'm much more familiar with their product lines, and how to find things on their website. Everything has a part number and a price, right down to the individual bits of their knocked-down kits. You can find something close to what you want, get an idea of what makes up that ensemble, and then go A La Carte to build up something customized. I'll be buying two drawer units with tabletops, and then adding additional drawer units, tabletops, and legs to get an "L" shaped bench for the workbench, and a "U" shaped bench for the operating position. Adding a couple of riser units in a complimentary color to the operating desk will give it the functionality I want, and a semi-custom look.
And I made some rough measurements and sketches of where the cable penetration will go. I'll need about a 3" hole cored through the concrete foundation to get the pipe inside, and then I'm not sure if I'll continue the run of cables in the pipe, or break them out into a cable tray. Cable trays mounted to the walls or hung from the ceiling just look so.........Professional!
It'll come down to cost, of course. 3" electrical PVC conduit is probably MUCH cheaper than even small size cable tray. The pipe will be laid in with NO 90* elbows allowed. We'll use two 45* elbows with a foot or so of straight section between them. I've fought with waaay too many cable pulling jobs that had runs loaded with 90* turns, and NO junction boxes or "Pull Boxes" anywhere.
And while down in the basement measuring things, I went through and sorted 4 boxes of clothing. I wound up with two boxes of things that will never fit again, things that have lost their appeal to me, and some just plain weird T-shirts I have no idea how I came about owning. All going to Goodwill in the next day or two.
Friday, June 29, 2018
Thursday, June 28, 2018
Chair Repair Finished
So, I had the chair apart to replace the "Rocker Bearing Assembly" after I figured out I wouldn't be able to repair the OEM assembly. It was riveted together, and some of the parts were munched up, and while it could have been rebuilt, it would have been a major undertaking.
So, Googling around found multiple choices for new assemblies. Prices ranged from $30, free shipping, for something from the WongBongBing Chair Bearing Company all the way up to a $700 all stainless steel unit made for deep sea fishing chairs.
I settled on this one for $55 shipped.

It had the correct dimensions side-to-side, but the fore-and-aft mounting holes were about 3/16" too close together.
45 minutes with a round file, and the holes were elongated enough to slip over the other two mounting studs.

Not the most "precision" job I've ever done, but hey...it's an old chair; it doesn't turn 7500RPM!
So after what our British cousins would call "fettling a while", the new assembly fit nicely over the four OEM mounting studs, and was properly secured with new flat and split-lock washers.
The clamp and 'load spreader' board are holding the middle piece of bamboo trim down while the glue sets. This is where I left off the other night.


My wife was helping me, and I got too involved explaining what I was doing to take pictures of how I put the base back on to the new rocker bearing, so I'll get all wordy on you....
The thin plate with long, slotted holes in the top picture bolts to the round base of the chair using 1/4-20x4" carriage bolts. Between the thin plate (which is the other mounting flange for the bearing) and the small round base is a "reinforcing plate" made of 1/2" high-density particle board. The long carriage bolts pass through this, through the plywood of the base, and are secured with 1/4-20 nuts, and "too small" flat washers that dug into the wood.
The problem is that after you install the bolts and slide on the reinforcing plate, you need to hold the top of the carriage bolts in place while you line up the bolts with the four holes in the base, and slide the base on to the looong, wobbly carriage bolts.
Only you can't get your hand in there....there's no clearance. So I taped the bolts in place with a couple of layers of blue painter's tape, hoping the adhesive would be strong enough to hold the bolts.
It almost worked. The first time I was able to get all four studs aligned and started into the base, and actually got two of the nuts on. The other two studs were flush with the base, but I just couldn't get even one thread through.
Hmmmmm........just how tight are the holes in the base? Sure enough, when I took the base out to the garage, a 1/4" drill bit dug in like a screw thread, and pulled the drill though. After making several passes from both sides, the drill bit went easily through the holes, and back in the house we went.
After a bit more "fettling" (hey...I like that word!), the base slipped on to the bolts, the washers were placed, and the nuts tightened down.

It rotates and rocks very smoothly now, and we saved this old guy from the landfill.

Wednesday, June 27, 2018
Chair Repair
Is almost finished. The new bearing assembly came today. and while it lined up side-to-side with the mounting hardware still in the chair, it was about 1/8" off fore-and-aft.
So out came my round, #2, bastard cut file and I elongated the holes. After about 45 minutes of filing and fitting, the holes lined up perfectly, and I attached the rocker bearing to the bottom of the chair, using flat and lock washers this time.
One of the bamboo pieces at the base of the chair had come loose, so I cleaned the mating surfaces, and glued it back on with some Weldwood TiteBond glue, and clamped it down for several hours Weldwood says you can remove the clamps after 30 minutes, but about 15 minutes after I pulled the clamps, the trim piece started to rise up a bit, so I clamped it back down and I'll wait until tomorrow to finish the project and post the pix.
And since it's supposed to be 103* here tomorrow, I think it'll be a good day to get all the items on my Home Depot list.
HD has AC, and we don't!
Friday, June 22, 2018
Field Day 2018
And I'm not doing anything this year.
I was going to set up my satellite station and run "1E CO" from the backyard, but my son, who was going to come out here for a week, got rear-ended a couple of weeks ago. His rental wouldn't insure him for a trip to Colorado, so he spent the time finding a new vehicle to replace the Nissan Frontier pick-up he had that the insurance company totaled. He got clobbered by a fairly new Honda Civic doing about 45MPH while he was stopped for traffic on the 405 freeway. The Civic was destroyed (they had to cut the guy out), and his truck suffered a bent rear axle, pretzeled driveshaft, and the rear bumper was torn off the frame, bending the frame "beyond economical repair" and ripping a couple of big chunks out of it. He's OK, other than being exceptionally upset that the guy who hit his three week old truck was uninsured, and has probably disappeared by now.
So, he replaced it with a 2010 Ram 1500 with a 5.7L Hemi, the class IV trailer towing package, and 38,000 miles on it. Sounds like a nice truck, and I suppose I'll get to see it if/when he decides to come out this way.
NCARC, the local radio club I'm a member of, will be running their Field Day operations out by the City of Nunn water tower, so I'll probably head out there Saturday afternoon to see what they're doing.
Wednesday, June 20, 2018
Finding My Bearings.....
Rotary "Swivel Rocker" bearings, to be precise, something quite similar to a Lazy Susan bearing, but with springs, like this:

Instead of the bottom bearing plate bolting directly to the structure, it's suspended by springs to a third plate which bolts to the structure.
The one being replaced doesn't look nearly as good:

It was raining steel bearing balls when the guy she bought it from brought it into the den (hey, twenty dollars delivered!), so I grabbed one and measured it to be .375". OK, close to the size that's used in my Yaesu antenna rotators, and it looks like a standard inch-size, so off to the web, where I got 100 .375" stainless steel balls for six bucks, free shipping.
Now having used these before in various projects, I've always put enough balls in the races to fill them to 85%~90% capacity, leaving enough space for a generous dollop or two of grease. And silly me, I assumed a mass-merchandised-built-to-low-cost piece of furniture would use components that were more to a spec I'm used to.
Nope, it used 8 balls caged in a little nylon ring, and a minimal amount of grease or oil.

I also learned that this is a "Three Spring" assembly, so it has a different feel than if it had two springs and a solid stop. Previous to learning this, I'd wondered where this piece of a broken spring had come from. You can clearly see where the coil broke on the upper end. I've seen valve springs do this, and it usually attributed to either exceeding the design limits of the spring, or faulty metallurgy. Once I found the spring, and saw the pictures of new units, the failure mechanism became clear. The spring failed, causing the bearing assembly to be subjected to bending moments far greater than it was designed for. The races spread apart, a ball popped out of the nylon cage, got jammed in there, and then jumped out of between the races, and it snowballed from there until the guy put the chair on some local list my wife gets.

Anyway, it's not economically viable to repair this. The "axle" through the center is peened over on one end like a large rivet, and that stops me right there. I'd have to thread the shaft and use a nut, and that aint gonna happen. The first new one I found was $97, plus undisclosed shipping, but some more searching found the same thing for $47, plus $7 shipping. Now that I know what they're called, I can search deeper.
Worth $75 total to fix this thing up?

She thinks so, and I don't mind doing it, as long as I can get the parts. I think they're neat chairs, and this one also came with a matching footstool. They're fairly comfy if the padding is good, and the little ones will love that it swivels and rocks. I might have to do something about a potential Pinch Point where the two sections go together and little fingers could go there, too.
Nope, still not my Eames Lounge Chair and Ottoman, but you have to start small, and besides, we saved this from the landfill.

Sunday, June 17, 2018
Happy Father's Day!
To all the Dad's out there, enjoy your day.
We just got back from a gathering of the tribe at a lake near here next to a fish hatchery. Pleasant little place to hang out and enjoy watching all three little ones play, have some food, and catch up with all the family comings and goings.
The Cache La Poudre River runs through here, and lots of people were fishing on both the river, and the lake. Didn't see anybody haul any fish in, but from the activity involving the anglers, it looked like the fish were biting pretty well.
Rained a bit, but then that's life here on the Western edge of The Great Plains.
Friday, June 15, 2018
Front Landscaping - Gettin' There! -
So our young handyman guy and his Dad (cool old dude!) came by today with the rest of the shredded cedar "mulch", and finished off the bare spots, and made sure the area had about 3" of mulch everywhere.
Looks much nicer than when we moved in. Sorry for the poor lighting, but I think you get the idea.

The little walkway makes street access easier. Yes, I know it's not a good idea to make it too easy for the goblins to get in, but we have some, uhh....., "Security Measures" in place besides Pebbles The Wonder Dog, who I would NOT want to deal with at 0300 unless my scent was in her memory bank "Top Ten Good Guys" category.
Maybe make that the "Top Five"??

Looks a bit barren, but the plants we picked are fast growing, and only get "so big", according to the House Botanist, my sweet little wife. The nursery we like had these in something like four sizes of pots, so she went by $$ for the final choice, and I think these are the "$10 size" plants. In the above picture you'll see a little "bush" to the left, and that's the size plant she wanted.
That's the "$40 size", and was a birthday/Mother's Day gift from her son. We were blown away when he took it out of his car and gave it to us! Forty bucks is a lot to The Kids, and we certainly didn't expect it.
Anyway....these little guys seemed to have survived the transition from pot to front yard, and seem to be happy.

And we still have to decide what to do on the North side of the house, besides turning the fence panel into a sturdy gate. And I'm going to emphasize "sturdy", because those 60+ MPH winds we had twice this last Spring really caught me by surprise. My neighbor had several fence panels come loose from the posts and blow down. In one case, it pulled loose from one post, and snapped the other one off at ground level, That post was rotted out, along with two on our shared fence, so I helped him dig the old ones out and set the new ones in. It's also why the antenna/tower project is on hold. I really need to seriously talk to some people with local experience with towers and Big HF Yagi antennas here. I should probably noodle up a separate post on the Tower Project. I know some of you guys have experience with towers in places with Real Weather, compared to the benign "weather" I've lived with for the past 35 years.
In the meantime I've clobbered both front and back with a double-dose of "Season Long" broadleaf weed killer. It has good old 2,4-D in it, which I distinctly remember in the "Ortho" cans in Dad's garage when I was growing up. Dad hated dandelions with a passion! Besides the "Weed-and-Feed" treatments he gave the lawn, he had a green plastic tube called a "Killer Kane" that you'd put some big tablets in, and fill up with water, The tablets fizzed and dissolved, and you put the cap on. The business end of it had a spring-loaded nozzle, and when you pushed the Killer Kane down on the dandelion, it got a shot of whatever herbicide tablets you were using.

I always thought the Killer Kane was Kool!
For now we've got the back yard in maintenance mode, just keeping it watered, fed, weeded, and mowed. And as soon as our "Original Lawn Guy" refunds the money he's holding from the canceled contract(s), we'll be getting in touch with Chainsaw Mama to work her magic on the cottonwood trunk. After looking at it for almost eight months, we think we "see" various critters in it, and we'll be interested to get her take on it.
Wednesday, June 13, 2018
Front Landscaping, Continued
We still have a lot of work to do, but it's progressing nicely.
Here are the pavers leading down to the sidewalk. All the bark on the right side has been scraped out, and we temporarily moved two of the pavers from the side by the downspout to the 'pathway' because the store was two short. I don't think we're going to dig out the area by the downspout; we'll get two more pavers to replace the two we borrowed, and fill in the rest with the shredded cedar we've already put in.

The new stepping stones make it much easier to go from the street to the house, and the grass won't get trashed by the foot traffic. And the new edging should help keep things tidy.

It looks a lot better than it did, and should look nice when we're done.

Still more to do. The place we got the shredded cedar from only had about half of what we ordered, so we have big spots that are still bare.

The wife is deciding what other plants to buy. We're trying to find things that either bloom all summer, or have staggered blooming times so we'll always have some color.
And once we get the North side of the front yard finished (is this stuff ever really finished?) we'll attack the South side. Plans call for the edging and shredded cedar over here, too.

Tuesday, June 12, 2018
Front Yard Landscaping
We knew the front and backyards would need some, uh, "cleanup work" when we bought the house, and we've been slowly getting things taken care of.
The first "lawn guy" we hired took TWENTY SEVEN bags of dead leaves, sticks, twigs, weeds, dead plants, branches, and assorted "other" detritus out of the backyard, and another 10~12 bags out of the front.
The backyard looked like the soil level dropped six inches, it was so clean! The previous owners, anxious as they were to get out from under this place, hadn't properly cleaned up either the front or back yards, but rather took some really shoddy shortcuts. Example: When they tore out the juniper bushes in front, they replaced them with some garish, orange colored bark. To fill the holes? Whatever they could find, including rocks, stones, and the cheapest "dirt" they could buy. And guess what they used for an underlayment for the bark? Why, the bags it came in, what else!
It was a mess, but looked kinda-sorta "OK". This is one of the listing pix.

One of the first things we did was have the rest of the junipers in the front removed, and the holes filled in with Real Dirt. My Dad had a couple of very similar evergreens back in Illinois. They didn't get berries like these do, and he called them Japanese Yews, but except for the berries, they looked identical. Even had the same penchant for having big spider webs in them during warm weather.

We still have the "red" bark to remove, along with most of that vegetation. We thought the stuff coming up that looks like tall grass were some kind of bulb, but when we dug one up, it had several small "bulbs", more like baby onions than any flowering bulb, which are usually much bigger.

And were still not sure what we'll do on the North side of the house. Mulch or something for now.

It's always shaded there, except for a very few hours in the morning as the sun comes up. The first "lawn guy" suggested ferns, but my wife hates them. And that solid fence panel? Yup...gonna get a good, sturdy gate installed there so you don't have to cut through the house, or go around the front of the house and garage to the other gate. This will give us much more convenient access to the back yard. Yes, the gate will be padlocked when not required to be opened.
And we're going to install some pavers down to the sidewalk from our front porch to make it easier to lug a very curious 15-month old little boy, and all his support equipment, up to the house from the street. We're shopping around now for some nice "wrought iron" railings for around the porch and down the first four concrete steps. Us old folks might need something handy to hang on to as we go down possibly icy steps in the winter.

And we're having some metal edging installed to delineate the bare earth from established grass. The "bare earth" section will get mulch (we're using shredded cedar) and hardy, pretty plants to fill in the empty spaces.
And you betcha the rest of that red bark is going bye-bye!

So, we've made some nice progress with the front since we bought the house, and these pix are a couple of weeks stale. I'll take some fresh ones tomorrow and show you where we're currently at....
Monday, June 11, 2018
Fresh Paint!
Masked off parts of the tail yesterday and shot some paint on it.
It came out better than I expected....

Kind of hard to tell in the above picture, but the paint covered fine, flowed out nicely, and -GASP!- it even came out SHINY!
Here's a "Before and After" shot of the spoiler center mount point.


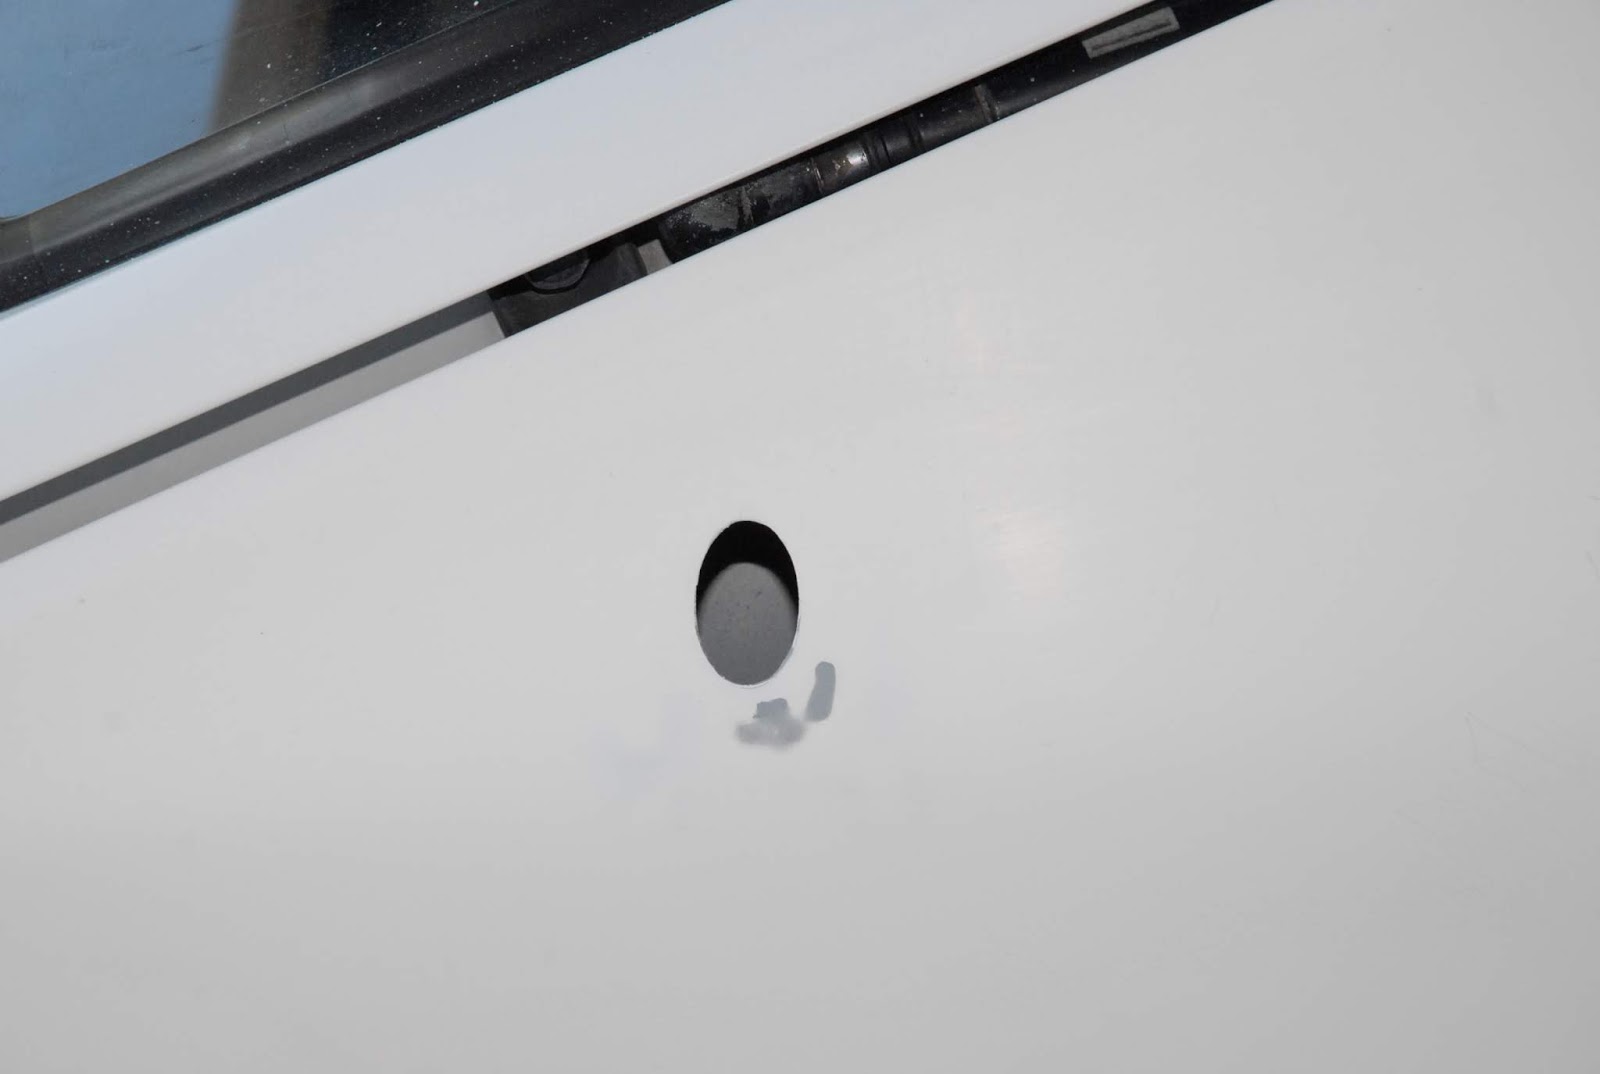
And here's the antenna mounting hole after the sand/prime/sand routine.


The rear edge of the spoiler was all chipped and dinged up, because when the spoiler is off the car, it very handily stores by standing it up against a wall or something. The bad news it that the bottom edge gets plunked down on whatever is on the floor, and if you don't protect that edge, the paint gets the living snot beat out of it.
I tried lightly wet sanding it, but some of the dings were completely through the paint and primer, and into the fiberglass. OUCH! So I went at it with some 600 wet-or-dry and a spray bottle of water to keep it wet.
Hard to see, but this is after the third round of sand/prime/sand.

I'll flip it over tonight and get the bottom of the rear edge.
It came out better than I expected....

Kind of hard to tell in the above picture, but the paint covered fine, flowed out nicely, and -GASP!- it even came out SHINY!
Here's a "Before and After" shot of the spoiler center mount point.


And here's the antenna mounting hole after the sand/prime/sand routine.

The rear edge of the spoiler was all chipped and dinged up, because when the spoiler is off the car, it very handily stores by standing it up against a wall or something. The bad news it that the bottom edge gets plunked down on whatever is on the floor, and if you don't protect that edge, the paint gets the living snot beat out of it.
I tried lightly wet sanding it, but some of the dings were completely through the paint and primer, and into the fiberglass. OUCH! So I went at it with some 600 wet-or-dry and a spray bottle of water to keep it wet.
Hard to see, but this is after the third round of sand/prime/sand.

I'll flip it over tonight and get the bottom of the rear edge.
Sunday, June 10, 2018
Oh, My Aching Fingers......
WELL......I finally did something about all the glop (aka Tape Residue) on the rear hatch.
When I first pulled the spoiler off I wanted to do something about the holes in the hatch as I was afraid they'd allow rainwater to get into the car, so I slapped some blue "painter's tape" over the holes. After a few weeks in the Kalifornia sun, the tape degraded, so I put another layer on.
And another.....
And another.....finally ending up with some aluminum foil tape over the holes.
After a few years, I figured I should pull the tape off, only to find it left an impervious layer of adhesive residue on the paint.
And I mean impervious to every solvent I had, including spit. I tried citrus-based cleaners like "Goo Gone" and "Goof Off", solvents like acetone, mineral spirits, "Brake Kleen" and even Birchwood-Casey "Gun Scrubber" which I've found to be a very good solvent for many things.
The adhesive residue was at least as bad as the remnants of the Supra decal on the rear.
So, Friday night I made the decision to SAND it off, and just accept whatever paint damage was going to occur.
Left lower spoiler mount:

Center lower spoiler mount:

I masked off the surrounding area with two layers of blue tape (it's only staying on the car a couple of hours this time), and started sanding away.
Now you see it....

Now you don't...

The darker areas are caused by the paint being very thin there, and the grey primer is just starting to show. Total time to sand out this approx 3" x 2" area was 90 minutes. The "rings" around the bolt holes are bare steel, soon to be primed, and the thin line beneath the holes is a rust line, caused by the triangular gasket on the spoiler chewing down through the paint after it degraded and became very hard.
Even though the spoiler covers the hatch, it 'floats' over the hatch at the bottom, being attached at the outer corners and center. With the spoiler on the car, you'd still be able to see the glop because the gasket doesn't cover it all.

If I knew back then what I know now, I never would have used tape. I would have have punched out some small discs of the aluminum foil tape, and stuck them over just the holes. Due to my own ineptitude, I now have some paint work to do, not something I enjoy.
Oh, and as I was finishing up, I noticed this:

That's the mounting point in the right rear quarter for the power antenna, and the site of my original Paint and Bodywork Experiments. The rubber parts for the antenna got hard and brittle (notice a pattern here?) and chewed through the paint, leaving bare metal, which rusted. So, several years ago I pulled the old antenna, and "fixed" the paint in that spot. This was when I first saw how thin the paint was, and wound up spotting in an area about TEN times as big as the damage. Every time I'd try to feather in the new repair, I'd blow through the original paint, and have to make the repair area bigger.
And yes, I masked off that area and sanded it out before I closed up for the night.

And I still have to address this mess at the top edge of the hatch, and rear edge of the jamb area.

The rust on the edge of the hatch was caused by the spoiler/gasket issues, but the back of the roof where it goes into the jamb area? Real live, genuine "Factory Installed Rust"! It never got painted at the factory in Japan. You can see where the paint on the roof flowed over the edge and dripped down, but the vertical section of the jamb either never had any paint on it, or was painted so thinly that water went through the paint and primer, and got at the steel.
Rust proofing on 1980's Japanese cars was NOT very good, and one of the British car magazines had an article on how fast these cars "dissolved" over in the UK.
Friday, June 8, 2018
Happy 40th Birthday to the 8086 uProcessor!

YOW.....I remember when these things were cutting edge. My first real, hands-on exposure to "Programmable Stuff" was when I was working as an Industrial Controls Engineer for McGraw-Edison Company. We had built several systems using a Texas Instruments 5TI Programmable Logic Controller to take inputs and produce outputs using "Ladder Diagram" logic.
After that, we started using the newest, latest, greatest thing; a fully programmable, uProcessor-controlled, industrial-rated, controller made by Sylvania, and programmed using "SYBIL", or the SYlvania Basic Industrial Language, customized version of BASIC running on an 8086. The required development system consisted of a NorthStar Horizon S-100 bus computer, dumb terminal, and a serial PROM programmer. I later built a Heathkit dot matrix printer so we could have hard-copy to play with.
Really good article over at Extreme Tech.
Thursday, June 7, 2018
Rear Spoiler, Part II
Well, I gave it a good soapy water scrub and rinse, and after that, I realized there's no way I'm going to be able to clean the sides and bottoms of the "wells" that the screws are at the bottom of.
Oh, well.....out came the power screwdriver, and THIRTY FOUR screws later I had it apart.


I know there are Engineering Guidelines for how many screws-per-inch to use, but this looks like I designed it. Yes, I generally prefer to overdesign things, but not in this case.
Oh, and they were all slightly loose, allowing 33 years of road dust to collect in the void spaces where the two pieces screw together. Took about 20 minutes to brush and vacuum it out of there.
So I then sanded off all the old gasket residue stuck to the fiberglass, as seen here in before and after pix:


It actually went easier than expected. I used a flexible block like a sponge, coated with "220 grit" abrasive, and took my time. It's a bit like hand finishing wood in that you carefully watch the amount of material being removed, and STOP when the stain/imperfection fades away.
This also breaks any sharp edges, and might prolong the life of my low-buck replacement gasket. Sharp edges pressing firmly against soft material usually results in soft material losing.
And then the fiberglass spoiler starts rubbing directly on the paint, and paint loses, too, as seen by the orange lines of rust on the hatch where the OEM gasket had been completely compressed, and then cut through, by the spoiler.

So now I have to bust out the Dremel, and use one of the small felt buffer pads to clean out the wells the screws live in. Luckily it's just fossilized road dirt, so it should "Buff Right Out" using mild cleaners.
Oh, well.....out came the power screwdriver, and THIRTY FOUR screws later I had it apart.


Oh, and they were all slightly loose, allowing 33 years of road dust to collect in the void spaces where the two pieces screw together. Took about 20 minutes to brush and vacuum it out of there.
So I then sanded off all the old gasket residue stuck to the fiberglass, as seen here in before and after pix:


It actually went easier than expected. I used a flexible block like a sponge, coated with "220 grit" abrasive, and took my time. It's a bit like hand finishing wood in that you carefully watch the amount of material being removed, and STOP when the stain/imperfection fades away.
This also breaks any sharp edges, and might prolong the life of my low-buck replacement gasket. Sharp edges pressing firmly against soft material usually results in soft material losing.
And then the fiberglass spoiler starts rubbing directly on the paint, and paint loses, too, as seen by the orange lines of rust on the hatch where the OEM gasket had been completely compressed, and then cut through, by the spoiler.

So now I have to bust out the Dremel, and use one of the small felt buffer pads to clean out the wells the screws live in. Luckily it's just fossilized road dirt, so it should "Buff Right Out" using mild cleaners.
Wednesday, June 6, 2018
D-Day
I don't know if I've ever posted about D-Day. So many others do it far better than I can, so I generally let observances of this nature pass by without posting.
Two things are different this year. One, the C-47 "That's All, Brother" finished it's restoration and is flying again. She WILL be in France next year for the 75th anniversary.

This was the lead aircraft for the paratroops that went in, and when I found out about, I started donating to it's restoration. The history of the aircraft is similar to a lot of other WWII veteran aircraft, and makes for very interesting reading at the link. I guess my Engineer's background as a hardware guy makes me want to help preserve the machines we used to win WWII, so when something like "That's All, Brother", or "Fifi", or the Iowa comes along, I donate to them so we can keep these important artifacts around.
The other thing I found out is that one of my Dad's brothers was one of the paratroops that went in shortly after midnight, well before the main force hit the beach.
He never talked about it.......
So, in grateful respect of those who served so long ago, thank you all, and God Bless.
Tuesday, June 5, 2018
Rear Spoiler Work Commencing
I went over to Harbor Fright yesterday and bought a set of saw horses to prop up the spoiler while I scrub it.

Like most things from HF, "Some Assembly Required", but the instructions were complete, and correct, and all hardware reported for duty.
Like most things from HF, it's made as lightweight as possible (they must channel Colin Chapman), and is scary flimsy until ALL the pieces are assembled, squared up, and all the hardware is securely tightened.
So here they are in use.....

This is the side that faces the car, and most of it can't be seen when it's on the car, but it's still filthy from several years of being off the car, mostly outside.
This is one of the parts you could see, if you squatted down and peeked up...

I vacuumed it down with my shop vac and a bench brush to get the Big Chunks off, and took a zillion measurements and pix for the archivists.
The reason for pulling this years ago was to clean all the stuff that had collected in the open areas between the spoiler and the car. If you look on the glass, you can see a 'ghost image' made of baked-in dirt of where the spoiler was covering the glass. That stuff is darned near impossible to get off, and I finally resorted to 600 grit Wet-or-Dry, and a flood of water, to get most of it off the glass.
I have special polishes and pads, but I've never buffed/polished glass before, so I'm a little hesitant to go at it without at least watching a few YouTube videos.
And the inside of the glass has areas of residue from when it had a tinted film applied. The film is still on the side rear quarter windows, but has been sun damaged to where it's no longer dark grey/black, but a bluish-purple tint. I'll pull it off when I go gonzo on the interior. I really like a dark tint on those three windows, so that's something else I have to shop. Maybe the tint shops here can give me some tips on getting the stuff off. "Automotive Goo Gone" does nothing, so I'm sure most of the other cleaners like Simple Green won't budget it, either. Previous experience indicates some kind of solvent mixed with an appropriate amount of Elbow Grease will be required.
Look at that CRUD!

This stuff was baked on so hard I had to soak it with a mix of dish soap and Windex for several days before it popped loose. The corner of the rubber gasket is caked with similar dirt. It took a couple of days of soaking and scrubbing to get the window gasket clean. It looks pretty good now, but 'black stuff' keeps coming off when I clean the glass and hatch area, so I'll have to scrub a coat or three of Back-To-Black into it to seal it up.

More of the same on the passenger side. You can see one end of the wiper assembly poking in to the picture. Having both the spoiler and the wiper installed makes it very difficult to get the bottom edge of the glass clean. When the wiper is parked, you can't lift it to clean the glass under it, or change the blade. Since I'll never deliberately take it out in the rain, I'll never use the wiper, so off it came.
 An astounding amount of crap was trapped in there, and every time I washed the car it came flooding out. Even 15 minutes pressure washing *this corner* (pic immediately above) just kept bringing stuff out, so I pulled the spoiler. You can also see the mud caked on the window gasket, and the dust that's baked on to the glass. One of the main reasons so much got it there was the 'rubber' gasket had degraded so badly that it was buckled and shrunken, allowing water and small debris to enter, but not leave.

So that's what been going on lately in the garage. Still going through stuff in the basement, including clothing to donate to Good Will, and trying to find some of my equipment. My cool little Weller temperature-controlled soldering station is AWOL. I'll probably get another one to keep on the garage workbench, because sometimes you need to solder stuff.

Like most things from HF, "Some Assembly Required", but the instructions were complete, and correct, and all hardware reported for duty.
Like most things from HF, it's made as lightweight as possible (they must channel Colin Chapman), and is scary flimsy until ALL the pieces are assembled, squared up, and all the hardware is securely tightened.
So here they are in use.....

This is the side that faces the car, and most of it can't be seen when it's on the car, but it's still filthy from several years of being off the car, mostly outside.
This is one of the parts you could see, if you squatted down and peeked up...

I vacuumed it down with my shop vac and a bench brush to get the Big Chunks off, and took a zillion measurements and pix for the archivists.
The reason for pulling this years ago was to clean all the stuff that had collected in the open areas between the spoiler and the car. If you look on the glass, you can see a 'ghost image' made of baked-in dirt of where the spoiler was covering the glass. That stuff is darned near impossible to get off, and I finally resorted to 600 grit Wet-or-Dry, and a flood of water, to get most of it off the glass.
I have special polishes and pads, but I've never buffed/polished glass before, so I'm a little hesitant to go at it without at least watching a few YouTube videos.
And the inside of the glass has areas of residue from when it had a tinted film applied. The film is still on the side rear quarter windows, but has been sun damaged to where it's no longer dark grey/black, but a bluish-purple tint. I'll pull it off when I go gonzo on the interior. I really like a dark tint on those three windows, so that's something else I have to shop. Maybe the tint shops here can give me some tips on getting the stuff off. "Automotive Goo Gone" does nothing, so I'm sure most of the other cleaners like Simple Green won't budget it, either. Previous experience indicates some kind of solvent mixed with an appropriate amount of Elbow Grease will be required.
Look at that CRUD!

This stuff was baked on so hard I had to soak it with a mix of dish soap and Windex for several days before it popped loose. The corner of the rubber gasket is caked with similar dirt. It took a couple of days of soaking and scrubbing to get the window gasket clean. It looks pretty good now, but 'black stuff' keeps coming off when I clean the glass and hatch area, so I'll have to scrub a coat or three of Back-To-Black into it to seal it up.

More of the same on the passenger side. You can see one end of the wiper assembly poking in to the picture. Having both the spoiler and the wiper installed makes it very difficult to get the bottom edge of the glass clean. When the wiper is parked, you can't lift it to clean the glass under it, or change the blade. Since I'll never deliberately take it out in the rain, I'll never use the wiper, so off it came.


So that's what been going on lately in the garage. Still going through stuff in the basement, including clothing to donate to Good Will, and trying to find some of my equipment. My cool little Weller temperature-controlled soldering station is AWOL. I'll probably get another one to keep on the garage workbench, because sometimes you need to solder stuff.
Subscribe to:
Posts (Atom)
PAINT!
Got a bee in my bonnet and shot some paint yesterday. Two medium coats of Eastwood :Safety White" Rust Encapsulator, and I'm happ...

-
Yawn....just more Kabuki Theater, but interesting reading, nonetheless. Read All About It Here.....
-
%20American%20Airlines%20Flight%20Tracking%20and%20History%2004-Aug-2024%20(KDFW-KEGE)%20-%20FlightAware.png) Every so often when I'm checking my PiAware ADSB receiver/display I'll notice an aircraft with a flight path that catches my eye. I...
Every so often when I'm checking my PiAware ADSB receiver/display I'll notice an aircraft with a flight path that catches my eye. I...