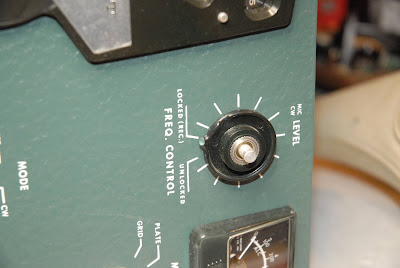
In which Murphy walks in the shop, dumps over my coffee, and laughs......
Well, I hit a snag in the process of removing the knobs on the control panel so I can free the control panel from the chassis, and repair the dial mechanism. It's an identical procedure to what I did on the receiver, but this time one of the knobs fought me. It uses a small, Allen-drive setscrew to secure it on the shaft. It takes an .050" Allen wrench to get it loose. And the setscrew is in an awkward position, meaning it's hard to get the teeny-tiny Allen wrench all the way into the setscrew to tighten and loosen it. Most people don't get the wrench fully bottomed out, and they round the corners of the wrench, and round the corners of the setscrew, meaning it gets very difficult to get the setscrew loose.
I tried brand-new wrenches with sharp corners, grinding an older wrench so the rounded off part was removed, heating the metal insert the setscrew threads into, and lots of other things, including turning the knob a bit too hard.........POP!....there goes the coffee....
I broke the little "paddle" off the knob by pushing on it with my thumb, and it shot off across the shop towards The Place Where 10mm Sockets Go To Die......
The bright green color is where the "paddle" that hangs down used to go. So now I HAVE to get the knob off so I can replace it. I was able to easily cut off the green plastic, and then attacked the aluminum insert the setscrew threads into.
Took a good 90 minutes of gently cutting away parts of the aluminum insert so I could "split" it, release the tension provided by the setscrew, and slide it off the shaft.
You can see the setscrew sitting there laughing at me....
So finally, and with minimal collateral damage, I got the insert off the shaft.
In other news, The Brown Truck of Happiness stopped by today with a load of Thermionic Devices of types I didn't have, so at least some things are progressing.
Too bad we can't "Reload" tubes when they get used up.
Enjoy your weekend!


Thanks for the update on your activities, DRJIM.
ReplyDeleteNot much else to do here right now, so it's time well-spent.
DeleteGah. Little breaking bits. The bane of Beans...
ReplyDeleteAnd it's a double whammy when the part is 90% unobtainium.
DeleteGot my feelers out, and an eBay search dialed in. Thought I could snag one from one of my other Heathkits, but this knob is unique to a few models.
The Micro Laser Cutter has yet to appear at Amazon. But once in a while it would be very handy.
ReplyDeleteI will email my thoughts on an collateral damage limiters.
I would have used my Sonic Screwdriver, but K9 ran off with it....
DeleteAck! The nightmare problem in any restoration. Congrats on handling it well.
ReplyDeleteGood luck with finding another.
I was considering not removing it, and then I broke the little "paddle" off the body.
DeleteSo far the only knob available has been in a complete set from an HW-101, and they're in South America.
Just have to keep looking.....
Does Antique Electronics Supply have anything? I’ve never done the kind of restoration you’re doing.
ReplyDeleteThat's one of the places I use for tubes, but they cater more to the audio/guitar amp crowd.
DeleteUsed parts like knobs, dials, switches, crystals, etc are best found on eBay, QRZ, and googling. Almost all the SB-Series knobs are available, except for the knobs with the lever or "paddle" extension on them. I'm starting to think they break easily! I could see somebody 3D printing them, BUT you'd need to scan the part to generate a file, and then you need the metal insert for the setscrew. I don't think leaving out the metal insert would be a good idea, as I don't think they have a strong enough filament to print with.
Ouch, sorry to hear that!
ReplyDeleteIt doesn't render the radio unusable until I replace it. All that knob does is either lock the transmit frequency to the receiver (full transceive), or switch to the built-in crystals and let you run split frequency transmit/receive.
DeleteI'm considering making a mold of the one, good knob I have, and trying to cast one. Still have to figure out a way to jig up a metal insert that will accept a 2-56 setscrew.