Got the air cleaner assembly all cleaned up, put together, and mounted back on the plate that also holds the Air Flow Meter ("AFM"), along with the now spotless rubber air coupling. This particular coupling, being several feet away from the engine, and located behind the grill, was extremely dirty with "road dirt", but in excellent condition once I spent about 20 minutes in the kitchen sink scrubbing it with hot, soapy water and various small brushes. Finished it up with some of the 'no scratch' Scoth-Brite and a good rinse, and it looked great . And I used some silicone grease on the slip connection to the air cleaner. This helps preserve the rubber, helps seal it from air leaks, and makes it much easier to rotate for alignment during assembly.
This is the side you can't see when it's mounted in the car. Besides the one main 'snorkel' air intake, there's also a smaller one below it, and turned 90* into the airstream coming in from the grille. "Ram Air"? Not a chance...ram air only adds significant power at very high (>>100MPH) speed. No, it's for cold air into the air cleaner. Cold air makes more power than hot under hood air, so although the 60's and 70's muscle cars offered "Ram Air", almost all the benefit of those systems was to feed cold outside air to the carburettor.
In some cases, the temperature difference was 100* or more, resulting in an increase in the air density, and a resultant increase in the amount of Oxygen available for combustion. More Oxygen means you can add more fuel, and get more power.
This is the side the AFM connects to. It's an 80mm flow path all the way from the outlet of the air cleaner, through the AFM, and into the new air intake pipe, which feeds a 75mm Throttle Body via a reducing silicone hose coupling.
OK, turn to your right, please....
My wife sees me scrubbing these parts down, and at first just shook her head and said "Nobody's going to see it. Why clean it so well?". It's a valid question if you look at cars like toasters, and yes, I know, there are people who collect old and "vintage" or "classic" toasters. Those guys look at their toasters like I do my project car and my radio gear. I'LL know it's dirty there, and as long as it's apart, I'll at least wipe the grunge off it. It actually looks a notch or two nicer now, as after I took the pix, I noticed a couple of spots on it I missed, so they got the windex-and-scotch-brite treatment, and now the entire metal bracket looks pretty spiffy.
The AFM also cleaned up nicely. Not sure why I didn't take any pix. All the dirt on the alloy casting was "road dirt", and not greasy at all. It came right off with the previously mentioned method, and the stains on the housing came off with some green Scotch-Brite, Windex, and elbow grease.
One thing that troubled me when I took these assemblies off to clean was the corrosion I found in the rubber air coupling between the AFM and air cleaner. See all that "white stuff"? It's residue of the corrosion on the inlet to the AFM. Looking through the air coupling you can see a shinky area at the other end of the house. That's where the hose clamps to the air cleaner, which is plastic.
I buffed both the inlet and outlet of the AFM with the green Scotch-Brite, and it cut the white oxide/chloride/whateveride right off the metal, and it looks much better ow. The connections these make to their air couplings will also get some silicone grease for the same reasons, but it's curious that this surface, NOT in "electrical" contact with anything, could have that kind of corrosion. I don't know what alloy this casting is. It might be aluminum, or it might be zinc, but it sure got attacked a noticeable amount.
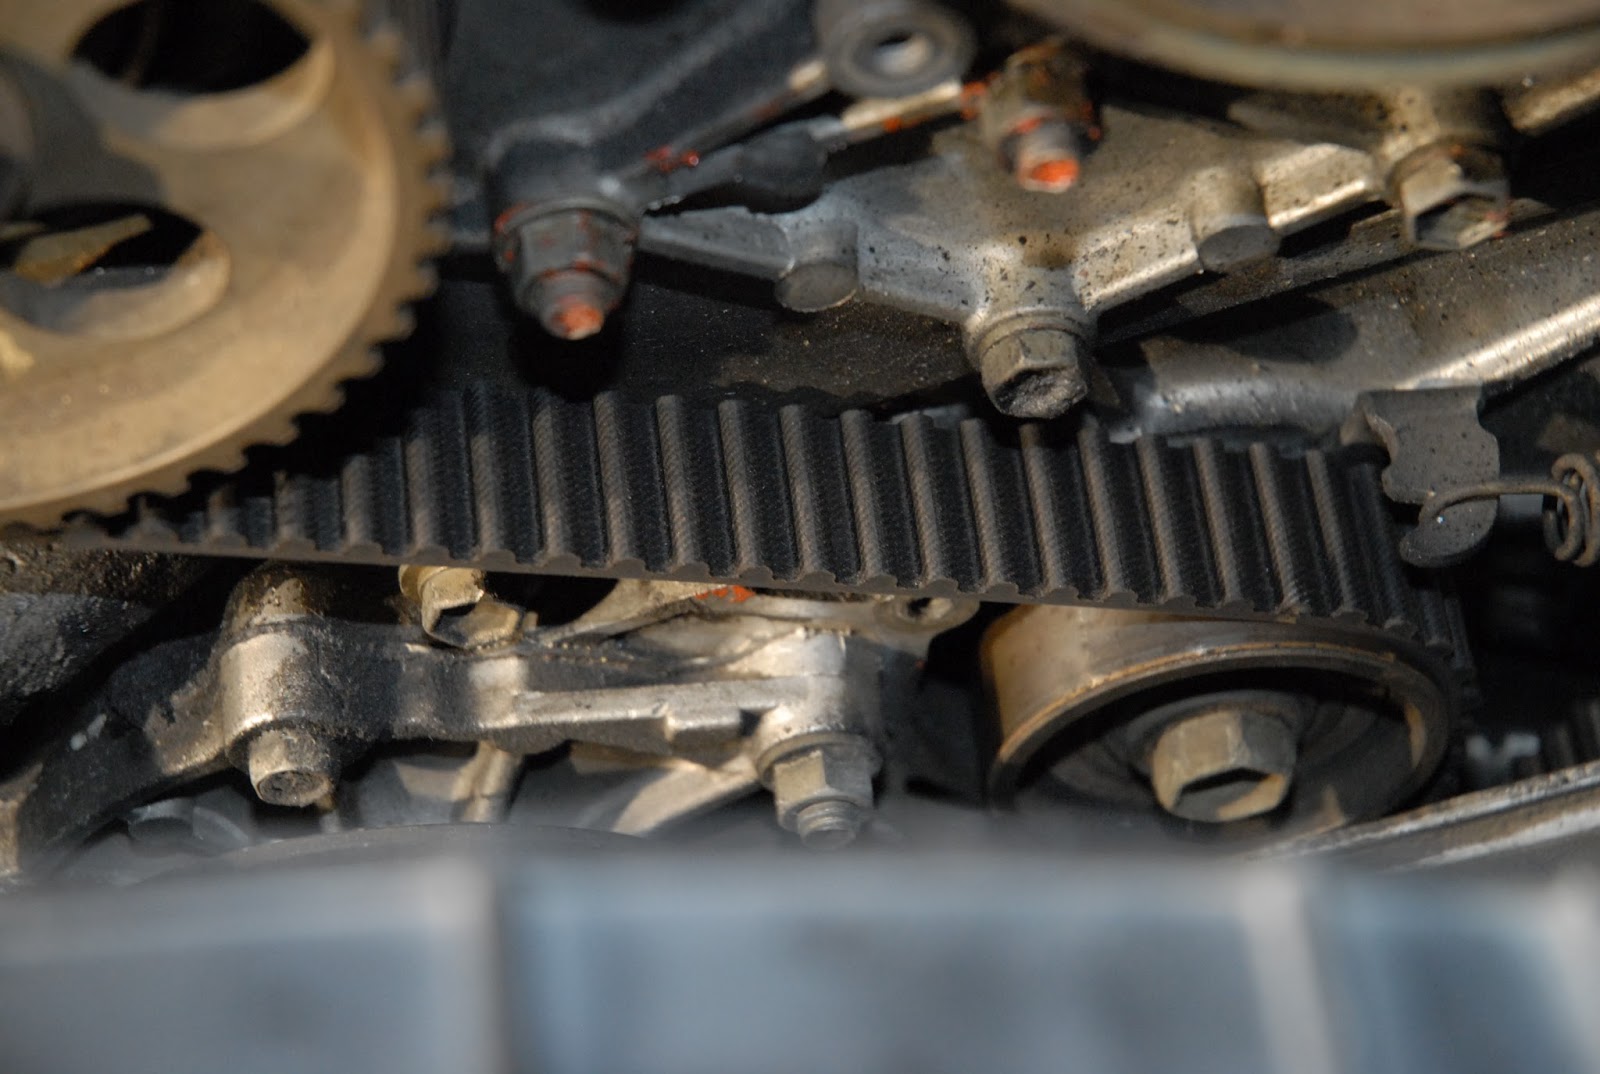
And the timing belt cover is a real PITA to clean. 30+ years of belt dust, oil vapor, and engine heat combined to cook a layer of "stuff" on the backside of the cover that requires Good Old Gunk and a stiff brush to get loose, and then everything has to be wiped down again, and put back together.
I took a break from the outside paint because I was getting "dazzled" by staring at dirty white paint being scrubbed to clean white paint under bright LED lighting.
And I'll be equally glad to take a break from scrubbing under the hood! At least I've been wearing the 5 mil nitrile "Two By Two Hands Of Blue" gloves from Harbor Freight. Keeps the solvents and cleaners off my dainty hands, makes clean-up easier, and my hands don't smell like Gunk....
Admiral Yamamoto infamously said "You cannot invade the mainland United States. There would be a man with a rifle behind every blade of grass."
And so it should be, a nation of riflemen....
Thursday, May 3, 2018
Wednesday, May 2, 2018
Meanwhile, Back In Jim's Garage.....
We have progress on the cleaning project. The right front corner of the engine bay is about as clean as I'm going to get it without expending significantly more time, and making significantly more MESS in the process.
Further cleaning of the engine bay goes on hold after the air cleaner/AFM bracket and rubber air coupling get cleaned up and reinstalled.
These bits are a bit dirty.....
One of the numerous semi-flexible (30 years ago...) molded rubber air couplings in the air intake ducting. These are one of the many unobtainium parts for this car. Somebody, somewhere, might have a new set of them, or some of them, but these have been out of stock for many years. I was fortunate to be able to get a complete set of these in excellent condition from a friend in the PNW. Stuff like this lasts forever up there because of the climate, while it dry rots, bakes out, and cooks off down in SoCal, where this car came from.
This is the outlet of the air cleaner housing, it's 80mm in diameter, the same as the inlet on the AFM. The rubber air coupling connects the air cleaner outlet to the Air Flow Meter (AFM), and needs a really good scrubbing. It doesn't appear to be cracked at all, but I'm going to order an 80mm 45* bend silicone hose and see if I can trim it to fit.
And the backside (bottom side) of the bracket showing 33 years of road dust and dirt caked on. These parts have been cleaning up very nicely using my Secret Sauce Spray formula on the "dry" dirt, and Good Old Gunk on a shop towel for the "wet" looking stuff. After they're clean, I wipe them down with "303 Protectant" to try and preserve what's left of the original finishes. You want "patina"? Yup we got it!
And I pulled "Timing Cover Number 3" to get a quick look at the cam belt and tensioner.
It's pretty clean in there for 168,000 miles. The timing belt and tensioner are "Unkowns" on the maintenance list and have to be cleared eventually, but I wanted to pull the cover to clean it, it's only 5 bolts, and it was off the car in ten minutes.
This car has the "Round Tooth" belt and pulleys, a Toyota refinement leading to quieter operation, and longer belt life.
The tensioner is the puller under the belt on the right side of the picture, and I think it's getting to be and end-of-life item, as I see little flecks of distinctly shiny, metallic looking "stuff", and I've seen it before when bearings like that first begin to fail.
The inside of the cover was pretty clean, but again, I have no idea if/when this was ever off the engine.
It's much easier to get glop like this stuff off when the part is off the car and on the bench, then it is to clean it on the car.
Anywhoo....As soon as this stuff is cleaned up and back on the car, I'm going to get back on the paint. I'll have all upcoming winter to do more cleaning, clear items from the maintenance punch list, and get the new carpet installed, but I want to get the paint cleaned and sealed before I take the car out again. I can do a 'quickie' wipe down of the rims and tires, vacuum out the interior, clean the glass, and roll if the paint is cleaned and sealed.
Further cleaning of the engine bay goes on hold after the air cleaner/AFM bracket and rubber air coupling get cleaned up and reinstalled.
These bits are a bit dirty.....
One of the numerous semi-flexible (30 years ago...) molded rubber air couplings in the air intake ducting. These are one of the many unobtainium parts for this car. Somebody, somewhere, might have a new set of them, or some of them, but these have been out of stock for many years. I was fortunate to be able to get a complete set of these in excellent condition from a friend in the PNW. Stuff like this lasts forever up there because of the climate, while it dry rots, bakes out, and cooks off down in SoCal, where this car came from.
This is the outlet of the air cleaner housing, it's 80mm in diameter, the same as the inlet on the AFM. The rubber air coupling connects the air cleaner outlet to the Air Flow Meter (AFM), and needs a really good scrubbing. It doesn't appear to be cracked at all, but I'm going to order an 80mm 45* bend silicone hose and see if I can trim it to fit.
And I pulled "Timing Cover Number 3" to get a quick look at the cam belt and tensioner.
It's pretty clean in there for 168,000 miles. The timing belt and tensioner are "Unkowns" on the maintenance list and have to be cleared eventually, but I wanted to pull the cover to clean it, it's only 5 bolts, and it was off the car in ten minutes.
This car has the "Round Tooth" belt and pulleys, a Toyota refinement leading to quieter operation, and longer belt life.
The tensioner is the puller under the belt on the right side of the picture, and I think it's getting to be and end-of-life item, as I see little flecks of distinctly shiny, metallic looking "stuff", and I've seen it before when bearings like that first begin to fail.
The inside of the cover was pretty clean, but again, I have no idea if/when this was ever off the engine.
It's much easier to get glop like this stuff off when the part is off the car and on the bench, then it is to clean it on the car.
Anywhoo....As soon as this stuff is cleaned up and back on the car, I'm going to get back on the paint. I'll have all upcoming winter to do more cleaning, clear items from the maintenance punch list, and get the new carpet installed, but I want to get the paint cleaned and sealed before I take the car out again. I can do a 'quickie' wipe down of the rims and tires, vacuum out the interior, clean the glass, and roll if the paint is cleaned and sealed.
Monday, April 30, 2018
Sunday, April 29, 2018
Spring Blooms
I am NOT a "Nature Photographer" by any means. I tend to be more of a "Technical Photographer" who tries to record things mechanical and electrical for posterity and/or understanding.
Anyway......here's what's been happening the last couple of days. I can't believe how fast these various trees and plants exploded in the last few days.
Here's our crab apple tree in the backyard.
It's prettier than this, depending on how the light hits it.
"My" maple tree in the front yard is doing well. It was just dying down from it's fall colors when we first looked at the house, so my wife never got to see a maple in full regalia.
We still don't know what these are. Guess we'll find out when they bloom.
And the same goes with these by the side of the garage.
I thought these were weeds, and then they surprised my yesterday with flowers!
And even the little 'rogue' pine tree is getting into the act with little future pine cones appearing.
All over the neighborhood things are blooming and growing like crazy. We're supposed to get some rain about mid-week, so things will really get going.
My wife is really enjoying spring here. She'll probably be breathless when fall hits, and everything turns.
Friday, April 27, 2018
Cap and Rotor Time
Since one of the priorities in this project is to take care of deferred maintenance items, I thought I'd start with the ignition system. It's easy to get at, and relatively easy to work on.
The cap is held on by three hex head screws that also have a full-width slot, and a Phillips head drive. I have no idea when the cap was last changed, but holy smokes were the screws ever tight. I tried a Phillips head, and could only get the top one loose, so then I tried a big flat blade. Barely any better, so I got out an 8mm nut driver. No dice, couldn't get a decent grip on the handle, so I broke out the 1/4" drive socket set, and busted the other two screws loose.
And then I had to get out a soft hammer, and tap the cap to get it loose from the distributor housing.
The cap isn't the worst one I've seen (or used..), but it was really stuck on the housing by some corrosion.
The inside of the housing is fairly clean, and I'll be really gentle cleaning it, as these things are a bit delicate, and expensive to replace. You can see the corrosion on the right side of the housing. There are two "Reluctor Pickups" in this distributor. The one with two "lobes" tells the Engine Control Computer that the crank has made one revolution, and the one deeper inside with all the teeth gives the ECC much more precise information.
NEVER disturb the pick-up coils or the spacing to the teeth unless you know what you're doing and have the shop manual.
And the hold down clamp doesn't look like it's ever been loosened.
The rotor looks really weird, and I can't recall ever seeing one with this pattern of discoloration on it. It's all mottled and a bit 'sooty' looking, but shows no signs of cracks or carbon tracking, and the car idled as smooth as silk. The parts are pretty dirty and worn, but they were still working. Just gotta love that Toyota reliability, although I'm sure WSF might disagree.
I think it's made of the carbon button contact in the cap, and other "stuff" like oil vapor and humidity that gets in through the vented cap. There's a baffle on the outside of the cap that covers the vent hole, but stuff still gets in, and over time, it looks like a lot got in.
I have no idea when the cap and rotor were last changed. I put a new set of plugs in her the first time it failed smog, but that's all I did to the ignition system.
Looking at the plug wires reveals a manufacturing date code of 2003, 15 years ago.
Looks like I'm off to Rock Auto to order a set of plug wires, as nobody local carries them.
I might very well have the only functional, road-worthy MKII Supra in the area.
Thursday, April 26, 2018
New Post "In Work"
But since I've been posting a lot more lately I thought I'd do a quickie....
Spent the day waging Chemical Warfare on the back yard. Holy Moley did the weeds ever explode the last two weeks. We have concrete edging in the back yard along the fence and house, and between the edging and the lawn is an area filled with what I call "River Rock". The rock is quite possibly grown and harvested locally, and is most likely from the Cache Le Poudre river. With the rain and warm weather we've had, all the seeds that had blown in all year took root, and BOOM!
I mean I like a green yard, but I prefer it to be all GRASS!
So I loaded up two gallons of RoundUp 365 in the sprayer, and commenced firing.
Was able to give ALL of the rock area a good spraying, and then went after the rogues in the lawn. We have some YUGE bare spots, and the local chapter of "The Brotherhood of Weeds of Opportunity" gang tried to grab and hold a little turf.
I took out the Big Ones in a Decapitation Strike, and I'll continue mopping up tomorrow with an Air Strike, but this time loaded up with Agent Weed-and-Feed. This should knock out the remaining cells of The Gang, and give a good dose of support to our allies in the lawn who are valiantly trying stage a come back.
Not sure what this little bush is, but it brightens up the backyard, so we left it. Our neighbor has a big one in her front yard, and it's quite pretty. This poor little guy has been neglected, and is pretty sparse.
Oh, and I've spending one to several hours a night cleaning the paint on the Supra. I'm using Meguiar's "Professional Quik Detailer" spray and a very fine Scotch-Brite pad. The spray is what normally gets used with a clay bar to clean the finish, but the paint is so bad, aint no way, no how that a clay bar treatment will get the "stuff" off, so I dug out some of the very fine Scotch-Brite pads I have, mounted one to a flexible sanding block, and had at it.
The paint is coming out smooth, "flattened", and best of all, pretty clean. Some of it came back stunningly good, although it's not shiny yet, due to the myriad of "micro-scratches" in the paint which refract the light far better than they reflect it.
This is the left front fender flare. It's not dirty. It's been washed. All the discoloration is IN the paint; i.e. the paint is stained. It looks much worse in person due to the way the extremely dirty surface reflects light. Pretty "nonspecular" and FUGLY!
This is the right front fender flare after scrubbing. It was actually worse than the driver's side.
The stains are 95% removed. And while the top picture shows signs of a shine coming back, it looks much different in person. The surface is clean, and reflects light much better now that it's been "flattened" (i.e. leveled out), but it looks "soft" and not "shiny" because of the "Billions and Billions" of small scratches in the surface which scatter the light at many different angles.
At least it appears to be pretty much all-one-color now, a far cry from the dirty, splotchy, neglected car she was "As Delivered". The Bill of Lading said it best under the "Comments" section filled in by the driver: "Car extremely dirty 360".
Pretty much described her.
I have the hood, roof, hatch, and most of the right side done. When I'm satisfied the right side is acceptable, I'll open the door and clean the door jambs and lube the hinges.
And I'll continue around the car until all of the exterior surfaces have been scrubbed like this. Then it's on to doing some touch-up work, and treating the now clean paint to some restorative treatments which will buff out the micro-scratches while chemically cleaning the paint. Then a wax/sealer, and that's it for now.
As to the question of "What's playing tonight in the Engine Room", sorry, but it's closed for cleaning!
Kinda hard to see the amount of grime in there, but it's plenty. Most of it is dust blown in and washed in, and it wipes up pretty easily with just some Windex and shop towels, but some of the areas were exposed to oil vapors, and then the heater core blew, and then the power steering pressure hose started leaking, so some areas are covered with Mechanic's Favorite.....oily, greasy, muddy, glop.
And that stuff needs something like kerosene or mineral spirits to clean it off.
This area under the hood has both kinds of dirt. The stuff in front of the rubber seal that runs side-to-side behind the hood latch striker is pretty much "dirt", and cleaned up easily. The crud in the recessed areas to either side of the hood latch striker is a mixture, and will take some mild solvent to get off.
The underhood pad will be vacuumed in place, then removed to be refurbished. The black "scrim" type fabric will be peeled off, the fiberglass pad will be solvent cleaned, and then new scrim fabric will be glued back on. New OEM molded pads haven't been available for probably 15~20 years, and the replacement pads are $100, but they're not a molded pad, just flat pad material, cut to size, and punched in all the right places to install on your clean hood. It's pretty labor intensive to restore one of these, but as my buddy Marvin would say, "It just looks "nice" when it's done".
The complete underside of the hood will get cleaned when the pad is off. Great care will be taken to preserve the decals under the hood. Some repro decals are available, but not too often, and rarely in full sets. The printed-on-foil fusebox decal can be saved, cleaned, reglued, and reused.
The rest of the engine bay is a similar mix of the two kinds of dirt, with the greasy stuff being down lower and for the most part, out of sight.
The inner fender area is cleaning up nicely, and I'm planning on unbolting all those bits so I can clean them up, and get at some of the harder to reach areas.
And it sure is nice to have enough light to work by! The 7000 Lumen Husky LED worklight makes things jump out at you, and yet it's not a super-bright bluish color, but nice and warm so colors don't get distorted, and the contrast between differing surfaces is distinct.
And yes, the front bumper is on the task list to refinish. The paint is completely shot, down to the primer in places, and down to the yellow urethane in others. It's got a small ding on one corner, so I bought one of the "Flexible Bumper Repair Kits", a kind of rubberized Bondo, and I'll see what special procedures need to be followed in priming and painting one of these that's been allowed to weather like this. There's no surface cracking or "checking" of the exposed urethane, and it wasn't this bad when I parked it last September.
And I haven't even started on the interior........yet!
Saturday, April 21, 2018
A Bit Of This and That, and an Error Admission
Well, it turns out my Air Intake Pipe is made correctly after all. It just doesn't fit in a neat, tidy way, with the straight section crossing the cam covers at 90* like I would have designed it. Nope, it's meant to run at a sloppy-looking angle, and when you position it like that, it "fits". This is thanks to a couple of members of the MKII Supra Tribe who sent me some pix. If my case of "Adrian Monk Syndrome" flares up I'll probably fabricate one myself. In the meantime, I'll shut up and use the one I paid for, as what I consider to be a "less than beauteous" fitment will have NO impact on how well it works, and I know they work well. Another thing I'm considering is to wrap the pipe with some heat insulating wrap. This keeps the air cooler, resulting in a denser charge of air going into the engine, which makes more power as it allows the electronic fuel injection to richen the mixture. And then there's the hidden "Stealth Model" cold-air duct to the air cleaner, further dropping the inlet air temperature.
Got up at 0500 to let the dog out, and there was an inch of snow in the backyard, and it was still coming down. I had to shove the dog down the steps to get her to go out and do her bidness......
The snow's pretty much gone now due to the off-and-on rain we had that started shortly before the dog came back in, which required the standard 15 minute paw-cleaning drill. If it's really muddy outside, I summon the "Paw Patrol", and my wife brings a bucket of warm water to wash with while I hold the dog. Pebbles has gotten quite used to this, as she knows if she cooperates, she'll get a rawhide chew. Pavlov was right!
Our lawn guy quit on us over a "contract dispute" with my wife. The Big Winds we had damaged the fence on the North side of the house, and we wanted a gate installed to replace a single panel on that end of the house. He quoted us $4k to replace the run of fence. Our neighbor on that side, my Ham friend, said he could do it for a lot less. It required two new posts to replace the two that rotted out at ground level, a few new pickets, a bag or three of Quickcrete, and three days of his labor to remove and reset the post. She called the lawn guy (who also does fences) and said she'd changed her mind and wanted to cancel the contract. She'd also had him come back twice concerning his original plans to redo the front yard, each time working with him to remove some things, and get the price more manageable. See my comments about the proposed electrical work.
WELL.....we got a certified letter on Friday that he was cancelling all contracts with us, and we'd be receiving a refund of all monies paid, and we'd paid him in advance for a full year of lawn care. He was here once to do work, and several times to measure the yard in preparation of a sprinkler install. Kind of annoying, as he seemed to have plenty of time to come and design stuff for big projects, but never came by to whack the weeds like he said he was going to do. Oh, well.......
Then the quote from the electrical contractor came in Friday.
$3600, which means I've got to chop it waaay back to get it under budget. The separate outlet boxes for the garage door openers will go, along with the 240 Volt outlet for a future air compressor, and the separate outlets for the overhead workbench lights. While the material cost those items isn't all that much, the labor to add the additional conduit, and pull the wire, is what kills you. I'll be down to "only" three, 20 Amp quad outlet boxes. I'll do what a friend suggested for the air compressor; make an extension cord that plugs into the easily accessible dryer outlet just inside the entry door. And I'll pare back the new circuits for Radio to just having him install a couple of "spare" breakers that we can use for future expansion.
The two door openers and the overhead lights can get plugged into one of the quad boxes, saving me a nice chunk of change.
The real kicker is that he did some "Load Calculations" indicating we might possibly draw 135 Amps from our 150 Amp service. Since this loads the incomer to 90%, he said the city would most likely require us to upgrade our incoming line to 200 Amp service, at an additional $2600. Since I've done these calculations before, I understand them. In "The Name Of Safety", they're very conservative, and somewhat unrealistic. I strenuously doubt that the clothes dryer, AND the air compressor, AND every heater in the house, AND my Collins 30L-1 would ever be all running at max draw at the same time.
In fact, I could damn well guarantee it.
But, they're done "To Code", and sometimes you have to make adjustments to suit the code.
Still, I'd rather ask for everything I could want and get shut up by the "Fully Loaded" price than to start adding things to the build-out and have it get out of hand.
The Little Guy is still here, and getting over being Captain Crankypants for the third time today. He's got another tooth coming in on top, and TWO more ready to bust through on the bottom, so I guess he's allowed to be a bit fussy. He's really warming up to me, and my collection of Amazing Funny Noises I know how to make. And he's pulling himself up and cruising along on the furniture. If you hold him by one hand, he can manage to do two or three steps before he Blue Screens, so he'll be blasting around the backyard with Pebbles before long.
Final item for today is I'm going through all my t-shirts, polos, pants, and other clothing coming up with a box (or three) for Goodwill. And our in-laws just stopped by to drop off some things we inadvertently left at the country house in Bellvue. All four of my Caldwell shot bags for my Lead Sled, a box of "misc electronic bits", and another rolling suitcase full of t-shirts, hence the drive to sort stuff out and get rid of what doesn't fit, like medium size shirts. I can now get back in a Large shirt, and the XL shirts are starting to look decidedly Urban Youth on me. Still, some of them like my Sea Launch shirts, have sentimental value, so I'll hold on to those.
Thursday, April 19, 2018
GROAN.........More Pigeons......
NOT having good Kar Karma the last few days. Probably lost a whole lotta Kar Karma points for leaving the poor Supra sit outside for five months, but that's past.
The tire store my wife got her snow tires from wanted $78 to swap out the mounted snow tires for her OEM aluminum rims and tires. I thought $20 a corner was a bit high, so I told her I'd do it.
The two rears came off no problem, but the left front lug nuts felt "funny" as I unscrewed them. Normally you bust them loose with a big breaker bar or an impact, and then they just spin right off. I started smelling something rotten when I had to use my impact to get them completely off the studs, and that 'aint right!
Before I even tried mounting the tire I tried a "test fit" of the lug nuts I just took off.
NONE of them would screw on the bare stud by hand. Closer inspection showed three of the lug nuts had the lead thread mashed up, and all 5 of them showed signs of thread distortion, most likely due to excessive tightening torque.
So out comes the rethreading set (my wife is starting to understand why I have two full size rolling cabinets with two full size top boxes), the metric thread pitch gauge, the dial caliper, and some tapping oil. Yeah, I could have looked up the thread size on-line, but I have the tools to figure it out, I'm not time constrained, and doing it will calm me down a bit over what I'm feeling for the person that did this. Plus I enjoy doing that kind of thing.
An Extreme Rookie Mistake was made, and I've seen people fired at auto and tire shops for doing it. And if the person doing it was an Extreme Rookie, it also becomes a management mistake for allow that person to work on a car without proper supervision.
Turns out it's a 12x1.5 thread, so I start running the die over the studs, and then the tap into the lug nuts. Flush the chips out of and off them, and do the next.....
Took me a good hour to rethread the 5 lug nuts and wheel studs, but now the nuts spin right down on the studs like they supposed to. Three of the nuts showed signs of leading thread damage, which almost always happens when you use an impact wrench to start the nuts on the studs.
Doesn't wanna fit? Mash the nut into the stud and hold down the trigger on the impact. It'll start sooner or later.......
Le Big Sigh......
Only one damaged nut and stud on the right front, so maybe the goober that did the first corner had some oversight on the rest.
All four OEM wheels and tires are back on the car, properly torqued to 80 ft-lbs, and the tires aired to 34PSI.
What would have normally taken 90 minutes wound up taking four hours.
And that tire store has lost TWO customers forever........
Wednesday, April 18, 2018
Huh.....Looks Like Another Pigeon Or Two Showed Up.....
After I wrote the post last night, I went back out to the garage to stand and stare for a while.
Sometimes I'll get a flash of inspiration or an insight while just standing there looking at random things.
Since one of the long deferred maintenance items are the hoses that carry the coolant, I started checking them. The upper and lower radiator hoses have worm-drive clamps on them, along with most of the heater hoses, indicating that they've probably been replaced at some time in the past. The radiator looks newer than the rest of the things in the engine bay, so I'm SWAGGING that it and the upper/lower hoses are replacements.
I have new upper and lower hoses, so I'll replace them.
One of the heater hoses is a weird two-piece thing with a metal coupling joining the two sections. It's not a flow restrictor, just a coupling.Why on Earth Toyota did it this way is unknown, but there's a similar one piece hose used on the Tundra pickup truck that fits with trimming an inch off each end, so I bought one of those when I found out about it.
And there's the rub.....That hose is disconnected at one end!
And looking at the amount of glop on it, it's been disconnected for some time. I stumbled on this as I was doing the "Wiggle-and-Jiggle" on that hose to see where it went, and found out it goes......NOWHERE!
Looking closely at the firewall reveals an empty hole where the pipe from the heater core is supposed to be.
The out-of-focus hose is the loose one, and the connected end is out of the picture. It's connected to the other heater core pipe, which is still there.
So while this is going to be a Royal PITA to fix, at least it explains the ruined carpet that I thought was caused by the clutch master cylinder failing and dumping the fluid inside the car. And in retrospect, it makes much more sense. The clutch master cylinder only holds a few ounces of fluid, and even if the seals blew, it's a contorted path for the fluid to actually get inside the car.
I've had heater cores let go before, even in well maintained vehicles. Some are fairly easy to change, and some aren't. This one isn't, requiring the removal of most of the dashboard. The heater cores are between $50 and $75 depending on where you buy it from, and nobody local stocks them. Rock Auto wanted $75 for the same "Spectre" core that O'Reilly's gets $51 for, so I ordered it from O'Reilly's. I doubt if I'll change it soon, as I don't need heat here in the summer, so It'll get deferred until Fall, and I'll do it when I pull the interior out to install the new carpet and have some of the interior parts refurbished/recovered. The tops of the door panels are completely disintegrated, and crunch when you slide your fingers along them, so the foam under the vinyl is shot, along with the vinyl being split in many places.
ANYWAY.....going to see Brandon Marsalis Quartet tonight at the Lincoln Center. Not sure if my wife likes Jazz or not. Guess I'll find out!
Somedays You're The Pigeon, and Somedays You're The Statue
And today I'm a statue.
I removed all the OEM air ducting on the Supra today to replace it with the Air Intake Tube I bought a couple of years ago. The story of this particular piece of kit is a tale of woe. It came from Canada, and somewhere along the way, it "broke open", the pipe disappeared, and it was taped back up, and sent on it's merry way.
It took the vendor and I SIX MONTHS to get it straightened out with the shipper, and I had to send everything I received to a special address where the shipper investigated it, admitted it had been stolen, and paid up.
In the mean time the vendor sent me this one, and it's been sitting on the shelf all this time. As part of the "5000' Elevation Adjustment Program" I'll be investigating ways to pick up a few "free" horsepower by making the engine breathe a bit better, and reducing Parasitic Drag.
So, after stripping off all the OEM air ducting and installing the new parts, I get this:
There are two "air taps" with hoses connected to them, so I keyed the position of the tube off where they connected to the OEM ducting. And notice I had to pull my strut tower brace to get even this far.
That's a 3" tube in the above picture, so to say they don't line up is being kind.
Pondering over this fitment issue during dinner, and remembering the vendor said he'd "get a kit right out so you don't have to wait", and our shared tale of woe in my even acquiring this item, I chuckled to myself and said "Gee....I wonder if they put the air fittings in the wrong place, and they thing is really meant to be flipped around".
Nawwwww...couldn't possibly be that simple, could it?
Considering the Air/Fuel Meter (the Nippondenso box) is loose, and the coupling on the other end is loose and sloppy, I'd say it fits pretty nicely when flipped around.
Sorry about those air tap fittings, though.......
And oh, man.....I really hate to contact the vendor about this. He bent over backwards to get me the first pipe out of the next batch that was being ceramic coated. And he's gone out of his way for me on other items, he's one of the few vendors to make anything for these cars, and he totally supports the car community. AFAIC, this is one of those "Let's Have A Few Beers Next Time", and I'll cut those fittings down, seal them up, and install the two fittings I have from when I was going to fab one of these from scratch.
My wife was wondering what I was having such a hoot about, and came out to the garage. I showed the "before" and "After" versions, and she said "You're taking this awfully well". Then I clued her in as to what this part was, and all the trouble it caused, and she said "OH NO.....That's the part you told me about? And now it doesn't fit? Because it was made wrong?".......
Yup. Call it irony, or Kar Karma, or what ever, I think it's hilarious because of the back story......
And I took about 50 detailed, well-lit photos of the engine compartment, the vacuum lines, electrical connections, the throttle and cruise control linkages, and some other details. I'll do the same when I start stripping the front of the engine down to replace the timing belt, tensioner and water pump. And I'll do the same when I strip down the intake side to replace the fuel injectors and give the throttle body and EGR passages a complete cleaning.
I was inspecting the hoses, and noticed one of the heater hoses is disconnected. That's NEVER a good sign, and usually indicates a bad heater core. I just checked Rock Auto, and they had ONE left in stock, so I ordered it. So far, none of the auto parts stores here have anything in stock for this car, compared to SoCal. Which I kinda knew in the back of my mind but never started appreciating until I got the car our here.
Swapping out the heater core in this cars is a Royal PITA. Most of the dash has to come out, at least as much as I had out when the car was apart before. And the destroyed carpet in the car, and the way it feels, leads me to believe that it was the heater core dumping coolant inside the car that ruined the carpet, and NOT the clutch master cylinder blowing out and dumping brake fluid inside. The carpet still has that sticky "antifreeze" feel, and from the area of the carper that was ruined, it would have taken more than the 5 or 6 Ozs of fluid in the clutch master.
Geez....and I wanted to drive the thing this summer!
Tuesday, April 17, 2018
Supra Is Now "Colorado Tagged".....Crazy Windy Today
Total cost including title transfer was $206.20 for FIVE years of registration. Add in the cost of the emissions test and VIN Verification and the total is $251.20.
The cost of registration is Kommiefornia was $130 PER YEAR.
The Jeep is about $77 per year here in Colorado, while it was well over $200 "back there".
They gave me a temporary paper tag in a nice holder until the other plates get mailed from Denver. It should take about 3 weeks to get them.
And I sent the paperwork to Denver to get my callsign plates for the Jeep. Those have to be "approved" before they get made, so they'll take about 8 weeks to get.
And it's crazy windy here again. We're having sustained winds of 40~45 MPH with "gusts" of 65+MPH.
The big double gate blew open again, this time ripping the latch clean out of the 4x4 post. I'm getting REALLY tired of fixing this damn thing every single time the winds get up over 40MPH.
I'm gonna nail the GD thing shut with some 2x4 bracing. Maybe I was nuts to get a 14' wide double gate put in there that MIGHT get used once every few years.
Whatever.....it needs to be repaired AGAIN after the wind dies down.
This is really making me rethink the antenna tower plans........
And the wind just blew over the 5' tripod with the Davis weather station on it AND my 8' satellite antenna tower, which landed in the yard with a pretty big THUD.
And three complete panels of fence just blew down in my neighbors yard! Ripped all three panels clean off the posts, and THUMP! they went down in his yard. I'll help him get them back up after the wind dies down. Three 8' sections of fence is a little too much 'sail area' to be fighting with in 50MPH winds....yep, FIFTY MPH sustained winds.
It's almost hard to walk out there. I'd hate to be on I-80 up by Cheyenne. Probably blow a big rig all over the road.
Subscribe to:
Posts (Atom)
We Hit 'Em.......<i>Now What Happens?</i>
Breaking story from Newsmax.....
-
Yawn....just more Kabuki Theater, but interesting reading, nonetheless. Read All About It Here.....
-
Every so often when I'm checking my PiAware ADSB receiver/display I'll notice an aircraft with a flight path that catches my eye. I...