Interior is 95+% back together. The "missing" things are cosmetic, and don't affect the function of the car.
Stereo is installed, and it works.
Laundry is in the dryer and I'll finish packing when it's dry.
I took a break and went to the closest Radio Shack in the area that's still open so I could get a three-way splitter for the cigarette lighter socket. Say what you will about Radio Shack, they do have a lot of useful stuff there that's hard to find at other brick-and-mortar stores.
The car only has one receptacle, and I'll need to run both my GPS and Valentine One on the drive there.
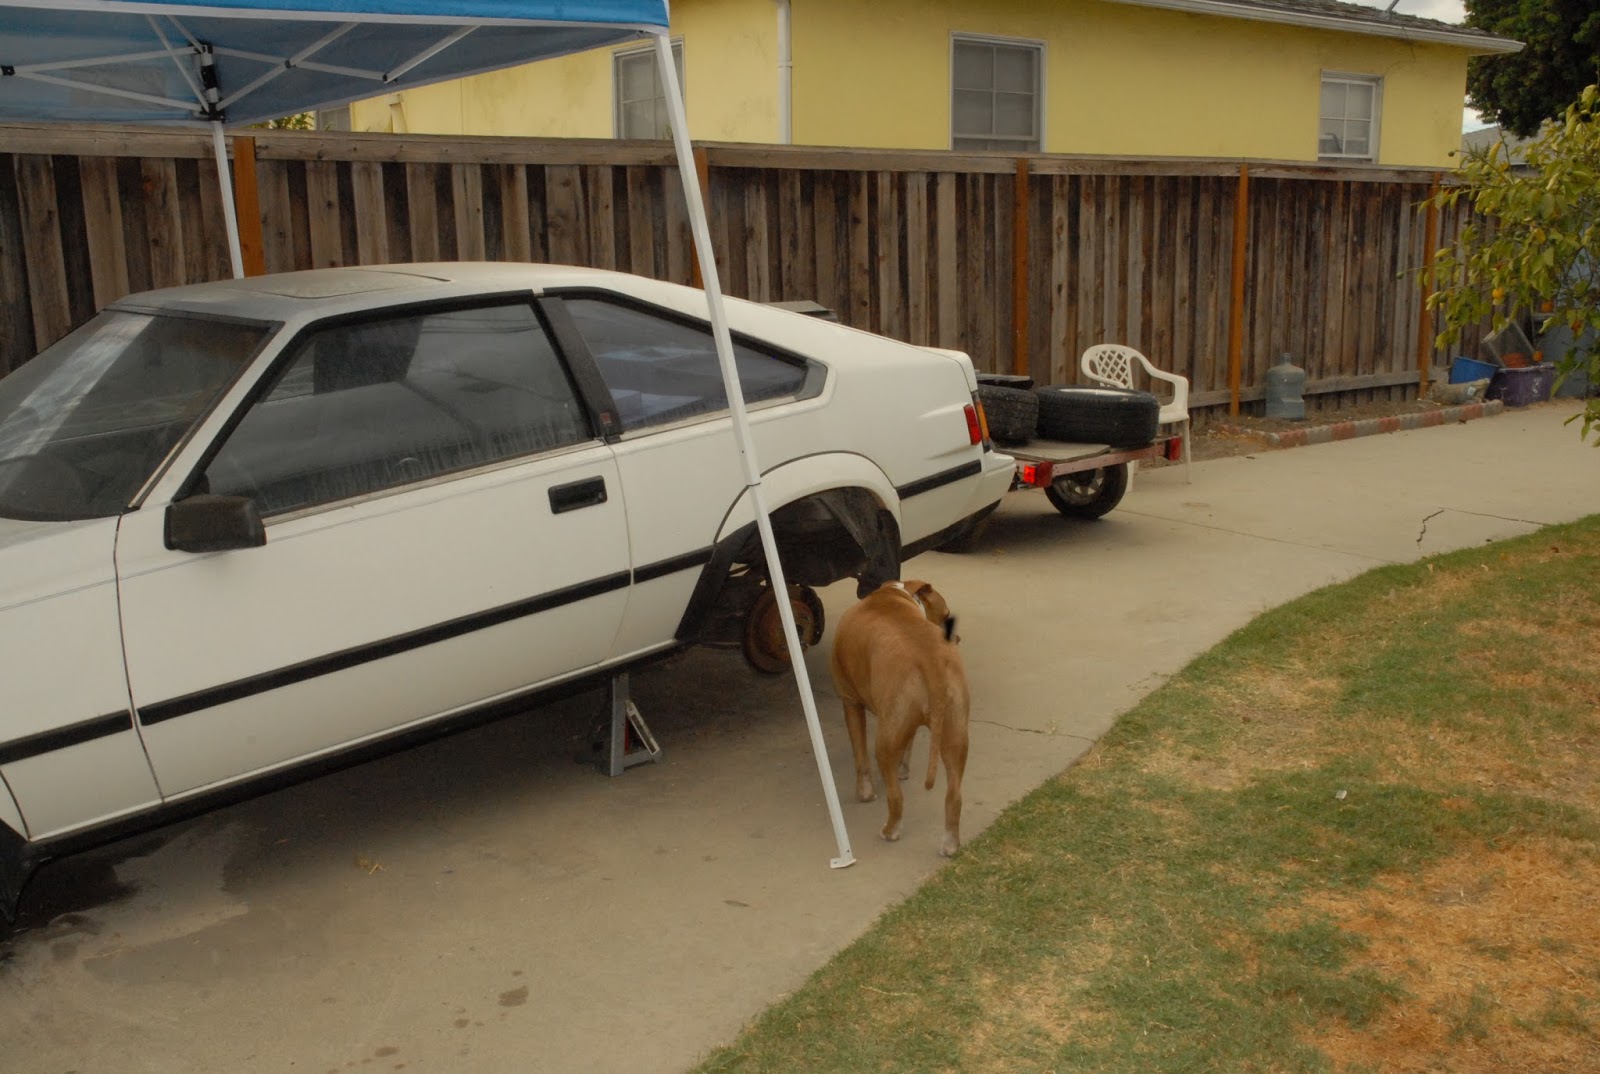
And I'm trashed. I have bruises in places I forgot I had, my hands look like I went three rounds bare-knuckle and lost, I have scrapes on my knees like a ten year old gets, and I'm sweaty, grimy, and beat.
And the car needs to be washed. At this point, I'm just going to clean the windows inside and out, and drive it there crummy. I don't care what other people think. They don't know the effort I've put forth over the last month or so, so screw 'em!
I'm going to Vegas in the Supra.......
I'll post again after I get there.
Tuesday, September 20, 2016
Monday, September 19, 2016
Alignment Passed!
Whoopeeee!
I was afraid I'd either done something wrong, or there were worn parts that I'd missed, or that Murphy would exact his revenge, but everything turned out GREAT!
My setting the caster adjustment on the front strut rods was spot on, so close in fact, that the young guy didn't want to adjust it, as he said he doubted if he could get it any closer.
The "specified range" is 3.69* to 4.69*, and my shade tree measurements wound up giving me 4.19* on the left side, and 4.29* on the right side.
Front toe specified range is .09* to .16*, and I had .39* on the left, and .29* on the right.
After adjustment it was .14* on the left and .12* on the right.
Front camber measured at -.25* left, and -.30* on the right, the result of dropping it.
At the rear, the specified range for toe is -.09* to +.09*, and mine measured .13* on the left and .12* on the right.
After adjustment I have -.02* on both sides.
Rear camber measures -2.14* on the left, and -2.22* on the right, also the result of the drop.
So, the alignment is probably as good as it's ever going to be, and I'm cleared to go to Vegas!
Gonna have a bite to eat, finish up the adapter plug/wiring harness for the new radio, and then get back to work so I can have most of the interior back in the car.
One thing I noticed when he was pulling the car on the alignment rack is that one of my brake lights was burned out. So, I stopped at the O'Reilly's store I always go to and bought all new bulbs for the rear.
The bulbs I took out were "Koyto" brand,made in Japan, and might very well be the original bulbs that came with the car.
The young guys at O'Reilly's came pouring out of the store when I pulled up, and were all smiles, thumbs up, and hand shakes/fist bumps to me.
They've been hearing about the car for two months now, and really flipped out over the wheels/tires and stance.
They were amazed that all the bodywork is straight, that the paint is original, and none of the flares are cracked or broken.
More to come.......
Sunday, September 18, 2016
Interior Work Today
Got my new 3-1/2" "Kicker" speakers installed in the dash panels today. It took a little "Precision Dremel Work", I had to flip the speed nuts around 180*, and use some other screws with washers I scrounged out of "Jim's Stainless Hardware Emporium", but I got them solidly mounted.
The original 30 year old speakers were still in the dash when I pulled it apart, and I tell you....tin cans and string would have sounded better!
The rears had been replaced some time ago with some junky off-brand speakers (IIRC, they were "Spark-O-Matic"!), but one was blown out with an open voice coil, and the other sounded really scratchy, so essentially I had NO sound system in the car until I replaced both rear speakers with some decent Pioneer units I got on sale at Best Buy.
As of right now, the passenger side of the interior (dash, kick panel, door sill) is back together, and the driver's side is partially together (kick panel and door sill), but I needed to take a break.
I'm pretty sure I can get the dash panel installed tonight, but I have to hit the hay early as I have an 0800 (groan.....) appointment with the alignment rack that I can't miss.
I've got my fingers crossed (founding member of the "Crossed Fingers Workgroup" here!) that all goes well with the alignment, because if it doesn't, I'll be pretty upset with myself for not being at this point six months ago, when I would have had enough time to rectify any problems before heading off to "Supras In Vegas".
Hopefully all goes well with the alignment, and I can finish up plugging in the radio with the harness I'll be making shortly, and installing the rest of the radio surround and console Monday afternoon.....
Saturday, September 17, 2016
"Minor Repairs" Day
Did some minor repairs today.
Pulled the driver's seat so I could get at the lever assembly that operates the gas filler door and the rear hatch release. They'd been "broken" since I bought the car, and while I could get the door and the hatch open, I had to hold both levers together, while pulling on the one I wanted to open.
Sure enough, the bolt had come out, and was right next to the mechanism under the carpet. Put it back in place and tightened it down, and one more item crossed off the list.
And since the driver's seat was out, it makes it a whole lot easier to
get at the clutch pedal to measure and adjust the pedal height and
free-play adjustment.
The pedal height was "in spec", but the free-play was waaaay off.
The car had the clutch master cylinder replaced some years ago when it failed and dumped the contents of the fluid reservoir (standard brake fluid) into the interior, and all over the carpet, ruining the carpet.
I don't think they bothered to set the free-play when they replaced it because it was always a bit reluctant to go into first gear at a stop (typical "crunch" when you put it in gear), and I could always feel it "snag" a bit when shifting. The clutch still feels a bit "soggy", so I'll put the car up in the air on Sunday and flush the fluid and bleed the system like I did for the brakes.
BTW...the fluid that came out of the rear calipers when I did the flush and bleed a couple of days ago was actually worse than what came out of the front!
I'm not putting in the new carpet kit before I leave for Vegas as it's just too much work. One of the guys I met there last year has the same carpet kit, and agreed that it's very high-quality. He also said it's cut very "generously", and he had to trim 4~6" of carpet from the door sill area, and about the same at the top front where it goes up against the firewall. He told me it took him two full weekends, plus an hour or so per night between weekends, to get it installed really nice.
I'm sure the carpet installation will be another whole series of posts.....
Small Block Chevy Time Lapse Rebuild
Yeah, yeah, yeah....I know I've posted this before.
I like it. It's cool. Watch it again.
Pretty low-perf engine they started with. Two-bolt mains, cast iron crank, cast pistons, pressed-in rocker studs, no push rod guide plates (only used with screw-in studs), and a two barrel intake manifold.
But they rebuilt it properly, with an overbore and hone, decked the block and surfaced the heads, installed hardened valve seats and a roller-type timing chain. The intake manifold and carb they used are Edelbrock street performance types, and I bet that little motor just purrs......
Friday, September 16, 2016
Maiden Voyage......
Well....She's back on the road!
Cleaned the windows, and took her around the block a few times.
Brake pedal is rock solid, and the steering wheel is straighter than before I started.
NO pulling to either side, and she tracks straight down the road, hands off the wheel.
So, since things seemed OK, I kept driving her, and went out on the streets around here. Ride is very nice, definitely a bit stiffer than before, but no more floating or wallowing in turns.
Tires barely rub at full lock and going over a bump.
Called the alignment shop and he said "Bring her down". Drove down there, and he was expecting me to drop the car off. Since I didn't make arrangements for a ride home, he said he'd call as soon as the alignment rack was open, and I could wait while they did it.
And he knew quite a bit about the car.
SO...I took the long way home, and enjoyed driving her a bit.
Post alignment follow up to come.....

UPDATE
The alignment shop couldn't get me in today. As the guy said "Fridays are NUTS!".
So, I'm scheduled for a 4-wheel alignment on Monday, at 0800.
There's not much that's adjustable on these cars. The front only has toe-in and caster, and the rear only has toe-in. Since the front adjustments interact somewhat, you go back-and-forth as you're doing them. The manager at the shop is well-versed in "Old Jap Cars" as we both called her, and says their alignment guy has been doing alignments for over 20 years.
This place isn't cheap, but they do superb work, from complete "frame off" restorations, to general body and paint, and collision repair.
Wednesday, September 14, 2016
Back On The Ground
WELL.....after a several week adventure, the suspension work is finally finished. I still have a few things I want to do, and some more parts to replace, but nothing that's on the "Do It NOW!" list like replacing the top strut mounts was.
And since I had to pull the struts and compress the spring to get the Big Nut on the top of the shock absorber insert off so I could change the strut mount, why not just replace the shock insert and springs with the parts I have on hand?
And since the hub and brake disc had to come off, better check and repack those wheel bearings! Whoops...the bearings show definite signs of wear (they're probably the 167,000 mile OEM bearings) better replace those, too. AND, since I have new brake discs, and the old ones are already off, why put the old ones back on?
Gee...the ball joint boot on the lower control arm is split and spilling grease all over the place. Better replace the boots. AND, since the control arm is now on the bench, why don't I just replace those ratty old bushings with my new Energy Suspension polyurethane ones?
AND...gee, the sway bar is disconnected, and those rubber bushings are (quite literally!) cracked, split, and falling apart, so I'd better install that new kit of end links I have in The Big Box Of Supra Parts.
WHOOPS! The front brake hoses are cracked, and the outer jacket is (really!) peeled off in a few spots! WoW! That's a Safety Issue. Sure glad I bought some braided stainless steel replacements a year ago! Installing the speed bleeders took all of 10 minutes, so I won't discuss that further, other than to say I was absolutely stunned that all four of the OEM bleed screws came out with ZERO drama.
Otherwise I just would have sprung for new calipers.....
I think you get the picture.
If you've been following this escapade, then you already know that I (finally) got the front finished a couple of days ago. And yesterday I completed the right rear refurb, with relatively little pain.
The plan for the rear was never as ambitious as the front was. It was pretty mach always a straight "Spring and Shock Swap", along with the new rotors. Since I had no idea what shape the brakes were in when I bought the car, I ordered the new pads and rotors TWO YEARS ago, and they've been sitting in the garage taking up space all this time.
Today I knocked out the left side rear suspension, having learned a few things in doing the right side. A small bottle jack I bought last night at O'Reilly Auto Parts (they know me by name now, and the young guys always ask how the car is coming along) proved to be well worth the $25 it cost. It saved me at least an hour of farting around with the floor jack, some big wood blocks, and a jack stand when I had to reposition certain things to R&R them.
Here's the left rear, all refurbed and pretty:

Yep, new cross-drilled rotors there, too! Hey, why buy two rotors when for twice the price you can get FOUR?
And as the sun sank slowly in the West, all four (new!) wheels and tires were on the car, torqued, and ready to support the car, whereupon I unceremoniously pulled the jack stands, and let her drop

Here's the famous Car Magazine "Rear Three-Quarter Shot":

Never mind the mess, it's all cleaned up now.....
SO...Thursday should be an "easy" day, compared to what the last 6 weeks or so has been. I (just) have to torque the lower control arm bolts (one on each side, 80ft-lbs, please), and torque the Big Nut on the left and right strut rods to 76 ft-lbs.
Then it's cross my fingers, and take her for an easy drive around the block. Then I'll recheck the torque on the wheel lugs, check everything else I've fiddled with to make sure nothing bad has happened, and call the alignment shop for an ASAP appointment. I'd really like to get at least some of the interior back in, along with the new stereo, but the carpet can wait, as my friend I met at Supras In Vegas last year tells me to allow a good, solid week-end to install the new carpet.
That means a month, considering how dog-slow I work on this stuff.
Time to hit the showers and then go to bed......
Funny, But Sadly True
Just taking a quick break during the disassembly of the right rear suspension....


Tuesday, September 13, 2016
Rear Suspension Work
Well, I'm shutting down for the night. I didn't get as much done as I had hoped for, but then that's nothing new for me....
I followed the TSM, and dropped the outer flange for the half-shaft, and as soon as the shock was loose at the top, I lowered the jack, and the spring about fell out.

The upper isolator/cushion was in pretty good shape for being 30+ years old.


But, WOW...the bottom one was toast! I'd say it deserves retirement after 30+ years and 167,000 miles of faithful service.

Had to do some finagling to get the shock installed, and it really would have helped if I'd had an extra floor jack, or a bottle jack, but I finally got the shock installed, and all the hardware tight.

I also replaced the top bushings for the sway bar end links. They were really shot, and you could rattle them around a good 1/4"!
Some info on the new and old springs for those that keep track of this stuff.
The OEM springs are wound from wire that's .570" / 14.5mm in diameter, and have an overall free length of 14.25" / 360mm.
The new Dobinson C59-059 springs are wound from wire that's .604" / 15.3mm in diameter, and have an overall free length of 12.6" / 320mm.
Bigger wire, and a shorter OAL equals a stiffer spring, so even though it's specified to drop the car about .75", the rate should be higher. I know from my "bounce test" the other night that the front seems a lot stiffer, but I won't know for a day or two until I drive the car.
Final picture for the night I'm going to call "3 Down, and 1 To Go!".....

At this point all I have left to do is a preliminary bleeding of the brake caliper using the MityVac, and recheck everything to make sure all the hardware I touched is torqued properly. I'm playing hookey again from the Iowa on Wednesday (sorry, guys...) so I can get the left rear knocked out. As with the front, now that I've done it one time, the next time will be easier.
Onward...To The Rear!
Tail end is up and on jack stands.

Notice "Inspector Pebbles" checking my work to ensure proper safety standards are being followed!
And yep, I've either got a spot of something on my sun filter, or the sensor in my Nikon needs cleaning.
Initial inspection shows the rear pads and rotors to be in excellent condition, but man.....the rear spring lower isolators/cushions (kind of like a big rubber ring) are TOAST!
Theyre both cracked and split, and it's a Good Thing they're one of those parts I ordered long ago because I suspected they might be a bit worn after 30+ years, and 167,000 miles.
The factory shop manual says to remove the rear sway bar end links, remove the rear shocks, and the springs should come right out if the suspension is hanging free, like it is.
As far as replacing the rear rotors with new ones I have, all I should have to do is remove the bracket that holds the caliper in place, and the rotor should pop right off if the emergency brake is released.
I'm not going to replace the rear control arm bushings at this time, as it's pretty involved, and I'll do those, along with the subframe mounting bushings, and differential mounting bushings, after I get back from Supras in Vegas.
Doing all that, along with replacing the steering rack, is probably a several week project at the rate I work at.
She's On The Ground!
Scrubbed all the grease and glop off the power steering hose assembly, and then rebuilt it with the new high-pressure hose, and a length of "SAE J189 Low Pressure Power Steering Return Hose".
And I used the same hose on the short piece that connects the outlet of the cooling loop back to the reservoir.
Then I spent a couple of "pleasant" hours (I must be deranged...) putting everything back together. Actually, it wasn't that bad, as it's always a good feeling putting nice, clean, freshly rebuilt stuff back on the car!
Filled the reservoir and started the car, carefully checking for leaks.
WHOOPEE! No leaks!
So then I ran the steering wheel from lock to lock a few times, and watched all the foam in the reservoir build up and dissipate, indicating the air was getting bled out of the system. Topped off the reservoir, checked all the fittings for tightness after I shut the engine down, and all was good.
Fired up the engine again and bled the brakes by cracking open the speed bleeders, connecting them to a small jar to collect the expelled fluid, and slowly pumping the pedal a few times, checking the fluid in the master cylinder reservoir to make sure it didn't get too low and suck air.
Got a few more bubbles out of the brake system and decided it was bled.
Rolled out one "left" and one "right" wheel/tire for each side (the tires have a directional tread pattern, so there's a "left" and a "right"), got out my new lug nuts and wheel locks, and "hub centric rings", and immediately noticed a problem.
The lug nuts I bought have the correct 1.5 thread pitch for the wheel studs on the car, but the wheel locks I ordered were a 1.25 thread pitch.....RATS!
Fortunately I have more than enough lug nuts, but now I'll have to order some matching wheel locks in the correct thread pitch!
Drove the hub-centric rings into the back of the new rims with a soft mallet, and mounted the new front wheels and tires on the car. Dropped her down on the ground and torqued the lug nuts, and I'm done for the night!
Tuesday morning I'll do the final torquing of the lower control arm bolts, and the large nut on the end of the strut rod, and other than a front end alignment, the front of the car is (finally!) finished.

Say "Goodnight, Gracie".....
Subscribe to:
Posts (Atom)
Ahhhhh.....<i>RAIN.....!</i>
And the weather has been gorgeous since my last post. Cool breezes, puffy clouds, blue skies kind of weather. Had a few little spritzes of ...

-
 FOURTH time I've written this post. MY Muse has apparently vacated the premises, leaving me too busy doing other things to keep both m...
 -
With apologies to The Control Voice.... Yup.....got The Busies the last few weeks. Lots of stuff happening this week, including my Nuclea...