Thursday, May 30, 2019

The Continuing Saga of The Antenna....Now With Pictures!

So in between playing Grandpa and installing the new weather station, I did manage to get some (undocumented - gasp! -) antenna work accomplished, both on the end-fed random wire, and on the 20 Meter BuddiStick replacement. The BuddiStick worked extremely well, but I didn't consider it to be an "all weather" antenna, so I took it down during windy, stormy weather. I just couldn't see letting that Really Cool shock-cord whip get turned into a pretzel.

On the 88' end-fed, I wound up removing ALL the counterpoise radials, exactly "As Advertised", and it works acceptably well on all bands except 75 Meters (3.5~4MHz), and 60 Meters (5 "channelized", shared frequencies at ~5.5MHz). I took the radials off in stages, sweeping and recording the antenna response each time, and the "best" it got was with a single 7' wire off the ground connection. I could raise the center another 6', but I really don't want 3 sections of mast on the ends. I'm just afraid it might get 'whippy' in the winds we have here and come down like the Tacoma Narrows bridge did. I might change my mind after I get the new post installed for the fed end, and have a much more substantial mount for the mast, but for now, this is about as good as I think I can make it work. Took me a while to shift-gears, and think about the specifics of deliberately NON resonant antennas, but now I understand why that particular class of antennas can be quite 'counterpoise independent'. What I had ingrained in me about antennas was 90% resonant antennas, and it's wrong for these antennas. So it was a valuable learning experience to understand this new critter, and proves an Old Dog can learn a few new tricks when properly motivated.

And I finally took down the BuddiStick tripod which has been out there for about a year now. Even though the "final" version of what is now called the "20 Meter Vertical" is sketched out, there comes a point where I put the hardware I have together, and test it out. Then I use it, experiment with it, and modify it until I figure it's pretty much optimized for what I have to work with. For now, it's mounted on the 5' tripod and section of mast that my original Davis weather station was mounted on. The curves are "text book perfect" for a 1/4-wave, resonant antenna, and I'm quite pleased, even though my meticulously calculated element lengths appear to be an inch or so too long. Better than too short! It's a simple matter to loosen a hose clamp, slide a section down an inch or two, and retighten the clamp to change the resonant frequency, but that could shift again if I move the antenna. Anyway, it never exceeds 1.5:1 VSWR anywhere in the 20 Meter band, so getting it 'smack on' @14.150MHz is easy to do, but not strictly necessary.

Pix of the aftermath.....

Weather station off the tripod and ready to rebuild. I was going to replace the white plastic OEM enclosure with a plastic junction box from HD, but after examining the damage, I can just glue it back together with some JB Weld, and paint it to slow down any further degradation.


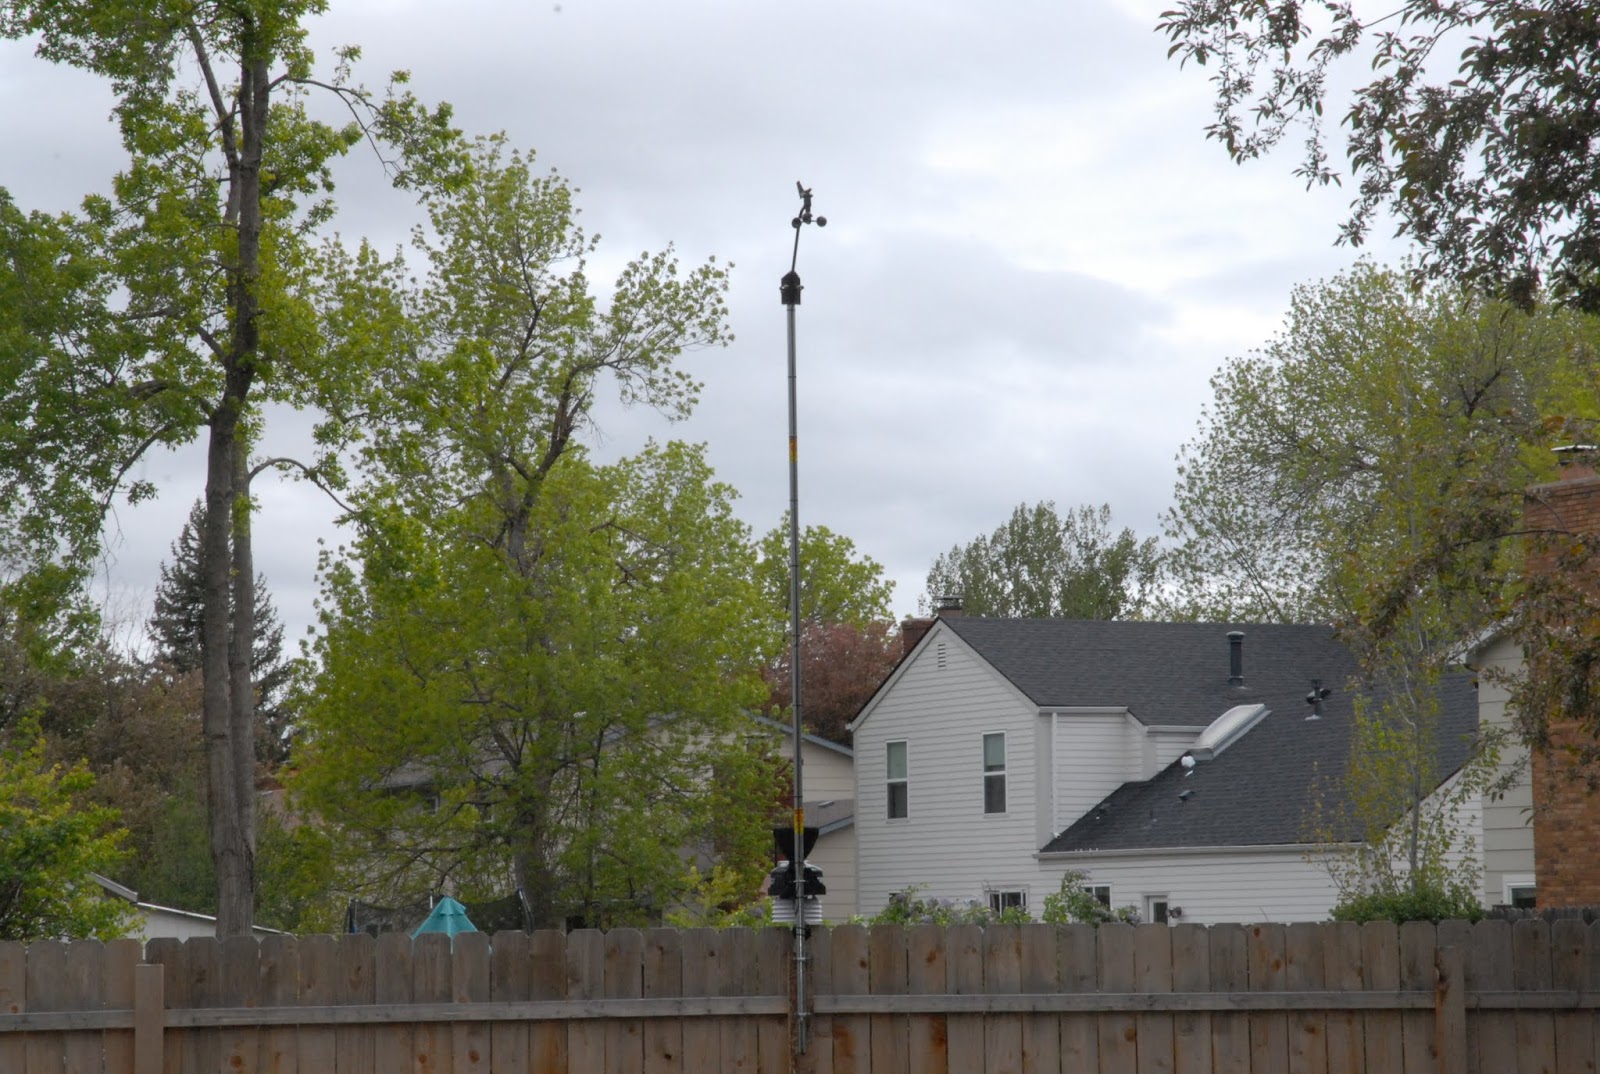
Here's the new vertical on the former weather station tripod. I'm going to put a few guy ropes on it later today.


Yes, it's "Pebbles Approved"! The branch is from the crabapple tree. Once it dries out, I'll strip the leaves and twigs from it, cut it up, and we'll have a bit of hardwood to toss on the fire.

Truly a gorgeous day outside today.

This the feedpoint assembly showing the coax-to-studs box I made, and the line isolator coax choke I threw together last night. The coil of coax adds some "Common Mode" isolation between the feedline and antenna. If you don't use something like this you'll get currents on the outside of the coax shield, and it can cause Funny Things to happen.


The five books I've been pouring over on antennas, transmission lines, and baluns really helped me understand a few things I was more than just a bit hazy on, and solidified the differences between resonant and non-resonant antennas for me. They're both antennas, but quite different in how you feed them, and what you see when you measure them.

This is the VSWR curve for the vertical.

Pretty damn flat!

But will it help get us off the island, Professor? Well, maybe, Gilligan, if propagation is good.

I'll find out both answers this weekend, as it's Museum Ships Weekend, and I'll be on 20 Meters trying to contact as many Museum Ships as I can. The Iowa, New Jersey, and Missouri will be on-the-air, but the Wisconsin is MIA again. They have an Amateur Radio club, but they're not very active.

The USS Nautilus is supposed to be on, and I'd really like to contact them.

Tuesday, May 28, 2019

'Twas A Dark and Stormy Night.....

Actually that was last night when the front went through but I haven't used that title in a while, and it is 44* and raining right now, so that's kind of "stormy".

Anywhoo....spent some time cleaning up the basement workshop/lab/repair shop so The Little Guy can go down there tomorrow morning. We had him last night, and he was quite disappointed that we couldn't go down there today before he had to go home.

Seems he spent his time budget playing with this little guy I picked up at Harbor Freight.


Turning out to be the best $20 I ever spent at Harbor Freight! It's a super simple R/C car, with two independently controllable motors, and a twin-stick remote. It's driven like a skid-steer (kind of) in that you stop one motor to turn, or reverse that motor to turn reeeal fast. In fact, with proper manipulation of the two sticks, you can make this thing spin, dance, flip around, and all kinds of other crazy maneuvers. Which I got quite good at doing, much to The Little Guy's delight and amusement.

On Sunday when it was still nice and dry out, we made and chased soap bubbles all over the backyard using his "Tiger Head" soap bubble blower, which his gramma (my wife) bought for him at their recent trip to the Denver Zoo, his first trip ever to THE ZOO!


But it was pretty soggy outside, so we resorted to building things with his giant-size lego-type blocks, and running the crazy little R/C car around, driving poor Miss Pebbles absolutely bonkers.

So the basement area is now squared away, and all the equipment I had on the racks has been rearranged, freeing  up two whole shelves, which are quickly filling up with the dreaded STUFF.....

Sunday, May 26, 2019

Memorial Day 2019

The graphic below says it all.


Image courtesy of Stilton's Place. Image created by Janet Burroff.

Saturday, May 25, 2019

Memorial Day Remembrance Event

Down on the Battleship Iowa.

If you're in L.A. for the weekend, it's a very moving ceremony.


And I just worked K1A in the Dallas-Fort Worth area on 20 Meters, at 2230 local time. That's very unusual because at this time of night, at this point in the sunspot cycle, 20 Meters isn't supposed to support any propagation.

The callsign "K1A" is a memorial to "KIA", and the station is being operated in remembrance of all out fallen warriors.

Friday, May 24, 2019

Anybody Up for a Little Sinatra?

Well, i finally got around to gathering up and patching together enough stuff to drive the HitMaker speakers I finished a while back.


I had the little amp in the workshop, but the turntable and phono preamp were stored (buried?) in the 'cold storage' area under the steps in the basement that my seet little wifer refers to as "Der Boonker" for some strange reason. Must be the Gadsden Flag hanging inside. Oh, well....

So I dug those things out, then went on a hunt for the 12 Volt power supply, aka "Wall Wart", the preamp needs. I have several medium U-Haul boxes  packed full of these little critters, some AC output, some DC output, and even some regulated ones. Took about an hour or so, but I now have them semi-sorted, and found one that works for the preamp.


I have no idea where I bought the preamp from. Might have been eBay, or Amazon, or one of the specialty vendors I buy things from. It had rave reviews on the audio forums, does exactly what I need, and was under $100. Well under, IIRC. It's dead quiet with no input, sounds good to my tin ears, and it's built like a brick in a nice, heavy steel case.

The Pyle amp was sitting on the shelf, victim of my shack "realignment" plans. I was going to use it with my Flex 5000 as the 'audio output' stage, but that's not needed any longer. It's rated "40 Watts" per channel, but I think that might be downhill with a tailwind on a good day. That power rating is also spec'd as into 4 Ohms, and these are 8 Ohm speakers, so it might not have enough voltage to drive them to that power level. In any case, the amp isn't happy with the speakers, and depending on how you have the Bass control set, you can easily get to a volume setting where it's pretty obvious the speaker/amp combo is going into some kind of sub-sonic oscillation. If it were happening at a lower frequency it would be called "Motorboating", but you can hear that. This oscillation makes the speaker cones appear as if they're 'vibrating' in and out. I suppose I could break out my scope and look at the audio.....

BUT.....if I keep the Bass control down some, and don't try and rattle the windows in the basement, the amp and speakers play nice, and the speakers sound really nice. You have to be pretty much "on axis" with these, and as you move around you can hear the sound change. It's more pronounced if you get above the speakers. The tweeters start to overpower the other speaker, and it sounds too "bright". I still haven't decided where and how to mount these, and have to give it some more thought.

The turntable is my 'Ol Faithful' Technics Quartz Direct Drive SL-1210MK5, and yes, that's all on the label. Cartridge is a low-end Audio-Tecnica AT92E, soon to be replaced by an AT440MLa, a much better cartridge.


Taken as a whole, this little 'mini-system' sounds pretty good. I won't go into all the audiofool techno babble, but Sinatra sounds like he's 10' from you.

I can hardly wait to get the big Heathkit completed. Then I will be able to rattle the basement windows....

Tuesday, May 21, 2019

New Weather Station Installed

I didn't really "get into" monitoring the weather until I started working at Sea Launch in 2004, and wound up being assigned to keep the Weather Monitoring and Reporting System maintained and operational. That also included the C-Band Pulsed Doppler Weather Radar System, the only one ever installed on a ship. I always had one of those multi-instrument  barometer/thermometer/hygrometers around, but never seriously studied the weather. Then one of the Meteorologists I worked with showed me his home weather station connected to the Internet, and I kind of picked up (another!) new hobby.

I went with a Davis Instruments Vantage PRO2, and went through half-a-dozen different devices to get it on the Internet so I could monitor the weather while out-of-town.

Fast forward to 2019.....

My original Vantage weather station was getting a bit 'tatty', and while it was sitting outdoors here, we had a couple of huge windstorms come through, blowing over the 5' tripod, mast section, and weather station. It smacked the concrete patio pretty good, and damaged the cover for the instrument package.

The solar cells are for a fan kit I added when the station was sited on the big, flat, HOT roof of my apartment, and kept a flow of air  going through the sensor housing during the day. This helped keep the temperature sensor at more of an 'ambient' temp to counteract the effects of it being sited on a HOT surface.


So I just kind of moved it off to the side and let it sit. A week or so ago I stood it back up, connected the cable to the display console, turned it on, and went through the setup procedure. Rats! It just sat there blinking at me, and I assumed (uh-oh....) that it was damaged, and no longer functional.

So, off I went to the Interwebz, and ordered a newer version. While waiting for the new one to arrive, I did the RTFM thing to acquaint myself with the new one, and this time I read the whole thing.

Uh-oh.....I didn't complete the setup procedure! Doing it right made the station come up and function normally. So while this one needs some mechanical repair, electrically it seems to be just fine. I'll get a plastic electrical "Junction Box" from HD, swap the guts into it, scrub it up, and either have a back-up unit, or more likely, I'll give it to one of the in-laws to use.

The new one arrived Friday, and I unpacked it, RTFM (at least Davis still gives you printed paper manuals), and commenced installation on Saturday.

And it went together, went up on the new mast, and worked 99% the first time!


This is a much better installation than the original station would have been just sitting on the tripod, as the wind sensor is in the clear, and 15' AGL. The only "better" site I have for this is up on the roof of the house, and that ain't gonna happen!


The vertical "wires" sticking up out of the rain collector are "Bird Spikes", and will discourage our feathered friends from perching on the rim, causing all manner of "stuff" to collect in the rain bucket besides just rain. The little black antenna sticking up on the Instrument Package is for the 900MHz radio link back to the display console. The cover has solar cells similar to my original station, but these are used to power the station, and charge the internal battery that gets used at night and on on days with little sunlight.


When I first installed it, I kept getting a "Low Battery On Station No.1" alert. Turns out I had the battery installed backwards! The solar cells were carrying the entire station, even at night! Yow....these must be pretty good cells. I swapped the battery around yesterday, and within 14 hours, the alarm had cleared, indicating that the cells not only run the whole shebang, but have enough 'extra' current to charge the battery. Good job, guys!

And the two stations agree very closely, unlike the "WeatherWise" station I bought last year as a 'gap filler' until I got the Davis station back on the air.

I have a little "ZOTAC ZBox" mini-pc that I'm going to use the get this on the 'Net, and I'm in the process of getting that all configured to connect to the Davis console, and our home network.


And we suffered a minor bit of storm damage from the front that went through and dropped 2" of heavy, wet snow on us.


A branch from our crabapple tree came down, nice, clean break, hopefully not injuring the tree much. I'll let this dry out, strip the leaves off it, and we'll have some nice kindling to use.

Sunday, May 19, 2019

I REALLY Needed to RTFM!

And I didn't.

Which resulted in my GoPro Hero video camera turning on, but not going into "Record" mode.

So I didn't get any video of the Union Pacific 4014 "Big Boy" locomotive chugging up the hills of Tie Siding, Wyoming.

But we had a great time finally meeting up with Well Seasoned Fool and his sister, and learned a lot about the railroad out here.

(Picture from Wikipedia)


This was the first time I'd seen Live Steam, and it was wonderful! I've been around a lot of locomotives in my career, but none recently. I used to go to Conrail in Enola, PA and do Field Service work on the electric locomotives that used a big upgrade kit the company I worked for sold them. Most current locomotives are diesel-electric, meaning the big diesel engine spins a generator, which supplies DC voltage for the Traction Motors used in the trucks under the loco. The Conrail ones ran "Under The Wire", like an old street car, and since the overhead wires carried AC, you needed to rectify it to DC to feed the motors. Why all the emphasis on DC motors? Because until recently, a series-connected (Field coils and Armature in series, like a starter motor) DC motor was the most powerful way available. They make maximum torque at ZERO RPM, exactly where you want it to get an extremely heavy load moving from a standstill.

And I was around all the big diesel-electric locomotives, too, because the yard we did the upgrade in also had them around to move cars in the yard.

Diesels, are big, noisy, smelly, vibrating things that seem alive as they rumble the ground they travel over. The electric ones were much quieter, didn't stink, and ran "Like an electric motor".

When Big Boy went by, it was almost ethereal. Steam puffing out out of the pistons, the melodious sounds of the big steam whistle, and smoke pouring out of the stack as she came over the crest.

And as they passed, she just glided by!

UP 844 was also in the convoy, along with a diesel-electric, but it sounded, and felt, like the diesel was just along for the ride, and was maybe pulling it's own weight. Pretty much just idling, which made the hammering, clattering, diesel noise and vibration you feel from 50' greatly diminished.

(UP 844 from Wikipedia)


You could tell the two steam engines were working, but the sound was totally different than anything I've heard before. Very little vibration coming in through your feet, and none of the hammering impulse noise of a diesel's firing cylinders. This was a different sort of power, different even than the other steam powered things (ships with steam turbines) I've been around. This was a Reciprocating Piston steam engine, and the first 'real' one I've ever heard run. The Los Angeles Maritime Museum has a small scale model of a Triple Expansion steam engine that was supposedly capable of actually running, and the SS Lane Victory has the working prop engine used in the movie "The Sand Pebbles", but it's turned by an electric motor.

And you could sense the power of these two engines, but it didn't hammer you over the head like a triple diesel-electric would have. It seemed alive, like a few other machines I've had the good fortune to get to know, and I connected with it as solidly as I did to the P-51 Mustang and the McClaren CanAm cars when I first met them.

An amazing display of technology, and it thrills me that people care enough about them to spend the time and (SERIOUS) money to restore them, keep them running and usable, and share them with others.

And thanks again to Well Seasoned Fool and his Sisty that made this possible!

Friday, May 17, 2019

"HitMaker" Speakers Finally Complete

Remember these guys?


Well, after giving them two coats of the DuraTex coating, and allowing to dry thoroughly, I finally got off the dime, stacked up all the bits and pieces needed to finish them, and went at it.


The two coats I gave them were probably a bit 'light', as I've never used the stuff before, and wasn't sure how it rolled out, if it ran or sagged, or how well it filled surface defects that I missed.

As you can see, the joining line between the top, side, and front panels wasn't completely filled in on the outside, and you can see the join line. Considering this stuff comes out of the can almost like pudding, I assumed it would cover any remaining flaws, which it doesn't. It shrinks quite a bit as it cures, which I now know. Seeing as these are 'Basement Workshop' speakers, and I'm not building them for sale, they're plenty good enough.


So here they are, fully assembled as specified in the "instructions" they give you, along with the twenty-six #8x3/4" deep thread screws, and the input terminal plate, which were not included in the "kit".

I'm going to tack on some protective grilles for the speakers with little dabs of sealer. That way they don't require any hardware to attach, and the sealer keeps them 'floating' over the grilles so they can't get loose, vibrate, and cause Bad Sound, like Da Kidz that drive by with their stereos on loud enough to vibrate everything in their car.


How do they sound? Crude preliminary testing with a little Pyle "40 Watt" per channel amp driven by my 'shop radio' indicate much promise.

Not an "Audiophile Grade" at all, but it works, and I had it.

Since these speakers have a reputation for being inefficient, and taking a lot of power to get good volume, this little amp, with sketchy specifications, actually worked OK.

Now to get that big old Heathkit AR-15 finished up!


Wednesday, May 15, 2019

83* and GORGEOUS Outside ; Big Local Fire

Hopefully we won't get clipped again with snow!

Got The Little Guy today, so we've been running around, upstairs and down, playing "What's THAT?", going through my tool boxes, playing with various Type-N and UHF coaxial connectors, moving the sprinklers in the yard, watching the dog jump through the sprinklers, wiping down a wet dog, wiping down a wet 2-year old, and in general expending vast amounts of energy trying to keep up with him.....

WHEW!

And on a more somber note, I had the scanner on in the garage, and the channels for the Poudre Fire Authority lit up. They were responding to a some kind of structure fire, and it sounded serious.

Sometime later, I heard some more radio traffic indicating two firefighters had been inside a building when it came down on them. They'd both been extracted, and were conscious, but required medical attention. These guys are warriors, but they don't run towards the sound of gunfire; they enter burning buildings to do battle, and God Bless Them for their courage and bravery.

*****UPDATE*****

Just heard they've pulled a third firefighter out, and are looking for a fourth one.....

1430 Local Update 

They just called a third alarm. It's some kind of multi-story structure.

And the casualty count is now up to six.


1515 Local Update

Medivac helicopter has been called in from Greely, and if the pilot doesn't accept the landing area, he'll set down on Hwy 287.

Saturday, May 11, 2019

Happy Mother's Day

To all the Moms and Grandmoms out there.

Thanks for taking care of us before we knew how to take care of ourselves, and for teaching us the essentials.


Friday, May 10, 2019

Saturday........Already???

Spent Thursday watching it rain, then snow, then rain some more, all while sneezing, wiping my eyes, blowing my nose, and trying to drink coffee.

The cold (in my head) has mostly cleared out, along with the rain and snow, and we're expecting mid to high 70's for the coming week.

And I'm hitting the rack early.

Y'all have a good weekend!

Wednesday, May 8, 2019

Radial Daze

Messed around with the radials today. I pulled them off the fence, and coiled them up to 25', and saw the VSWR curves improve. I kept doing it until I couldn't reach any higher to cut them, and they wound up being about 6'~7' long, hanging straight down from the ground connection (coax shield), and tie wrapped to the mast.

This might be "as good as it gets" with this antenna, in this installation. The BuddiStick still works better on 20 Meters, so I'm hoping the CommTek 20 Meter aluminum tubing vertical will be as good.


This isn't 100% usable with the FT-1000D, as the VSWR in the 75 Meter band (3.5~4.0MHz) is still outside of the range the radio.  

And I'm feeling somewhat better, but still sneezing with a very runny nose.....


Tuesday, May 7, 2019

Cloudy, Rainy, Dreary Day in Northern Colorado

And I have a cold on top of it, so that means no outside antenna work today.

Raising the center support from ~15' up to ~25' had very little effect, so my Wire Antenna Guru first thought I needed a "Common Mode Choke" on the feedline. These can be as simple as a number of turns of the coax feedline coiled up, or you can use a ferrite toroid core, and wrap the coax through that. Sine I already have a Balun Designs "Line Isolator", I went ahead and tried that. It made a slight improvement at the low end of the frequency range, but wasn't a Magic Bullet, so I took it back out.

The company that makes this antenna claims it will work without a counterpoise, but the coax needs to be at least 25' long. This is a huge red flag to me, because it means they're using the feedline as part of the antenna, and I've always read and been taught that you don't do that. It's a Kludge, and generally leads to poorly reproducible results. As in change the orientation of the coax, and your antenna no longer "works".

And they're pretty cagey in describing the use of a counterpoise:

"It could work without counterpoise (Coaxial cable has to be at least 25feet long) but grounding at wingnut next to connector is recommended."

And:

"Due to possible common mode currents on your feeder, we recommend using CMC-Common Mode Choke/Line isolator such as CMC-154-3K to keep RF away from you and your equipment. It will also help you on receive by filtering induced noise from various sources."

Hence my Guru's recommendation to try the choke.

Hmmmm.....On to "Grounding"? How? Run a #10 wire down to a good old "8' Ground Rod"?

Anywhoo.....It's an antenna, and it requires some kind of ground to work against. If not a properly engineered Ground System", which is basically as direct a connection as possible to Mother Earth, than it needs an "Artificial Ground", generally referred to as a Counterpoise. I've used the term many times before, and it's important to understand that pretty much any antenna other than a dipole must have a ground. In a dipole, one half of the antenna serves as the "ground" for the other half. It's "self contained" in a way, and doesn't require a separate ground.

Anywhoo (reprise)......Since the manufacturer is so vague, it looks like I'll have to explore playing with the counterpoise wires I have. My Guru now thinks they're too long, and I might only need a single one. After it dries out some and I'm feeling better, I'll get out there and start modifying what I installed. It's very easy to temporarily shorten them by coiling them up, so that's where I'll start.

At this point, since I now have the center point at 25', I'm musing about just putting up a 40 Meter (66' long) dipole......

Saturday, May 4, 2019

End Fed Antenna Project - Fettlin', Fiddlin', Tinkerin', and Piddle Fartin'!

Been a busy week here on the radio scene. I really want to get this "Mark-I" version finished up, as the weather is getting seriously nice, and I have to get cranked up on Ms. Swan again.

Anyway.....I raised the center point of the antenna today, going from ~15' up to ~25' or thereabouts. My Great Plan was to bore a 1-1/4" hole in the top of the trunk, and drive two pieces of mast into it. That plan failed when I borrowed my neighbor's 17' ladder, and went up to the top of the tree and looked around. Uhhhh......NO, I'm not going to be fighting with a Heavy Duty 1/2" corded drill mounting a 1-1/4" auger bit in it while trying to maintain my balance (and sanity) while perched atop a 17' ladder. No sir, don't like it at all!

So I dropped back and thought about while I did some other things with the antenna. In reading some 50+ year old Amateur Radio publications, I discovered (REdiscovered?) how the Old Timers did it.

They bolted a 2x4 to their trees, giving them a flat surface to mount things to. Brilliant!

So since I had a 21" piece of clear cedar 2x4, I laid out a hole pattern, drilled some pilot holes in it, and proceeded to screw it to the tree with these really nasty 5" long SPAX construction screws. This is a 3" version, and even though they proudly proclaim "NO Predrilling! NO Splitting!", I still don't trust them, so I drilled 3/16" pilot holes through the cedar 2x4.


And after much huffing, puffing, and ladder moving, I now have a 10' mast very securely screwed into the side of the tree.


The cedar board is held in place with 7 of the SPAX screws. I drilled 8 pilot holes, but the last screw was giving me a lot of grief hitting the mast, so I left it out. These screws go through the 2x4, an inch and a half of bark, and then into the tree. Some back-of-the-envelope SWAGS indicate I've got the sunk 3" into the core of the tree, and I surrendered and went with 7.

The saddles that bolt the mast to the board are also held in with eight, 6" SPAX screws, so I really have fifteen points of attachment sunk 3" or so into the tree.

Yeah, I think it'll hold.


There's not much load on it at all, and wonder-of-wonders, looking at it from several locations ~90* apart, it's PLUMB!


How the *(&^^ that happened is beyond me. I put one screw in fairly tight, and then used a level to get the board plumb, and drove in another screw to tie it down. The level still indicated I was OK, so I blasted the rest of the screws into it, and ran up the mast!


And for Brig, here's the crabapple in bloom. I'll take another one when the light is better, as it's a very pretty tree. First "pretty" tree I've ever taken care of. I've tended maples, and they're gorgeous in the Fall, but this one really makes me appreciate Spring.


And on the bench, we have a little item I tinkered together. It's a "Feedpoint Interface Box", and nothin' special.


Just an SO-239 Type UHF female socket, and three attachment studs made using 10-32x1" screws, nuts, and washers. This is just a fancy way of going from coaxial cable to wire. The center conductor of the coax runs to the top, while the shield of the coax goes to two attachment points on the sides. The top terminal will connect to the 16-1/2' aluminum vertical I have partially assembled in the garage, while the two side terminals will each connect to a 16-1/2' long radial wire forming the counterpoise for the vertical radiator. Since the radiator will be about 6' above the ground, I'll just staple the two radials to the fence, and they'll be far enough above the ground to be "Elevated Radials", which I means I can "get away with" using only two. Three or four would be somewhat better, but two is enough as long as they're several feet above the ground. In essence, what I'm doing is making a more rugged, permanent version of my BuddiStick 20 Meter quarter-wave vertical antenna.

I've lost track of the number of times I just soldered the wires directly on the coax, wrapped it up with half a roll of tape, and hoisted it up into a tree. And they work just fine, thank you. Not super weather proof, but if you need an HF antenna NOW, they're perfect.


And I made some back-up plates for the outdoor entrance box, and the matching box inside the house. I don't like just screwing bulkhead feedthrough connectors directly into a plastic box. At a minimum, you need some big washers to help spread the unexpected side loads the connectors will suffer when somebody bashes into the connector. And when things like this are located outside, it will happen. So rather than having the connector(s) rip out of the box, I made some aluminum plates from some cheap stock I grabbed at Home Depot.


The plastic box is sandwiched between the two aluminum plates, which spread any loads out over a much larger area than what the thin hex nut holding the connector in the box does.


And here they are installed and sealed in the outdoor entrance box.


Notice the very large "Fender Washer" used on the other connector. These things are works of art, and they're much more a "Machined Spacer" than a humble "Fender Washer". They were also EIGHT BUCKS each! In retrospect I should have just bought the flat stock at Home Depot, but.....

The fettlin' part comes because there was some, uh....."drift" in the measurement/layout process that caused the holes in the box to be 1-1/2" apart, but the holes I made in the flat plates were something like 1-7/16" apart, causing me to "fettle" on the holes in the box with a rat tail file until all the pieces fit properly. Oh, well, the plates cover up the ovaled out holes in the box nicely.

And I still don't believe I got the mast plumb.....

Annnnd.....We Got Zip.....

 Total snow was about 6~8", but half o0f it melted as soon as it hit, and we never had more than 3" on the ground at any one time....