Others have written far more eloquently than I ever could, so please go check them out.
Aesop, in particular, expresses my sentiments on this day.
Yup...I'm just another Old Man who bitterly clings.
Tuesday, September 11, 2018
Saturday, September 8, 2018
Mundane Automotive Tasks
Mundane, but necessary, like a lot of grunt work.
Doing some clean-up work on a few items so I can paint them tomorrow. I took my Cooling Plate and buzzed it off with my orbital sander and some 140 grit. It put a nice, smooth, flat finish on it, and also gave the surface some "tooth" so the paint will stick better. This will get painted wrinkle-finish black.
Then I prepped two pieces of headlight trim that screw down to the hood. They fill the gap between the leading edge of the hood, and the back edge of the headlight pods. These are stamped steel, and the paint was weathered but solid, so I cleaned them, and then scuffed them up with some 220 grit. These will get painted satin black.
I'm going over the grille right now. I scrubbed the living daylights out of it in the sink with hot, soapy water (Dawn works very well), and several different brushes to get in all the nooks and crannies, and then went over it again with some of that semi-lame "No Scratch" blue Scotch-Brite I have. Even though it feels "squeaky clean", it still has splotches of road film on it that don't want to easily come off. I went through this with the two big pieces of black plastic headlight trim that go on the front and sides of the headlight pod and hide all the mechanical bits. I finally gave up on trying to get them clean, and went over them with the green Scotch-Brite I have, and a ton of my "Sanding Juice". It gave them a very clean, "brushed" look, and after treating them with Mother's "Back-To-Black", they look ready for their close-up, Mr. DeMille!
BUT....the grille has TWO-HUNDRED AND SIXTY-EIGHT of these little hex-shaped holes in it, and I don't want to spend the next six months cleaning each and every one of them by hand! So since it's really clean right now, it's getting painted satin black tomorrow when I do the headlight trim.
I took my little "spare" laptop, and set it up in the garage. I patched the audio into the receiver, and now I can stream YouTube audio, or play CDs and DVDs in the garage.
Tonight's music to work on your car is by the Allman Brothers Band and is their "At Fillmore East" live album, one of their best.
The wife hit the rack really early, as she's bit depleted from a week of relatives, and watching the little guy from the afternoon they left until early this evening.
And just in case you think I spend all my "spare time" in the garage, I don't. We're going out tomorrow afternoon after I finish the painting, and just going to stroll around Old Town for a while, and then go out to dinner.
Thursday, September 6, 2018
Supra Headlights, Cooling Plate, and "Whisker" Install
Besides hanging out with my wife's sister-in-law, and her sister-in-law, and my sweet little wife, I've also been beavering away out in "Gandpa's Garage". The fog lamps are all cleaned up, bagged, and awaiting final cleaning and painting. It's been a little too cool and humid to have bare-naked metal out in the shop for my taste, so I've done a few other things, like the headlights, and starting the prep work to refinish the bumper cover.
I wet sanded all the mostly horizontal surfaces on it were the worst, and then blended those areas in to where the paint was still fairly intact. This took about 45 minutes with some 220 grit in a rubber sanding block, and lots of my "Sanding Juice" out of a spray bottle. This will be a project of it's own, but getting started like this lets me examine the underlying urethane for damage. It's got some scuffs on the outer corners, and the black band running horizontally across the front has a lot of gravel dings, so there's a lot more sanding and reapiar work to do.

And the new headlights are in after about two hours of fettling. The OEM sealed beam lamps used protrusions molded into the glass to provide a mounting surface where the glass rested against the bucket. The bezel then held the lamp tight in the bucket, and once you aligned the headlights, they stayed put. The new ones are a stamped reflector housing adhesive bonded to the glass lens. To position the lamp in the bucket, it relies on small metal tabs on the back of the reflector. Small metal tabs that can be bent to adjust, but weren't. I couldn't even get the bezel to fit close enough to get a screw started. I compared the backside of the old sealed beam to the new one, and then used my caliper to measure the distance from the front of the lens to the mounting surface. Sure enough, the new ones were 1/8" out-of-tolerance. I bent them with some needle nose pliers to get the correct dimension, and they fit right in. I also cleaned and polished out the stainless steel bezel that holds the headlamp in the bucket, and replaced the screws with new hex drive stainless steel button-head screws. Then I popped out what was left of the plastic headlight trim (aka "Whiskers") with a trim tool, cleaned the paint under the area, and snapped the new whiskers in place. The round black plastic plugs turned out to be the same size as the one I used to plug the hole for the rear window wiper, and they snapped right in, replacing the headlamp washer nozzles quite nicely.

This one just had a "ring" of rust ground into it from the round rubber bumper. It cleaned up in just a few minutes.

Oh, boy....this one. For some reason, water pooled here, and even got under the seam sealer and lifted it. Those two little black spots? Yep, rust holes. They started out as pinholes, and since that's as far as they easily opened up, they fortunately never got much bigger. That's solid metal all around them, and I was able to get at the backside of the metal through the convenient drain hole Toyota provided. I poked around in there and couldn't get any loose scale or rust to come out, so I'm crossing my fingers that I caught it in time. I shot some Eastwood Rust Encapsulator in there, and that should seal it off. But rust never sleeps, and like some of the old "B" movies, it might get released later to ravage the hood. The correct, "purist" way to fix this would to weld or braze up the holes, or perhaps even lead them. Lacking a welder, and not wanting to repaint a larger part of the hood than absolutely necessary, I'll be using a different method. Yes, I'm going to "Bubba" it, and use a couple of dabs of JB Weld, then sand smooth, use some spot putty, prime and paint. Before you laugh too hard, I know people who have put their cast-iron axle center sections back together with the stuff, and drove out of the middle-of-nowhere. It;s strong, and if the metal is clean, it holds.

This one took maybe 15~20 minutes to clean up. Just a ring of rust, and some rust coloration on the seam sealer, and what looked like a hole in the sealer. Turned out to be a bit of rust that quickly cleaned up.

This one was another piece of cake. 5, maybe 10 minutes.

So while the primer and rust encapsulators are curing, I measured, located, and drilled the other two mounting holes in my "Cooling Plate".
The cooling plate is to ensure that most of the air coming in the front of the car goes through the radiator, and not over it. There's a rubber seal on the bottom of the leading edge of the hood, and one on the cowl that seals to the bottom of the trailing edge of the hood. If the front seal gets out of shape, or is missing, a lot of the air coming in will scoot over the top of the radiator, rather than going through it.
And it makes a nifty place to hold things!

Holes drilled, reamed, and chamfered.

New holes in core support for plate. After I finished the holes in the plate, I clamped it in place as a template, and used transfer punches the locate the centers of the new mounting holes.

The reason I was stalled on installing this thing was what to use for fasteners? I need it removable, as there's stuff down there can fail, so that means something like a nut and a bolt, right?
Nope. I stumbled across these "Bumper Cover Retainers" while looking for something else. Most of these push-pin type fasteners are meant to be single-use, like a plastic rivet. These have threaded pins that can be backed out with a good old #2 Phillips screwdriver, and then you pull the fastener out. Elegant, light, simple, and reusable! The nylon washers will go between the plate and the sheet metal to isolate it a bit.

Washers over the holes.

Plate and fasteners installed!

It doesn't rattle when I tap it, so it should be quiet on the road. It's coming back off to get cleaned, and then I'm painting it with wrinkle-finish black paint, something I've loved on machinery and vintage radio gear since I first saw it probably fifty years ago. On my never-ending list of projects is to refinish a pair of cam covers I have. They'll get the same wrinkle-finish black like from the factory, with the fins and lettering polished. Then I'll go over the "TOYOTA" block lettering with a bright red, and the "DOHC" block lettering with either a bright blue like it was, or a matching yellow to the "DOHC" on the cam drive belt cover (see below). Then a couple of coats of clear, and hopefully they'll be good for a few years.

I wet sanded all the mostly horizontal surfaces on it were the worst, and then blended those areas in to where the paint was still fairly intact. This took about 45 minutes with some 220 grit in a rubber sanding block, and lots of my "Sanding Juice" out of a spray bottle. This will be a project of it's own, but getting started like this lets me examine the underlying urethane for damage. It's got some scuffs on the outer corners, and the black band running horizontally across the front has a lot of gravel dings, so there's a lot more sanding and reapiar work to do.

And the new headlights are in after about two hours of fettling. The OEM sealed beam lamps used protrusions molded into the glass to provide a mounting surface where the glass rested against the bucket. The bezel then held the lamp tight in the bucket, and once you aligned the headlights, they stayed put. The new ones are a stamped reflector housing adhesive bonded to the glass lens. To position the lamp in the bucket, it relies on small metal tabs on the back of the reflector. Small metal tabs that can be bent to adjust, but weren't. I couldn't even get the bezel to fit close enough to get a screw started. I compared the backside of the old sealed beam to the new one, and then used my caliper to measure the distance from the front of the lens to the mounting surface. Sure enough, the new ones were 1/8" out-of-tolerance. I bent them with some needle nose pliers to get the correct dimension, and they fit right in. I also cleaned and polished out the stainless steel bezel that holds the headlamp in the bucket, and replaced the screws with new hex drive stainless steel button-head screws. Then I popped out what was left of the plastic headlight trim (aka "Whiskers") with a trim tool, cleaned the paint under the area, and snapped the new whiskers in place. The round black plastic plugs turned out to be the same size as the one I used to plug the hole for the rear window wiper, and they snapped right in, replacing the headlamp washer nozzles quite nicely.

Then I moved on to repairing the surface rust on the four spots on the hood that contact the rubber hood bumpers when the hood is closed. Since this car was never cleaned under the hood, dirt and oil vapors built up on the contact surfaces of the rubber bumpers, and ground through the paint. So I used the flap wheel in the Dremel to take all the rust down to clean, shiny metal, and then treated it with Evapo-Rust Gel, and primed it. It will get smoothed out and painted later.
This one just had a "ring" of rust ground into it from the round rubber bumper. It cleaned up in just a few minutes.

Oh, boy....this one. For some reason, water pooled here, and even got under the seam sealer and lifted it. Those two little black spots? Yep, rust holes. They started out as pinholes, and since that's as far as they easily opened up, they fortunately never got much bigger. That's solid metal all around them, and I was able to get at the backside of the metal through the convenient drain hole Toyota provided. I poked around in there and couldn't get any loose scale or rust to come out, so I'm crossing my fingers that I caught it in time. I shot some Eastwood Rust Encapsulator in there, and that should seal it off. But rust never sleeps, and like some of the old "B" movies, it might get released later to ravage the hood. The correct, "purist" way to fix this would to weld or braze up the holes, or perhaps even lead them. Lacking a welder, and not wanting to repaint a larger part of the hood than absolutely necessary, I'll be using a different method. Yes, I'm going to "Bubba" it, and use a couple of dabs of JB Weld, then sand smooth, use some spot putty, prime and paint. Before you laugh too hard, I know people who have put their cast-iron axle center sections back together with the stuff, and drove out of the middle-of-nowhere. It;s strong, and if the metal is clean, it holds.

This one took maybe 15~20 minutes to clean up. Just a ring of rust, and some rust coloration on the seam sealer, and what looked like a hole in the sealer. Turned out to be a bit of rust that quickly cleaned up.

This one was another piece of cake. 5, maybe 10 minutes.

So while the primer and rust encapsulators are curing, I measured, located, and drilled the other two mounting holes in my "Cooling Plate".
The cooling plate is to ensure that most of the air coming in the front of the car goes through the radiator, and not over it. There's a rubber seal on the bottom of the leading edge of the hood, and one on the cowl that seals to the bottom of the trailing edge of the hood. If the front seal gets out of shape, or is missing, a lot of the air coming in will scoot over the top of the radiator, rather than going through it.
And it makes a nifty place to hold things!

Holes drilled, reamed, and chamfered.

New holes in core support for plate. After I finished the holes in the plate, I clamped it in place as a template, and used transfer punches the locate the centers of the new mounting holes.

The reason I was stalled on installing this thing was what to use for fasteners? I need it removable, as there's stuff down there can fail, so that means something like a nut and a bolt, right?
Nope. I stumbled across these "Bumper Cover Retainers" while looking for something else. Most of these push-pin type fasteners are meant to be single-use, like a plastic rivet. These have threaded pins that can be backed out with a good old #2 Phillips screwdriver, and then you pull the fastener out. Elegant, light, simple, and reusable! The nylon washers will go between the plate and the sheet metal to isolate it a bit.

Washers over the holes.

Plate and fasteners installed!

It doesn't rattle when I tap it, so it should be quiet on the road. It's coming back off to get cleaned, and then I'm painting it with wrinkle-finish black paint, something I've loved on machinery and vintage radio gear since I first saw it probably fifty years ago. On my never-ending list of projects is to refinish a pair of cam covers I have. They'll get the same wrinkle-finish black like from the factory, with the fins and lettering polished. Then I'll go over the "TOYOTA" block lettering with a bright red, and the "DOHC" block lettering with either a bright blue like it was, or a matching yellow to the "DOHC" on the cam drive belt cover (see below). Then a couple of coats of clear, and hopefully they'll be good for a few years.

Monday, September 3, 2018
Labor Day - End Of Summer -
So put away the white patent leather loafers, the white patent leather belt, and your lemon yellow leisure suit.
You can keep the diamond pinkie ring out until Thanksgiving.
Just kidding. The only people I knew who dressed like that were car dealership owners. Some of them thought they were really STYLIN' back in the day. One had a yellow Cadillac Coupe DeVille with a white leather interior that matched his outfit perfectly. I was very good friends with his oldest son, and we'd both crack up when Dad went out on the prowl. Al's Steak House was the most popular spot for Gentlemen Of A Certain Age to hang out and conduct business, and those of us in the Automotive Tribe could tell who was there by the cars in the lot. They conducted their business over Martinis and polished wood, and we conducted ours over blacktop County roads, 1320 feet at a time, or on the Center Street on-ramp to Westbound I-80. First one to Rte 7, Larkin Ave, wins!
So anyway........I'm headed out to the end-of-summer BBQ bash at The Kid's Place, aka The Country House. Hopefully the DIL's brother is there so I can find out if the CB radio in his truck works any better than it did.
Menu today is burgers, dogs, chips, potato and macaroni salad, sodas, and a pony keg for those so inclined. It's 80*, partly sunny, 20% chance of rain, and looks like a fine day for an end-of-summer BBQ!
Thursday, August 30, 2018
L.A. Fleet Week Starts Friday, August 31st
And I won't be there this year...sob..sob.
Looks like it's going to be pretty big this year, and I wouldn't mind being there, but we have relatives coming (again) this weekend.
Read all about it here at the L.A. Fleet Week website.
On a side note, it's just amazing how far the Battleship Iowa Museum has come since she came to San Pedro in 2012. New exhibits are opening, and more of the ship is becoming accessible to the public. You can *finally* get a tour of some of the Engineering Spaces down on Broadway, like Engine Room #2, and Fire Room #4. If you'd like to see the Transmitter Room on Broadway, just contact the nice folks at BIARA, and a tour of that area and the Radio Room ("FACCON1") can be arranged. ALL of the 24" fluorescent tubes on board have been replaced with LED lighting, giving the working spaces greatly improved lighting, reducing the electric bill, and have much better reliability than the old old tube/starter fixture they used to have. I donated 4 cases of 24" tubes to the ship over the years, along with a case of starters, so going LED will eliminate that.
If you're ever in the L.A. Harbor area, by all means take the time to see the Iowa. It'll give you a whole new understanding of the phrase "Built Like A BATTLESHIP".
Monday, August 27, 2018
Easy Radio "Field Service" Call
Since most of our new in-laws are in the construction/demolition/rehab/excavating/hauling business, they have good old CB Radios in their trucks. CB radios are still pretty big here, as they're cheap, easy to use, and work pretty well for what I'd consider "Short Range Ground Wave" communications of a mile or two.
Most of the gravel pits, constructions sites and paving plants these guys go to use CB radios to communicate with the truckers. Even though the truck may have a fancy 800~900MHz "Trunked Radio" 2-way FM radio in it to talk to the office, it will still have a CB in it to talk to the Dispatchers/Yard Managers at the places they go to.
The first of the in-laws trucks was a full-size Peterbuilt tractor with a full-size dump box on it. Our daughter-in-laws younger brother bought the tractor and dump box separately and 'married' them in the shop section of the little place we stayed at when we first moved here. He does very good quality work, and it looks like it rolled out of Peterbuilt that way.
At one time the truck had a commercial 2-way radio of some kind in it, so it had a Larsen "NMO" (for "New Motorola) antenna mount on the roof, with coax running behind the driver's seat down to where the radio was mounted, on the lower, door side of the seat mount.

This was NOT a good place to mount a non weather-resistant "consumer grade" radio! It got wet when the door was open in the rain, got kicked by people climbing in and out of the cab, and had all kinds of stuff get dropped on it.
He went through THREE of the "$50 class" radios before he decided to relocate the radio up to the top of the cab in the center where it's out of harms way.
And he bought a brand-news, shiny "$150 class" radio to put up there.

The wiring was beautifully installed, the coax had been rerouted, and the radio mounted solidly.
The problem was, he couldn't hear anybody at the gravel pits, although they said they could hear him.
Hmmmm......Well, I did the Full Monty on it when I got there. The power output of the radio was about 4 Watts, increasing with modulation, and sweeping the antenna with my analyzer revealed nothing out of the ordinary. The SWR was about 1.5:1, rising to 1.7:1 on one end of the band, and 1.8:1 at the other end, perfectly acceptable considering I could NOT get the analyzer to connect to my laptop, and was forced to read the little 2" x 3" display on the analyzer.
Double Hmmmmm.....this looks like a good installation, and AFAIC, it "meets specs". What could the problem be? I open the squelch all the way with volume at max, and was greeted by a slight noise increase, which quickly faded away. Yup....sounds like the receiver's dead. On a brand-new radio........DUH!??!
Flipping through the manual, I remembered this radio had an RF Gain control, basically a receiver sensitivity control. No, it couldn't be.......yep, it is. ALL the way to zero, meaning the receiver is pretty much deaf.
I turned the RF Gain wide open, and "Channel 19" audio came blasting out of the speaker from the trucks on I-25. People immediately came running over asking what I did to "fix" the problem.
Uhhhhh.....RTFM?
So I sat down with them and gave a "Radio 101" course, explaining what all the knobs and buttons did, and my findings on the antenna. The radio has a built-in SWR meter, and after calibrating it, it agreed with my analyzer well enough that I decided there wasn't any antenna problem.
He sent me a text today saying it worked fine at the gravel pit, and could I look at his Dad's radio? And his friend Nick's? And maybe Justin's too?
Saturday, August 25, 2018
Everything That Flies Needs A Place To Nest Or Rest....
As witnessed by this little guy (or gal) taking a break from whatever it is that Dragonflies do all day.

I was out just putterin' around (or 'piddle farting' as Phil calls it) out in the garage, and I stepped outside to look around. I happened to notice all the Dragonflies flitting around, and then saw the one sitting on top of my Larsen NMO 2/70, and just had to go get my camera.
And he/she/it (am I getting too PC?) had a lot of friends hangin' out today, too.
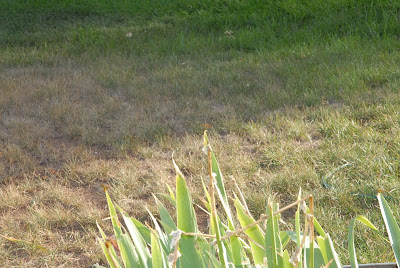

The green stuff are our Iris', and now that we're getting rid of the Sumac, that corner of the house is looking much tidier.
The picture below is from the end of May, and all those woody stalks sticking up, with a bit of greenery at the top, are what we're told is Sumac.


Now imagine those stalks, but two or three times that diameter. And completely covered in foliage, so much so that it's hanging over the Iris', and looked like something from the back lot at Universal Studios. It's fast growing, and as invasive as a truckload of "refugees" from South of the border. Not quite as bad as Kudzu, but very annoying. I was amazed looking at the pic above at how much, and how fast, that stuff grew from what you see to what we whacked.
I may or may not have a picture of it, but it's gone now. We cut it down to 12" high stumps, and we'll hack it down some more before I bore holes into the stumps, and we pour in some Ortho Poison Ivy Killer. This is what a couple of nursery's told us to do, so we'll give it a shot.

And the Little One was here last night and today. It's amazing to watch him grow from week-to-week, and watch his skills develop. It seems he's working on language now, and he's just starting to string a couple of words together now. "WHA??" and a point went to "WHAT?" and a point to (this week) "What THAT??" and more accurate point to what he wants to see.
And while we were sitting in Grandpa's Big Chair and looking at pictures, he strung together 5 or six "words" in a perfect sentence of utter nonsense. The sounds were distinct and separate, like words in a sentence, and not only did each "word" have unique inflection and intonation, but strung together they way he did, with correct inflection and intonation as a whole, it was a perfect sentence. Sure, they weren't words in the conventional sense, but it was obvious he knew what they meant, and how to string them together to convey a more complete message.
I was floored!
Have to get a key and CPO out for him to play with soon....
Thursday, August 23, 2018
OWWWW....My Achin' Head!
Got the granddaughter and her BF to DEN in really good time Tuesday night. Their flight was at 2200, which means TPTB want you there at 2000. Since it's typically about a 75 minute drive, we'd have to leave by 1845, but since rain was expected, and this would still be "Rush Hour" in Lost Angeleez, I decided we should leave NLT 1830.
Typical of this planning, we hit ZERO traffic, a few sprinkles, and dropped them off at 1940, a good 20 minutes earlier than I expected.
Sigh.....that would NEVER happen if I was taking them to LAX or ORD, where you can easily spend 30 minutes just finding a clear spot to drop your passengers off.
Same thing coming home, ZERO traffic and no rain. So we stopped for Dinner at Johnson's Corner along I-25, another place that's been here "forever", kinda like Vern's Place in Laporte.
I know, it's "just a truck stop", but having driven past it so many times, I wanted to stop. Decent food, large portions, and inexpensive compared to a lot of Road Food.
I had the meatloaf, and a large iced tea, while my wife just had Hot Cocoa and one of their "World Famous Cinnamon Rolls".
That sucker was 2/3rds the size of the dinner plate they brought it out on!
And it was "right out of the oven", and really, really, really GOOD.
Total tab was $13.12, quite reasonable for the amount and quality of the food.
Went to the Dermatologist today so I could hook up with them, and have them look at the "Actinic Keratosis" spots on my old, bald head. I've had them frozen off numerous times in the past, and did a "PhotoDynamic" treatment, but they just keep coming back. Must be global warming or fracking, or the HAARP project.
Anyway....the (very!) nice young lady Physician's Assistant checked it out, and froze a bunch of them again.
And she really clobbered a couple of spots, as it cooled off my head so much that it gave me a splitting headache, like having a 100 lb block of dry ice on my head.
So that's done for another year, and now I just wait for the spots to peel off.
And now I can get back to working on the car, setting up the basement workshop, sorting through stuff (I *still* haven't found my temperature-controlled soldering station, or my AEA PK900!), yard work, and a myriad of other things......
Saturday, August 18, 2018
Relatives In Town - Light Posting Ahead For A Few Days
My wife's granddaughter and her boyfriend came in today for a few days. We haven't seen them in almost a year, and of course, Pebbles The Wonder Dog went absolutely bonkers when she saw them. They're good kids; she's 21-ish and works at Target, and he's 28-ish and is a substitute grade school teacher for LAUSD and LBUSD in SoCal. They both want to get outta the Lost Angeleez area, but aren't sure where they'd like to live.
So, another trip down to DIA or DEN, or whatever, and back. I finally have it burned into my WETROM where to park (top level) in the parking structure, and what aisles to look for (J and K are good) so I can hop out of the car, and head straight to the baggage claim area to meet my visitors. And it only took SIX freaking trips there to get it through my thick skull where to park! The only airports I knew pretty well up to now were LAX, LGB, and ORD. Now I get to add another one to the list.
And even though there weren't any accidents, the traffic was c r a w l i n g along at 0 to 25MPH for large stretches.
Amazingly, it was clear sailing through the "Crossroads" area, and the Rte 34 interchange. Just lots of people out on I-25, in no particular hurry, exercising very poor lane discipline, and slowing everybody else down.
Left at 1245 and got back at 1600, so including a 20 minute stop to pick up the passengers, I averaged something like 43MPH.
Not sure what we're going to do, but for 'young people' stuff they can hang with the son and DIL, while the wimmenfolk have some serious shopping planned.
Back in a few.....
Thursday, August 16, 2018
Headlights
Fredd mentioned something about headlights the other day, so I dug out the ones I'll be replacing the sealed beams with.
These are "NEO-940" units, sometimes called "940CEH4", made by a place in India called "Neolite Products", and they produce clones (or knock-offs, if you will) of various High Performance automotive lighting items made by other companies.
Before you scream too loudly about "Counterfeit Products!!", from looking at their product line they seem to specialize in "classic" designs that are no longer produced by the original manufacturer.
They seem nicely made.

They take a standard "H-4" 50W/65W halogen bulb.

And they're functionally equivalent to the Cibie model they copied.

I'll probably go with a different bulb, since these things came with "no-name" bulbs, and the box isn't marked with country of origin. Daniel Stern Lighting has replacement bulbs that are rated "+50", "+110", etc, similar to "+P" loads in a hand gun.
The reviews on these low cost replacement are quite good. The pattern is excellent on low beam, and they really light up the road on high.
Hopefully I'll get to try them this summer!
Wednesday, August 15, 2018
Rain, and Other Things
Finally got some nice rain yesterday, after watching the last couple of storms slide around us.
Started as just light sprinkles, and then over the course of the next couple of hours turned into some heavy rain for about 30 minutes, and then a nice slow drizzle for a couple of hours.
So since it was raining, and the humidity shot up to >60%, I didn't want to sand down the other fog lamp reflector and expose clean, bare metal to high humidity. The other reflector is bagged up with some desiccant, so no worry there.
Last night's project was to remove the headlight washer nozzles and tubing, and to remove the last bits of the headlight "whiskers" from the car.

The "whiskers" are trim pieces that fit between the header panel and the headlight bucket, and they snap into some punched holes in the sheet metal header panel, the panel that goes between the headlights at the nose, as you can see below. The "whiskers" are soft-trim items, molded from a somewhat flexible plastic, but after 30+ years in the Kalifornia sun, they turn hard, brittle, and start to warp and curl between the attachment points. Then they crack, split, and fall apart, or shatter when you try and remove them, leaving the clips and chunks of plastic that look really bad.

This one one of them, new-in-the-bag from Toyota.

And the 20mm plastic hole plugs I bought for the "rear wiper delete" also fit perfectly into the holes vacated by the washer nozzles.

While headlight washers are a nice idea, the only ones I've ever seen work really well are the ones on old Mercedes cars. Besides having a "fluidic" nozzle that sprayed an oscillation pattern of fluid on the lens, they also had a wiper blade to clean it off. Typical Mercedes Engineering, and it probably added $1000 to the price of the car. The ones on my 1969 Corvette sprayed fluid on both headlamps, but that's all it did. And I didn't think it did much to keep the headlights clean.
So, some additional work was accomplished last night, and since it's drying out now, I can get back to Other Things to work on.
Subscribe to:
Posts (Atom)
-
 FOURTH time I've written this post. MY Muse has apparently vacated the premises, leaving me too busy doing other things to keep both m...
 -
With apologies to The Control Voice.... Yup.....got The Busies the last few weeks. Lots of stuff happening this week, including my Nuclea...