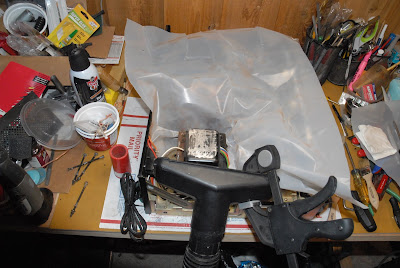
Just about finished with the cosmetic work on the receiver. Had some RUST to remove on the ventilation cover, the bottom chassis plate, and the top end bell on the power transformer.
Transformer before:
Transformer after:
Had to get really creative when I was removing the rust so I didn't blow iron oxide all over the place:
And equally creative when I painted it:
The top ventilation cover was really crummy after I wire brushed it:
So I used my orbital sander on it, gave it a coat of self-etching primer, then sealed it, and gave it two coast of Rust-Oleum "Bed Liner" spray, and it came out quite nice:
Same with the inside of the bottom chassis plate, but I used Krylon Satin Black:
The front panel was a mess, too. Somebody had put the old "shiny" Scotch Tape along the top the panel at some time during it's life, and it took several hours to get the tape, and glue residue, off the panel. Then it had to be further cleaned and polished. Unfortunately, it has some nicks and dings in the cast bezel, and I can't do anything about them, short of replacing the entire front panel. I'll just call it "patina", and live with it. At least it's clean and shiny again.
Same with the knobs; they were filthy, with finger grime on the them, and some scratches. The main tuning and volume control knobs are machined aluminum, so they could be cleaned up, but the rest of them are metalized plastic, and once they're scratched, that's it.
I should have it all back together tonight, except for the wood case that I'm still working on, and then I can start going through the check-out and alignment procedures. I need the case off the unit so I can get at the adjustments, so no biggie right now.
Hope y'all had a good weekend. Weather here has been cool (40's~50's) and windy, but no snow for now. I'll probably fire up the snow blower again this weekend just to make sure I haven't forgotten how to run it.....


You do good work! And have a LOT more patience than I do...LOL
ReplyDeleteThanks! Patience may be the only "virtue" I have in spades...
DeleteI love seeing what you're doing to old components that I remember. I appreciate the time, care, effort, etc that you expend.
ReplyDeleteThanks, Rev Paul. This one is far from perfect. It led a hard life, got put up wet at some point in it's life (the rust), but was pretty much As Advertised.
DeleteI'll be powering it up later today, and begin the alignment and power amplifier Bias Adjustment procedures.
drjim, do you have the factory specs for the aligment and amp bias adjustment procedures? Or is fly by the seated by the seat of my pants kinda thing?
ReplyDeleteI have the Pioneer OEM Service Manual. Gives the test equipment required, all the levels to set things to, the test points, and a complete alignment procedure.
DeleteSetting the bias current is easy-peasy. Turn it on, no inputs, and set two pots for a specified value.
Since it's on the bench, and I have the manual and proper test equipment, I'll go through everything.
You might consider trying some Gasket Remover spray from an auto parts store, for tape residue. Contents are Methylene Chloride, primarily. May damage/remove some surfaces, so a "hidden" test spot is recommended.
ReplyDeleteWill de-cement almost any adhesive.
Yep, I've used it before to remove really stubborn stuff, like decals.
DeleteI managed to get 95+% of it off. Closer inspection under magnification shows a couple of spots I thought were adhesive are actually scratches. The rest is coming off slowly as I have time with Gun Scrubber and denatured alcohol.