Tuesday, January 18, 2022

Olde Skool Tech.....In Action!

 AKA "I'll take Electronics I learned in Grade School for $1000, Alex!"....

Even though the copyright on the manual for this Heathkit THD Analyzer I'm restoring is dated 1978, I found a notation in ball-point on the underside of the chassis stating it was built in 1979. The actual circuit has been around "forever", and I've read in places this instrument is a virtual clone of the Hewlett-Packard 3xx series of Analyzers, as mentioned here on trona.com :

HP 331A thru 334A series (and Heath IM-5258)
These are solid-state, discrete-transistor designs; no opamps. They are Wien Bridge units with very wide range; in the HP units, up to 600kHz fundamentals(!!) and wide measuring bandwidth, above 3MHz except on the most-sensitive range. They offer low noise, and, in the 333 and 334 (and Heath unit), auto tuning. They employ average-responding metering. They have either a 400Hz passive LC high pass filter that is very good, or a passive 30kHz low pass LC filter, also very good, but not both filters. They desperately need expanded low pass filtering for better performance in the audio mid-band. Max full scale sensitivity is 0.1%, fully usable to 0.01% and below, except that their residual THD floor is around 0.01% (I've been told that the Heath has a higher floor but I've not used one). In the HP units I've used, this floor is dominated by 2nd harmonic distortion, which comes from the bridge amplifier/notch feedback system. I've never checked the depth of the fundamental null. I really should but I have good reason to believe that it is better than -90dB and may approach -100dB. Except for their high residual THD floor, and somewhat insensitive metering (300uV/0.1% full scale), the low noise and nulling of these analyzers may make them useful for measurements to 0.003% or even below.

So, looking up the HP Analyzers, we see that these are 1960's designs, all analog (or "Linear" BITD), and use very sound design principles. One of the things mentioned is that they have an "Auto Null" feature (called Auto Tuning above) that uses a servo loop to make much finer adjustments to the Wein Bridge than a human operator could. Imagine another set of tuning controls, being driven by a mechanism that can detect smaller differences than humanly possible, and tunes the other set of controls with much greater resolution than a human could.


Well, these "controls" are made of Photoresistors. Good, old Cadmium Sulphide Light Dependent Resistors, going back to at least the 1930's. They have a "Dark Resistance" of many Megohms, and a "Light Resistance" of anywhere from a few hundred Ohms to a few hundred thousand Megohms.

Think of them as a "Light Controlled Volume Control", and you're very close to having the concept.

And we have five of them in the Heatkit Analyzer:

The lonely little one on the left controls the "Resistive Component" of the bridge, and the four on the right control the "Reactive Component" of the bridge. You can see the lamps glowing dimly. These normally have black plastic covers over them, but to adjust the "idling" value of them, you have to move them closer or farther away from the lamp.

This is with the cover over the Reactive Component sensor in place:


The procedure is very tedious. Measure LDR with cover in place. If adjustment needed, remove cover and reposition the LDR. Install cover and measure LDR. If adjustment still needed, rinse, lather and repeat procedure until LDR measures the required value.

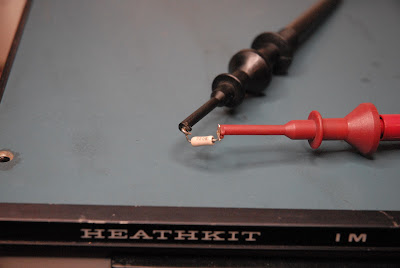
I measured them, and all were WAY off. I experimented with a couple of them, and they don't seem to want to adjust within range. Rather than freak out and order all new ones, I'm going to examine the circuit driving the lamp. They all seem to need more brightness to get down to the correct value, and that seems a little suspicious to me, so I'll do all the voltage checks of the circuits involved, and see if something is holding the lamp brightness down. I think it's a safe guess to assume these moved around a bit during the jolt the chassis received that bent up a few things.

Sunday, January 16, 2022

Heathkit IM-5258 Total Harmonic Distortion Analyzer Update

 As promised, here's the wrap-up on this section of the progress.....

The original problem was that the negative voltage regulator integrated circuit had failed, producing -30VDC instead of the -24VDC it was supposed to produce. The regulator IC is an obsolete part, and while they are available, I wasn't willing to pay the going price. Since this isn't a "Pebble Beach" restoration, I decided to use modern parts and build two individual voltage regulators, one for the positive voltage, and one for the negative. Between waiting for parts and getting distracted by other duties, it took me two weeks to get here.

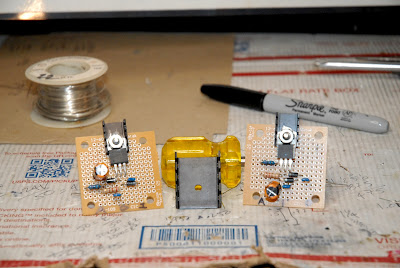
The two "daughter boards" ready to be installed:

The sharp eyed will notice I reduced the size of the heatsinks compared to what I had mocked-up, showed propped up on the screwdriver handle.. The original regulators were rated at 500mA, and these are rated at 1500mA, meaning they can safely regulate three times the current the OEM parts could handle. From some looking at the specs of this thing, I figured out the circuit only draws a few hundred milliamps of current, and these should do fine with a smaller heatsink. 

So here they are all moved into their new home:

 The positive regulator has an output of 24.35VDC, and the negative regulator has an output of -24.30 volts, so they're within 50 millivolts of each other, and well within the original spec of "24 Volts +/- 1.5 Volts", which is an absurdly loose spec for an electronic  voltage "regulator".

 I left it powered up with the cover on for about 45 minutes, and my IR thermometer shows the heatsinks get up to about 120*F, while the TO-220 packages read about 103*F, so the "small" heatsinks are adequate.

So this part of the project has been completed, and I can now pick up the adjustment/calibration procedure at Step 4.  I stopped when it failed Step 3, which was to measure the regulator outputs.

Now on to exorcising the next gremlin......Yes, this is a rabbit hole I've fallen into, and I'm NOT expecting the adjustment/calibration procedure to go smoothly.


Getting this thing functional again has almost turned into a matter of pride......


Saturday, January 15, 2022

Busy, But Having Fun, Learning New Stuff, and Making Progress

 Geez....it's been a week already? Well, that's what happens when I get busy doing things instead of just blogging about them....


I spent a few days this week playing with the TEAC A-4300SX deck, as it has some bias adjustments you can make depending on what type of tape you're using, and I wanted to see if I could hear a difference between recordings made using the different settings. I have four types of tape to choose from, and I spent some time evaluating them. I have fifty 7" reels of the "Type 1" tape (standard tape, standard bias) that came with the first TEAC deck I bought. This is what most people know as "Recording Tape", and has a  reddish-brown color. The "Type 2" tapes I have (low noise, standard bias) show a definite grey tint to them, and the "Type 3" tapes (low noise, high output) and "Type 4" tapes I have (high output, high bias) are a definite dark grey color, which look just like what I was using Back In The Day.

Four types of tape, and four different settings of the bias and equalization switches on the deck gave me sixteen different recorded segments to audition. And surprise, surprise, the settings recommended by TEAC for each type of tape were spot-on.

I can't tell much difference between the Type 3 and Type 4, but they're both much better sounding than the Type 1 and Type 2 tapes I have, with better high frequency response, lower noise, and a "cleaner" sound, so I'll be getting rid of the two "lower" grades of tape, and keeping the "higher" grades I have. 


I'll post again tomorrow with some pix and updates on the Heath THD analyzer. I'm finally ready to run the calibration procedure now that I have the power supply issues sorted out.

Friday, January 7, 2022

Denver Int'l Airport Delays

 I noticed all the "racetrack" patterns on incoming flights:


I looked up one of the incoming flights, and all I found was "Delays are 35 minutes, and increasing, due to VIP movement".

Wonder who's in town??

Tuesday, January 4, 2022

Meanwhile, Back On The Workbench....

 Work continues on the Heathkit THD Analyzer. I received the rest of the needed parts yesterday, including some pieces of 1/4" Delrin rod. The Delrin is to replace a Plexiglas insulating shaft used on a tuning capacitor. Heathkit was very fond of using this plastic to make little couplings, bushings, and insulators from, but it doesn't hold up well "Over The Ages". It gets brittle, develops cracks, and eventually disintegrates, as seen below:

The "stub" on the left end should be about three times as long to engage the reduction drive for the capacitor, and the cloudy area on the right end is where the plastic cracked and split under the load from the single setscrew that held it to the capacitor shaft. Since these parts are unobtainium, I had to make one using an aluminum 1/4" shaft coupler and a small length of the Delrin rod.

This is the reduction drive, a small ball-bearing unit made in England since King Arthur's days. I remember using these back in the 1960's, and was always kind of fond of them.

And this is the fabricated replacement for the broken plastic coupling from Heathkit:

All installed and aligned:


As far as the regulators go, here's my breadboard version, built using "ugly construction" practices to see how well my resistor calculations turned out. The small IC to the left is the original regulator, and I'll connect the new ones to the holes in the circuit board where this little guy used to live.


So now that the reduction drive for the tuning capacitor is squared away, and my prototype 24VDC regulator puts out 24.2VDC, I can get back to building up and installing the two new regulators, and continue on with bringing this analyzer back to working condition....I hope!


Saturday, January 1, 2022

Ariens First Use AAR

 YOWIE! This thing works like a champ!

I cleared our driveway, our neighbor's driveway, and the sidewalks around our cul-du-sac, in about 45 minutes. The battery-powered toy snowblower I had before would take me a good hour to do just our driveway, sidewalk, and the neighbor's sidewalk down to just the corner.


And I've now formulated my "Three Laws of Snowblowing".

#1 - Clear the vehicle(s) first. Otherwise you'll wind up having to plow what you scraped off the vehicles from your formerly clean driveway.

#2 - Do the driveway second, making sure you plow out into the street a bit so SLW can get her car in and out of the driveway easier.

#3 - Do the sidewalks last.

I had been plowing one path down the driveway, then turning and doing the sidewalks, only to have to replow some of the sidewalks after clearing the driveway, then replowing the driveway after I cleared the vehicles. It occurred to me today when redoing the sidewalks for the third time that there had to be a "better" way, so the The Laws came to be, with apologies to Dr. Asimov.

I might want to check the scraper blade and skid shoe heights again as I think I can lower them maybe 1/8th inch or so to get a bit more snow off the pavement.

Other than that, it started, ran, and operated flawlessly for the entire time.


BZ, Ariens!


Friday, December 31, 2021

Happy New Year! along with.... Power Supplies and SNOW!

 Hope you all have a very Happy New Year this coming year. Several of "us" have had some medical issues during the past year, and hopefully those are all behind us. Several of you had surgeries, and I had some issues with my medications putting me into The Twilight Zone for a good chunk of last year.

Let's hope and pray 2022 goes better for us all.

I'm still waiting for the LM-317/337 Regulators to arrive, so I went ahead and got their new home semi-prepared. I'll be making two almost identical little board assemblies, to be mounted on the inside of the rear panel of the THD Analyzer. It's way overkill for this application, but the parts are cheap, most of them I had, and it should enable this old analyzer to continue chugging along for another fifty years.

This is what I have so far. The boards are drilled for the regulators, and mounted to the back panel to see how well they fit.


The transistors on the boards are not the regulators, but are the same "TO-220" package, so I used them for mock-up. The boards will have a couple of resistors to set the voltage, some bypass capacitors,and a few enhancements to the regulator circuit courtesy of the manufacturer's data sheets. I'll fab up a little wiring harness to carry the unregulated 35 Volts to the boards, and then carry the +/- 24 Volt regulated voltages back to the OEM Power Supply board for distribution to the other circuit boards in the analyzer.
While this is Down For Parts, I'm attending some other little "housekeeping"  items, like scrubbing all the old solder flux off the circuit boards. As Heathkits go, this one is built pretty nice, and the soldering is quite good, except that the builder used a bit too much. Considering the kit was built in 1978, I doubt the builder was using a modern, temperature-controlled, "Soldering Station", and was most likely using a "pencil" type soldering iron.

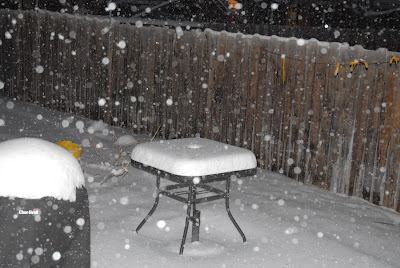
And we're getting SNOW! Supposed to get 1~3" today, and another 3~5" overnight.
 
At 1430 local:


And at 1700 local:


I'll call it 3~4", and we'll see what accumulates overnight.

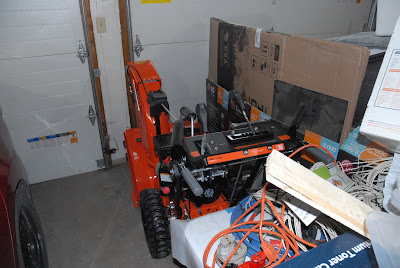
Meanwhile, sleeping in the garage, and soon to be awakened....:


Took it out yesterday for a spin up and down the sidewalks and driveways. Ran it another good 30 minutes or so, and got used to the speed control, and going forward/reverse. It steers beautifully, thanks to the Ariens clutch-type differential. We'll have an AAR around this time tomorrow.

And taking advantage of a  no-work day (or two...) my son finished his birthday present:
 

 All One-Thousand, Nine-Hundred and Sixty-Nine parts, and 40" tall fully assembled.

Biggest Lego kit I've seen. Even has a Lego version of the tanks and pumps under the skin. Now all he needs is a launch tower......


Be safe out there!


Wednesday, December 29, 2021

Starting To Feel A Bit Like Indiana Jones Here.....

 Only it's not snakes, it's power supplies.

Again....

I finished cleaning up, "Buffing Out", and reassembling the THD Analyzer and started the "Initial Checks" section of the manual. 


The first few steps went fine, and then Murphy popped up again. The (nominal) 24 Volt supply measured 27 VDC, while the (nominal) -24 Volt supply measured -30 VDC.

OOOPS.....WAY out of spec

Further checking and experimenting revealed the negative supply regulator was toast, and regardless of what resistor values I used on the "Adjust" pin, the output stayed stuck at -30 VDC. The circuit uses a uA78MG for the positive side, and a uA79MG for the negative side. These are obsolete parts, and on top of that, they're in an oddball package. *IF* you can find them, they go for $20~$30 each, plus shipping. Exact matching parts, in the odd package, are available from Europe for slightly less, but the shipping is $25 for each part! Considering I only paid $75 for the whole analyzer, there's no flipping way I'm putting that much into it for two little parts.

So, I'll replace the positive regulator with an LM317, and the negative regulator with an LM337, both of which should be available for the foreseeable future. I removed the two existing regulators and their adjustment resistors, and replaced all the filter capacitors on the power supply board. I'll build up a little "daughter board" and connect it to the rebuilt power supply board, which will become the "Rectifier and Filter Board".

Cleaned up power supply board:

 Parts should be here in a couple of days, and once the new power supply is up and running I'll continue on with the Initial Adjustments and Calibration.

Our Christmas Day celebration was a joy, and we had twenty people over, including seven little ones:

Pandemonium reigned, and paper flew everywhere....


And I received one of the most touching, thoughtful, memorable Christmas gifts I've ever received:

I'd mentioned to my SLW earlier this year that I wanted to get a flag flown over the Iowa. I thought it would be nice to have one to fly on certain days. Well, she started looking into it, and found out you can get one via the Gift Shop aboard the ship. She requested it be flown on my birthday, and was told "Uhhh.....well.....we don't do special requests like that". Being the O-6 on this here base, she's used to getting what she wants, so she marched it up the chain-of-command, and through the auspices of some Friends In High Places, she was able to get the flag flown on my birthday. She then ordered a stealth raid on my Iowa memorabilia, and procured one of my challenge coins, my CPO Club membership card, and one of the BOGO coupons I still have a ton of. My son then went on eBay and found two "covers" that had been canceled aboard the ship; one from 1946, and one from the very last mail run off the ship before she was decommissioned in 1990. They put them in a shadow box, and presented it to me Christmas Eve.

I'm truly touched, and for the first time in my life, I think I understand why Military People feel the way they do when given an award. Other people deserve this more than I do, and every time I see this on the wall, I'll think of those who served on the ship, and those who gave their lives in service to their Country.

Wishing you all a very Happy and Prosperous New Year!

Friday, December 24, 2021

Christmas Eve

 And I know my audience will remember all those who are busy doing other things, and can't be home for the Holidays.

 The Kids will be over for dinner tonight, and the whole clan will be here on Christmas Day for dinner and a gift exchange.

ANNNNNNND.......I (finally) found the problem with the Heathkit IM-5248 IM Distortion Analyzer.

See this little guy marked "320K"?

It's a 1% tolerance, precision resistor, used in a section of the metering circuitry. They used a 1% resistor as this part, and another 1% resistor in a 20:1 voltage divider, to set a precise voltage for the bias level in this stage.

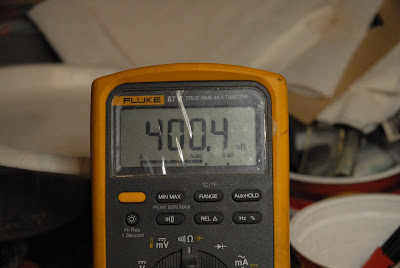
Only it's not 320k!

It measures 400k, a full 25% out-of-tolerance. This threw off the bias point by a similar amount, effectively killing this stage of the meter amplifier, and making it impossible to calibrate.

I'm very familiar with carbon composition resistors drifting off value with age, but this is the first time I can recall a 1% resistor going this far off the reservation.

So with this instrument calibrated and back on the shelf, I can get back to the one that "buffed out a bit" and most likely go down another rabbit hole getting that one back in service.


Tuesday, December 21, 2021

Well, It Kinda-Sorta Buffed Out....

 Used some hardwood blocks, a beefy C-Clamp, and my bazillion degree heat gun, to get this straightened out a bit.


Clamped it up:


Got it HOT, and squeezed it back:


 And it came out pretty straight:


Did a bit more tweaking, and got the small kinks out in the above picture. Also used the clamps and wood blocks on the bent rack handle, but without the heat. And yes, this one's going "down to the frame" also.


 ALL the hardware in it was loose, and with the front panel pulled for scrubbing, it makes it a lot easier to inspect and clean the switches.

This unit is back on hold, as the parts for the other analyzer arrived, and now it's back on the bench getting things replaced so I can attempt to sort out the problem(s) with the metering section. Both of these devices use the metering circuit as an integral part of the distortion measuring circuitry, so unless the metering circuit works properly, they're just door stops.


Tuesday, December 14, 2021

Uh-Oh.....This Might Not Buff Out....

 Since I'm waiting for some parts to get here to (hopefully!) fix the IM Analyzer, I decided to do a quick check on the THD Analyzer. All the capacitors in the THD (Total Harmonic Distortion) Analyzer have suitable working voltages, I have those values in stock, and they all passed the "Eyeball OK" check, I'll go with them for now.

First thing I noticed is that one of the rack handles for it is bent.


I checked the eBay listing photos again, and the handle is straight, so it must have happened in shipping. I unpacked this in the garage, and set it aside as I was busy with other stuff, so this one's on me. I thought they were cast Aluminum, but it weighs more than Aluminum would, so I guess it's a Zinc alloy, like "pot metal" or Zamak. I think if I heat it up with my big heat gun, and carefully apply pressure, I can bend it back.

The big surprise was when I pulled the covers off, and found the chassis is bent, too.

So I pulled the power transformer and the circuit boards, and see how well I can get this bent back.

 And it's another filthy unit, having been stored God knows where and for how long.


When I saw the bent chassis, I almost consigned this to the scrapyard, but since they don't come along very often, I'll try and bring it back with minimal expense, maximum elbow grease, while keeping an eye out for a replacement, like an old HP 333A analyzer:


The Heathkit is a clone of the HP, but much better built. I'd gladly take the HP over the Heath, but they tend to be a bit more expensive. Maybe I should just bite the bullet, and start looking for one.....


We Hit 'Em.......<i>Now What Happens?</i>

  Breaking story from Newsmax.....