Got the front brakes bled today.
Between the Russell "Speed Bleed" screws, and the MityVac, it's a one-man operation!
I started by slurping out as much fluid as I could from the master cylinder reservoir with the MityVac, and then wiping out the reservoir with a clean shop towel.
The fluid that came out looked like VERY bad coffee, and the plastic reservoir was filthy with rusty colored slime.
Took most of a quart of new DOT3 fluid before it was coming out clean from the bleeder screw on the caliper, and the drivers side is the closest to the master cylinder.
Generally, you start bleeding at the brake that's furthest from the master cylinder, usually the right rear, but I've done it different ways at different times, and it never seemed to make a difference where I started from.
So, one more item crossed off the list!
Thursday, September 8, 2016
Wednesday, September 7, 2016
New Shoes for Ms. Swan.....
The new rims are "XXR-531", and the tires are Toyo Proxes T1R.
And between the suspension rebuild and the mods, she ought to be able to really dance now....


The OEM wheels were 14x7, and the tires were 225/60-14.
The new hardware is 16x8, and 245/45-16.
Here's a "top view", kind of, of the OEM vs new:

The new tires are 20mm wider, about .79", and are "45 series" instead of "60 series".
I picked this size tire as it has the same "rolling radius" as the OEM tires, which means the speedometer should read the same.
HOWEVER...they look a little "shorter" to me, which means my "optimistic" speedo will be even more so. Oh, well...makes it harder to get a speeding ticket when the speedo indicates 65, and you're really doing about 62, as it is now.
The tires are also much newer technology even though they're both radial construction.
Monday, September 5, 2016
Right Side Strut Installed!
Geez....things are going so good today that I'd better find a BIG piece of wood to knock on!

And at the top, I installed the other mounting plate for the strut tower reinforcing bar:

I'll mess around a bit with installing the Raptor Racing braided stainless steel brake lines, and fix a screw-up on my part.
I accidentally installed the anti-rattle spring clips on the driver's side caliper upside down.
I didn't notice it until I was starting to rebuild the passenger side caliper, and as soon as I pulled the old pads, it smacked me right in the eyeballs.
I don't have to pull the entire caliper. Just remove one bolt, and pivot the caliper up just like I was changing the pads. Then remove the outer pad, flip the spring clips round, and put it all back together.

Sunday, September 4, 2016
"Driving Ms. Swan....The Adventure Continues....."
Well, here's another update on things.
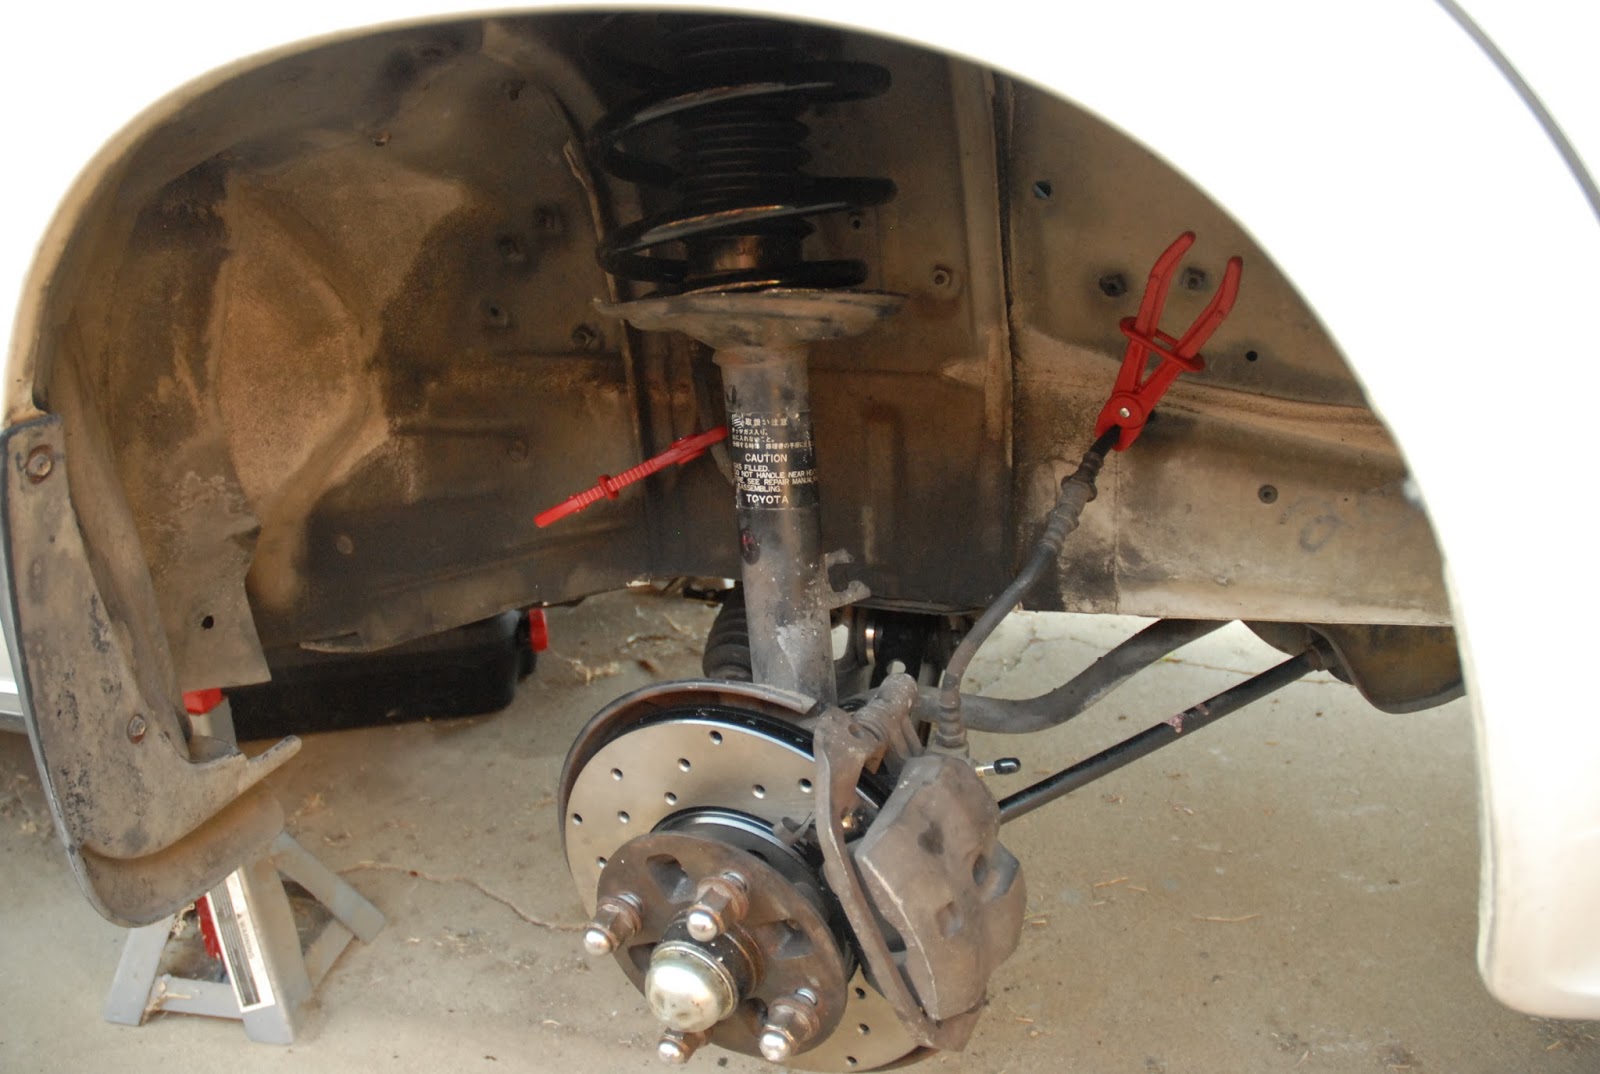
The right side strut has been completely refurbished with a new top mount, a new coil spring, and a new KYB shock insert.
The hub has new wheel bearings and a new seal, and the mate to my left side StopTech "Sport Rotor" is mounted.
Then I put the hub/disc assembly on the spindle, adjusted the wheel bearings, and put in a new cotter pin, and tapped on the dust cover, followed by installing the caliper with the new "PosiQuiet" ceramic brake pads, new Russell "speed bleeder" screw, and braided stainless steel line.
The lower control arm has been refurbished with a new Energy Suspension polyurethane bushing, and new polyurethane cushions for the strut rod, or "Lateral Locating Link" if you speak American cars!
I'm beat, as I've done all this work in the last couple of days, compared to taking two weeks to do it the first time.
It's nice having all the tools, AND the knowledge gained doing it the first time.
Final assembly of the right side will start Monday. I should be able to get the lower control arm and strut reinstalled in just a few hours this time, compared to a couple of days for the left side.
Then I'll flush the brake system and bleed the front brakes, put the wheels and tires back on her, drop her to the ground and bounce her a few times, and then do the final torquing of the lower control arm bolts and strut rod nuts.
Then on to the the rear.....
Saturday, September 3, 2016
L.A. Fleet Week
Had good crowds down at the Iowa yesterday. The US Navy has two ships open for tours, and the US Coast Guard has one.
The USS America LHA-6, and USS Wayne E. Meyer DDG-108, represent the Navy, and the WMEC-618 Active is there for the Coast Guard.
Friday was kind of the kick-off day, and Saturday, Sunday, and Monday are expected to draw about 100,000 people for the 3-day weekend.
If you're headed down there, get there EARLY, as parking will be absolutely insane.
As much as I'd like to, I just can't be more active for Fleet Week this year. I'm under the gun to get the Supra finished by next weekend so I can get the front and rear ends aligned, and have some "shakedown time" driving here to make sure she'll be ready for the trip to Vegas.
The strut from the right side of the car has now been completely rebuilt, just like the left side, and today I'll pull the Lower Control Arm and get started on it. I would expect the right front to be completed by Sunday evening. Then it's bleed the brakes, drop the car to the ground and do the final torquing of the suspension bolts, and on to the rear.
Thursday, September 1, 2016
SpaceX Loses One On The Pad
Been there, done that with NSS-8.
Being a launch provider is a risky business. You WILL lose a vehicle and/or the payload once in a while.
Good to hear no one was injured.
We now know why...(courtesy of Irish)...

Being a launch provider is a risky business. You WILL lose a vehicle and/or the payload once in a while.
Good to hear no one was injured.
****UPDATE****
We now know why...(courtesy of Irish)...

Wednesday, August 31, 2016
Clean Up Day!
Didn't get a bunch done on the car today. Installed the second half of the new braided stainless steel brake hose after I figured out how the mounting clip holds it to the strut.
To do that, I had to jack the car up and put a jack stand on the passenger side and pull the wheel and tire off. Once I saw how the OEM hoses were routed and attached, it was perfectly clear to me. This was a case of "I should have taken a few pix of it all stock", which I promptly did of the passenger side while it's all intact.
And I busted all the bolts loose on the passenger side so the strut is 90+% ready to be removed.
I'm hoping that now that I have a bunch of tools I didn't have before I started this, and the experience of doing it, that the rebuild of the passenger side will go much smoother than the driver's side did.
The other thing I did was to clean up and organize the workbench, throw out the trash can full of the dirty paper shop towels I use, wipe down some tools and put them back where they belong, and throw out a bunch of now empty ( !! YAY !! ) parts boxes.
Thursday should be a good day, and I figure I can easily get the strut pulled, pull the hub/brake disk assembly, and replace the spring and shock absorber insert.
Friday I'll be on the Iowa all day as we're having a radio event to commemorate VJ Day, and if I'm not too frazzled after all the "L.A. Fleet Week" activities, I'll take my wife out for dinner.
I really wanted to be an active participant in Fleet Week this year, but the "Supras in Vegas" event is a month earlier this year, and I let myself get jammed in a scheduling conflict by not getting off my duff and starting the work on the Supra earlier.
Oh, well...at least I'll be down there one day to support the Iowa.
Tuesday, August 30, 2016
Rebuilt Left Strut Installed
GROAN.......what a pain.
My wife helped, learning how to operate and adjust my floor jack as I muscled the 50+ pound assembly into place.
I think she learned a few new words, too.....
I had to use two long, tapered drift pins to get the alignment correct between the bolt holes in the steering knuckle and the threaded holes in the bottom of the strut housing.
A couple of pumps on the floor jack, and POP!, the parts lined up, and the steel locating sleeves on the steering knuckle piloted in to their bores on the strut housing, and the bolts went all the way in by hand.
Always pays to clean the threads when you take something apart....
Wednesday I'll replace what's left of the OEM brake hose with the mate to the new braided stainless steel hose already in the caliper, and bleed this side of the system, and put the end link for the sway bar back in. I had to pull it out so I could get the lower control arm to drop far enough so the strut would fit back in.
Then I'll make a final check to make sure all the hardware is "Finger Tight +10%", put the wheel and tire back on, and drop her to the ground.
Then I can do the final torque on all the suspension bolts, and everything on my checklist for this side of the car should be finished.

One more little item that I haven't discussed is also coming along:

This is a mounting plate for a reinforcing bar that ties the two front suspension towers together. It's just roughed in for now, as the final positioning of the plate on the other side and the connecting bar have to be done with the car sitting on it's wheels.
Shelby Mustangs had a bar similar that Ford called an "Export Brace" and included on all Mustangs that were exported. It stiffens the front structure of the car, and supposedly improves the handling. The guys on the Supra forums swear you can really tell a difference, so when one of the forum members did a "Group Buy", I signed up and ordered one.
I also have one for the rear that ties the spring/shock towers together, and I'll do that one (hopefully) next week when I start on the rear suspension.
Time to gather up my tools, wipe them down, and go grab a burger!
Lower Control Arm Installed
Got the LCA (Lower Control Arm) and other bits installed last night. Had to use my 15W LED
rechargeable work light, but "Got 'Er Done". Won't do final torque until
she's on her wheels, on the ground. And I had to make another Tool Run
to Harbor Freight because I lacked a large enough tapered drift to get
the bushing inner spacer properly aligned with the holes in the frame
pocket.
No, I DON'T just wail away on the bolt with a hammer to drive it through!
The LCA bolt and nut are "finger loose" at the moment, as I was just too beat to bother to put the nut and the steering rack "boot protector" back on. I'll get that done today before I install the strut.

This is the end link that might be over tightened. Tried to get it to the TSM (Toyota Service Manual) torque spec, but the nut bottomed out on the bolt before that happened. I'll check the Energy Suspension website to see if they have anything to say about it, but their website is woefully lacking in detailed information.

And props to my "Straw Boss" who makes sure I do things correctly, take proper hydration breaks, and don't get upset and start throwing tools around!

This afternoon's project will be to assemble the 10' x 10' canopy I bought from the place that a CelicaSupra forum member recommended. The temps are bearable outside today as long as you're in the shade. Working out in the hot sun really drains me these days, so the canopy was really a needed item.
And I'm going to make another tool run to get a floor fan for the garage. There's NO breeze against the back wall where the workbench is located, and I wind up soaked in sweat and with sweat running into my eyes, which also slooows me down.
More pix tonight after I get the strut installed.
Sunday, August 28, 2016
YAY! Got The Steering Arm Off! With Updates!
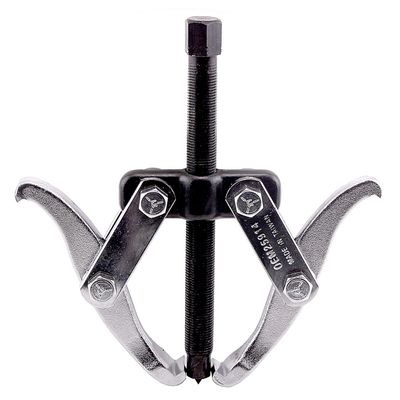
AutoZone didnt have the puller I wanted in stock, even though their website said they did.
SO....I settled for a two-jaw puller, like this:

The firs time I tried, I just cranked down on the screw, like I've always done. After a few mighty cranks, it popped off the ball joint stud!
So I put it back on, cranked it down a bunch, and rapped the steering arm with a suitably large persuader, and the steering arm popped off.
Now to get the plastic pan, parts cleaning brush, and Gunk out so I can scrub all the grease off the parts. Then I'll regrease the ball joint with Mobil 1 synthetic grease (the red stuff), install the new dust cover/rubber boot, mount the steering arm back on the stud, torque the nut, install the cotter pin, and start reinstalling the left front suspension.
Putting it all back together, in my humble experience, usually goes faster than tearing it apart. Hopefully I'll have the left front back on the car by tomorrow afternoon, and then start in on the right side.
Pix to follow when reinstallation is complete.....
****UPDATE****
The steering arm is now scrubbed clean. As expected, I had to chop the bristles on the cleaning brush off about half-way. When cleaning caked on grease and dirt, you need pretty STIFF bristles to knock the crud off. Otherwise you'll just move it around on the part, rather than 'flicking' it off with the short, stiff bristles.
Another "Helpful Hint from The Doctor" is to scrape off as much of the solid stuff and big chunks as you can before you start applying the solvent and scrubbing the part. The cleaner the parts are before you start, the longer the solvent is good for before it becomes too loaded up with crud to do any cleaning, and the less time you'll spend hanging over a pan of solvent happily (?) scrubbing away.
Oh, and wear TWO pairs of nitrile gloves, as the parts invariably have some sharp edges, and when the gloves split, and they will, the second set will give you enough time to change them out before grease and dirt loaded solvent leaks into the gloves, and all over your hands. I've had pretty good luck with the 5-mil thick ones from Harbor Freight. The vinyl gloves they sell seem to split about two minutes after you put them on, but the nitrile ones are pretty tough, and reasonably priced. I see they also sell 7-mil and 9-mil thick ones, so when I go buy some more, I'll try the thicker ones.
This also reminds to add "washing up sink" to the items I'll want in the Colorado shop if we have to build one.
Back in the late 1970s, early 1980's when my buddy George and I ran the shop, we had a Safety-Kleen solvent-based parts washer in the shop. Since we were a low-volume place, the Safety-Kleen guy would only come around every couple of months to check our solvent, and swap out the barrel of it that the machine sat on when it needed it. I don't remember how much it cost, but it was pretty reasonable, and that thing paid for itself many, many times over.
Now to work on the control arm........
****UPDATE 2****
Steering arm and lower control arm are now scrubbed "pretty damn clean". They both had 30+ years of grease, mud, oil, and other road grime caked on them that was 1/4 thick in places.
The ball joint was regreased with Mobil 1 synthetic grease after replacing the zerk fitting, which would no longer accept grease.
After watching the new grease come through the joint, I installed the new rubber boot/duct cover, as the old one was split from "Quick Change Grease Monkeys" pumping in WAY too much grease. Then I installed the now clean steering arm, torqued the nut to 58 ft-lbs, plus "a bit more" to get the castellations to line up with the cotter pin hole, and installed a new cotter pin.
I then added more grease until I saw the new rubber boot "inflate" slightly, at which point the fresh grease oozed out of the vent hole in the boot, and I stopped adding grease.
That, boys and girls, is how you properly grease a ball joint.....just until you see the rubber boot inflate slightly. And if you cleaned off the boot like you're supposed to before you started blindly pumping grease in to it, you'd also see the new grease ooze out of the vent hole, and then you'd STOP pumping grease in!
Sorry about this rant, but I've seen countless rubber dust boots on automotive steering linkages destroyed by excessive grease application, and there's no reason for it other than carelessness.
IF you always go back to the same grease pit on a regular basis, then you're probably OK, because the fresh grease pumped in every 6 months or so will keep the dirt that gets past the split boot from getting into the ball joint and wearing it out.
If you don't, then dirt gets in, the ball joint rapidly wears out, and your steering gets all sloppy and unsafe.
This probably all moot, as I don't think many (probably "any") new vehicles even have grease fittings on them any more.
ANYWHO......I'm sweaty, greasy, oily, and stink like kerosene from spraying and brushing Gunk on parts all afternoon.
BUT.....all the parts are now refurbished, CLEAN, and ready to go back together Monday morning.
Here's the completed Lower Control Arm. The "Steering Arm" is on the left, the new polyurethane bushing is on the right, and the loooong rod sticking out is the Strut Rod that had the "tatered-up" thread at the very end.


SO....I settled for a two-jaw puller, like this:
The firs time I tried, I just cranked down on the screw, like I've always done. After a few mighty cranks, it popped off the ball joint stud!
So I put it back on, cranked it down a bunch, and rapped the steering arm with a suitably large persuader, and the steering arm popped off.
Now to get the plastic pan, parts cleaning brush, and Gunk out so I can scrub all the grease off the parts. Then I'll regrease the ball joint with Mobil 1 synthetic grease (the red stuff), install the new dust cover/rubber boot, mount the steering arm back on the stud, torque the nut, install the cotter pin, and start reinstalling the left front suspension.
Putting it all back together, in my humble experience, usually goes faster than tearing it apart. Hopefully I'll have the left front back on the car by tomorrow afternoon, and then start in on the right side.
Pix to follow when reinstallation is complete.....
****UPDATE****
The steering arm is now scrubbed clean. As expected, I had to chop the bristles on the cleaning brush off about half-way. When cleaning caked on grease and dirt, you need pretty STIFF bristles to knock the crud off. Otherwise you'll just move it around on the part, rather than 'flicking' it off with the short, stiff bristles.
Another "Helpful Hint from The Doctor" is to scrape off as much of the solid stuff and big chunks as you can before you start applying the solvent and scrubbing the part. The cleaner the parts are before you start, the longer the solvent is good for before it becomes too loaded up with crud to do any cleaning, and the less time you'll spend hanging over a pan of solvent happily (?) scrubbing away.
Oh, and wear TWO pairs of nitrile gloves, as the parts invariably have some sharp edges, and when the gloves split, and they will, the second set will give you enough time to change them out before grease and dirt loaded solvent leaks into the gloves, and all over your hands. I've had pretty good luck with the 5-mil thick ones from Harbor Freight. The vinyl gloves they sell seem to split about two minutes after you put them on, but the nitrile ones are pretty tough, and reasonably priced. I see they also sell 7-mil and 9-mil thick ones, so when I go buy some more, I'll try the thicker ones.
This also reminds to add "washing up sink" to the items I'll want in the Colorado shop if we have to build one.
Back in the late 1970s, early 1980's when my buddy George and I ran the shop, we had a Safety-Kleen solvent-based parts washer in the shop. Since we were a low-volume place, the Safety-Kleen guy would only come around every couple of months to check our solvent, and swap out the barrel of it that the machine sat on when it needed it. I don't remember how much it cost, but it was pretty reasonable, and that thing paid for itself many, many times over.
Now to work on the control arm........
****UPDATE 2****
Steering arm and lower control arm are now scrubbed "pretty damn clean". They both had 30+ years of grease, mud, oil, and other road grime caked on them that was 1/4 thick in places.
The ball joint was regreased with Mobil 1 synthetic grease after replacing the zerk fitting, which would no longer accept grease.
After watching the new grease come through the joint, I installed the new rubber boot/duct cover, as the old one was split from "Quick Change Grease Monkeys" pumping in WAY too much grease. Then I installed the now clean steering arm, torqued the nut to 58 ft-lbs, plus "a bit more" to get the castellations to line up with the cotter pin hole, and installed a new cotter pin.
I then added more grease until I saw the new rubber boot "inflate" slightly, at which point the fresh grease oozed out of the vent hole in the boot, and I stopped adding grease.
That, boys and girls, is how you properly grease a ball joint.....just until you see the rubber boot inflate slightly. And if you cleaned off the boot like you're supposed to before you started blindly pumping grease in to it, you'd also see the new grease ooze out of the vent hole, and then you'd STOP pumping grease in!
Sorry about this rant, but I've seen countless rubber dust boots on automotive steering linkages destroyed by excessive grease application, and there's no reason for it other than carelessness.
IF you always go back to the same grease pit on a regular basis, then you're probably OK, because the fresh grease pumped in every 6 months or so will keep the dirt that gets past the split boot from getting into the ball joint and wearing it out.
If you don't, then dirt gets in, the ball joint rapidly wears out, and your steering gets all sloppy and unsafe.
This probably all moot, as I don't think many (probably "any") new vehicles even have grease fittings on them any more.
ANYWHO......I'm sweaty, greasy, oily, and stink like kerosene from spraying and brushing Gunk on parts all afternoon.
BUT.....all the parts are now refurbished, CLEAN, and ready to go back together Monday morning.
Here's the completed Lower Control Arm. The "Steering Arm" is on the left, the new polyurethane bushing is on the right, and the loooong rod sticking out is the Strut Rod that had the "tatered-up" thread at the very end.

Compared to the assembly when it was still in the car:

I'm sure the guy who'll be doing the front end alignment will be happy to have nice, clean parts to adjust!
Subscribe to:
Posts (Atom)
-
 FOURTH time I've written this post. MY Muse has apparently vacated the premises, leaving me too busy doing other things to keep both m...
 -
With apologies to The Control Voice.... Yup.....got The Busies the last few weeks. Lots of stuff happening this week, including my Nuclea...